Imagine walking into a room that instantly makes you smile—adorable decor can do just that! These charming touches have become a favorite among homeowners and renters alike because they add personality, warmth, and a dash of whimsy to any space.
In this article, you’ll find a delightful mix of ideas that range from sweet color schemes to playful accessories, perfect for creating a cozy and inviting atmosphere. Whether you’re looking to refresh a child’s room, add some charm to your living space, or simply enjoy the process of decorating, these ideas are sure to inspire your creative side.
1. DIY Fabric Wall Hangings to Add Cozy Charm
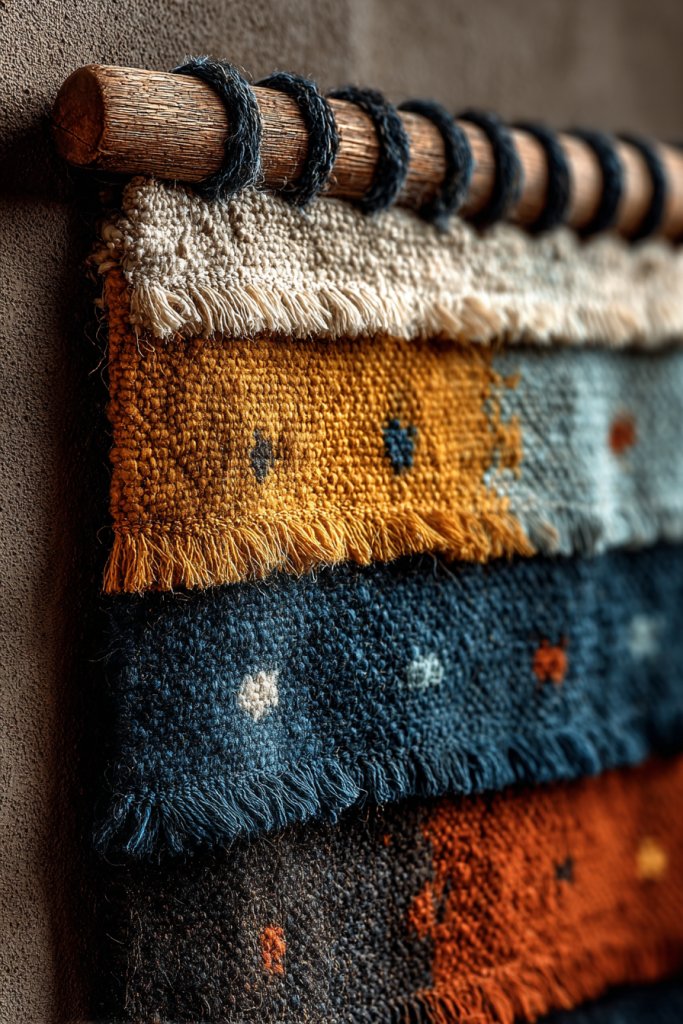
Ever feel like your walls are missing a warm, personal touch that makes your space truly yours? Stock art or posters can get boring fast, right? You crave something soft, tactile, and customizable that instantly transforms a plain wall into a cozy focal point. DIY fabric wall hangings are the perfect way to add that touch of comfort and personality without breaking the bank.
Imagine a wall adorned with a cascade of colorful textiles—think a mix of plush, textured fabrics in soothing tones or bold patterns. The fabric drapes softly from a simple wooden dowel, creating a layered, inviting vibe. The tactile surface adds depth, while the mix of materials like wool, linen, or cotton invites you to reach out and touch. The overall effect is a warm, artsy nook that feels both relaxing and stylish.
You can tailor these hangings to match any decor style—boho chic with tassels and fringes, modern with sleek geometric patterns, or vintage with muted floral fabrics. Seasonal fabrics like velvet for winter or linen for summer switch things up easily. Shorten or lengthen the textile layers for different wall proportions, or add decorative beads and trims for extra flair. The possibilities are endless, so let your taste run wild.
Start with lightweight fabrics and gather your supplies: fabrics, a wooden dowel, scissors, and perhaps some clips or sewing pins. Cut the fabric into strips or shapes you like, then fold or braid them for added texture. Attach the fabric to the dowel using clips, sewing, or tying knots—whatever suits your skill level. Hang the piece on the wall with nails or hooks, and adjust for a natural, tousled look. No fancy tools needed—just your creativity.
Add personal touches by incorporating favorite colors, patterns, or meaningful textiles like vintage scarves or family fabrics. Layer multiple hangings for a bohemian effect or keep it minimal with a single statement piece. You can also embellish with small charms, beads, or even incorporate fairy lights for a magical glow. This customization makes your wall truly one-of-a-kind.
Creating your own fabric wall hanging is a fun project that boosts your creative confidence. It proves that you don’t need expensive art to make a space warm and inviting. Plus, it’s easy to update whenever your style evolves or seasons change. Your walls will thank you for the cozy upgrade, and friends will ask for DIY tips in no time.
2. Upcycled Vintage Ladders as Unique Shelving Units
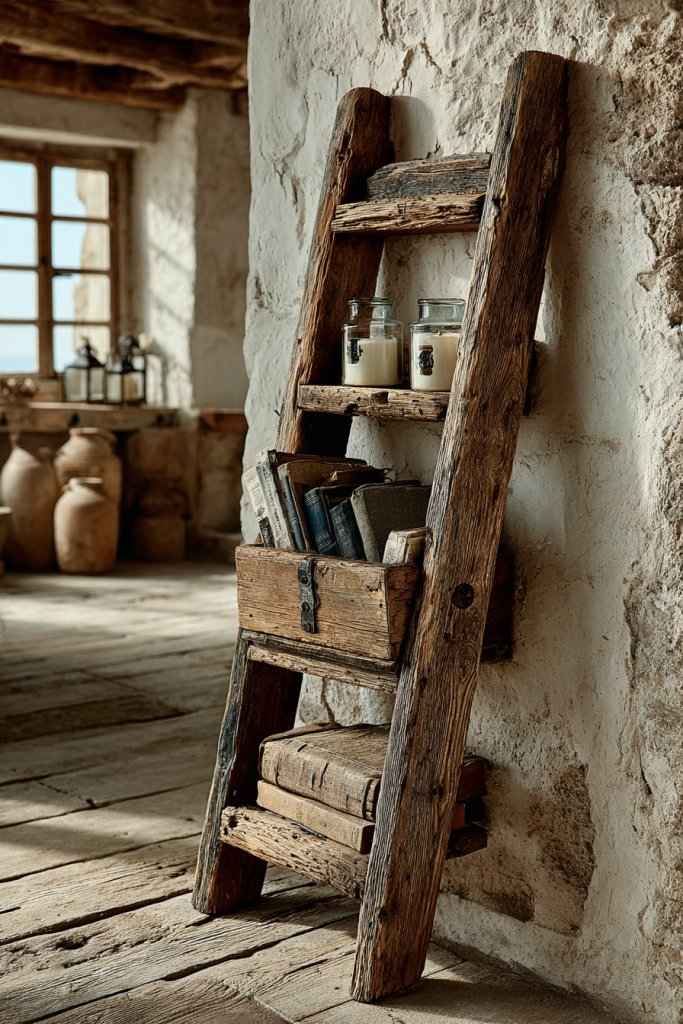
Ever wish you had more storage but hate cluttered, boring furniture? Vintage ladders are often overlooked, but they’re a goldmine for creating unique, functional decor. They add rustic charm and practical shelving without buying new furniture. Plus, repurposing old ladders feels so much more eco-friendly than mass-produced units.
Picture a weathered wooden ladder leaning against a wall, its rungs filled with neatly folded throws, stylish baskets, or decorative items. The aged paint and rough texture give it a lived-in vibe that instantly warms up any space. You can personalize it with a fresh coat of paint or a stain to match your decor. It’s a piece that combines history and function effortlessly.
Use different types of ladders—wooden, metal, or even industrial pipe styles—based on your aesthetic. Position it in the living room for blankets and books, or in the bathroom for towels and toiletries. For a modern look, paint it in bright colors or metallic finishes. You can also hang small hooks or baskets from the rungs to increase storage options and organization.
Choose a sturdy, lightweight ladder that can handle the weight of your items. Clean it thoroughly, then decide whether to sand and paint or leave the distressed finish as is. Securely lean or mount it at a slight angle against the wall for stability—use wall anchors if necessary. Arrange your items thoughtfully, balancing heavier objects at the bottom. For safety, ensure it’s stable and won’t tip over easily.
Decorate the ladder with small plants, candles, or vintage accessories—just avoid overloading it to keep the look balanced. Add decorative labels or tags for a farmhouse feel. You can also drape fabric or string fairy lights along the rungs for a cozy glow at night. The key is mixing practicality with your personal style.
Upcycling vintage ladders gives your home a charming, one-of-a-kind piece that’s both functional and beautiful. It’s a simple project anyone can do, saving money and reducing waste. This idea inspires you to see everyday objects as potential decor, making your space uniquely yours and full of character.
3. Floating Shelves with Decorative Baskets for Function and Style
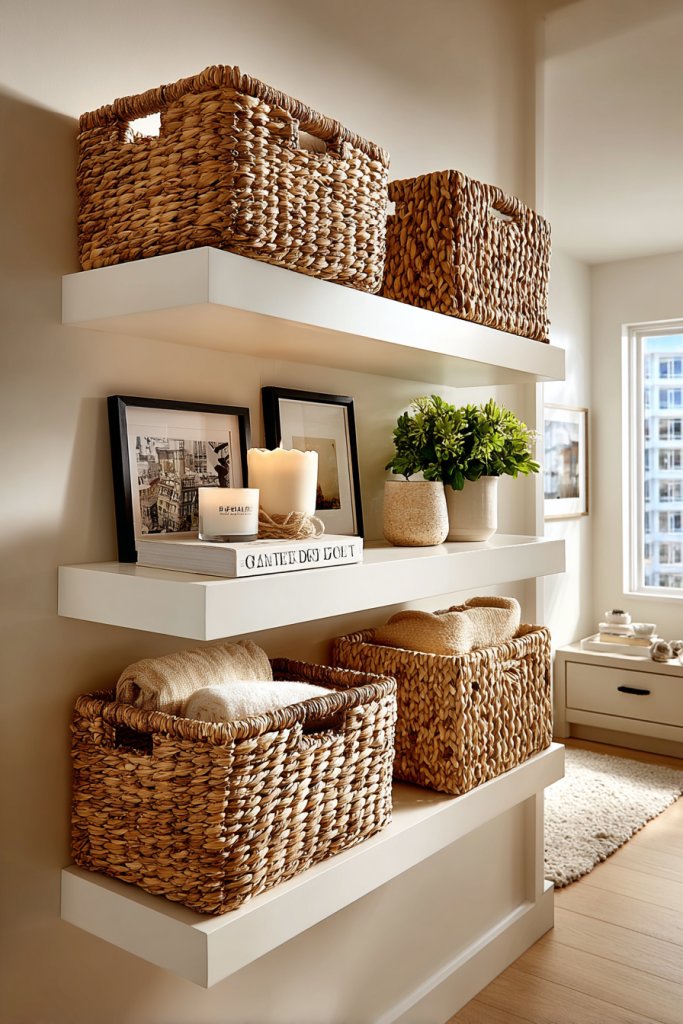
Cluttered surfaces can turn your cozy space into chaos in seconds. You need a smart way to keep things organized without sacrificing style. Floating shelves paired with decorative baskets provide a sleek, minimalist solution that keeps your essentials handy and your space looking chic. It’s organization made beautiful.
Imagine thin, matte-finished floating shelves mounted against a painted wall, each holding neatly folded fabrics, candles, or small decorative items. Below or beside, woven baskets add texture and warmth while hiding away everything from remote controls to chargers. The combination of smooth shelves and textured baskets creates a balanced, layered look that feels both modern and inviting. It’s like a tidy little boutique in your own home.
Choose shelves in different lengths, colors, or finishes to suit your decor—sleek black for industrial, white for Scandinavian minimalism, or natural wood for rustic charm. Use baskets of various sizes and materials—seagrass, wire, or fabric—to add visual interest. This setup works well in living rooms, bedrooms, or even kitchens for spices or utensils. Mix and match to reflect your style and needs.
Start by measuring your wall space and selecting appropriate shelf lengths. Install the floating brackets securely into studs or wall anchors for stability. Arrange the baskets on the shelves, then fill them with your essentials—think cozy throws, books, or decorative objects. Keep heavier items on the lower shelves for safety and balance. Adjust spacing for a clean, cohesive look. Regularly tidy up to maintain the aesthetic.
Add decorative labels or fabric linings inside baskets for a polished look. Change the contents seasonally—like holiday decor or summer accessories—to keep things fresh. Incorporate small artwork or photos on the wall above for a personalized gallery vibe. Layering different textures and colors makes your storage both functional and visually appealing.
This combination of floating shelves and baskets proves that organization doesn’t have to be boring. It’s an easy upgrade that instantly elevates your space’s style and practicality. Plus, it encourages a tidy mindset, making daily routines smoother and more enjoyable. Your home will look stylish and feel more manageable, one shelf at a time.
4. Customized Mason Jar Light Fixtures for Ambient Glow
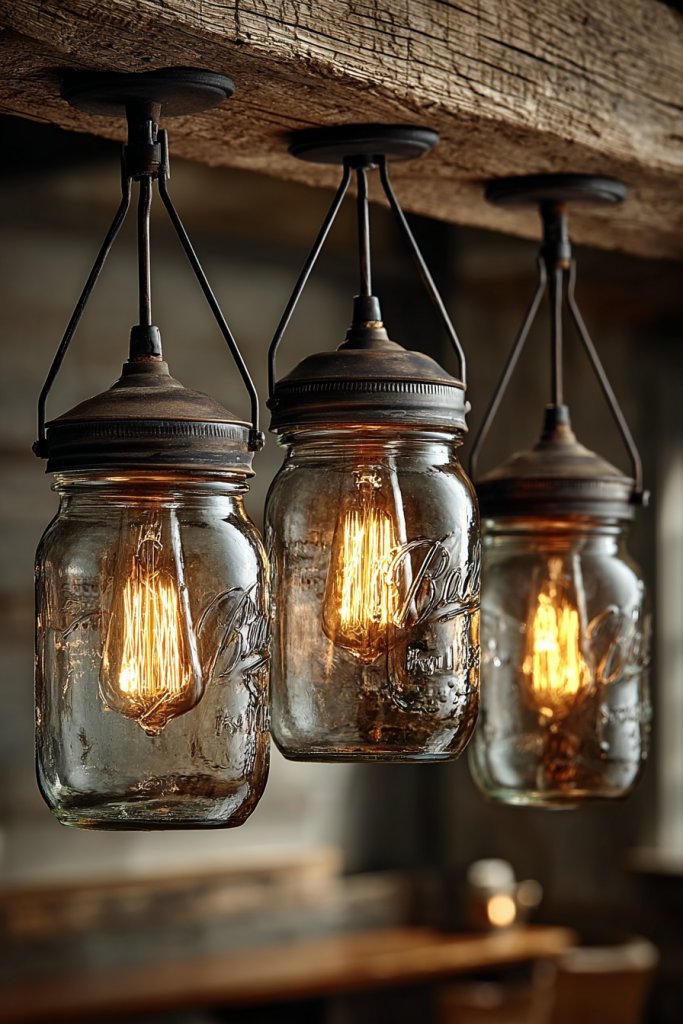
Looking for a charming, budget-friendly way to light up your space without relying on generic fixtures? Mason jars are the unsung heroes of DIY decor, offering a rustic, nostalgic vibe. Customizing them as light fixtures creates warm, ambient lighting perfect for cozy nights or intimate gatherings. It’s a small project with big style payoff.
Picture a row of mason jars hanging from a reclaimed wood beam, each filled with fairy lights or candles. The jars diffuse the warm glow, creating a soft, inviting atmosphere. You can even add decorative accents like twine, lace, or paint the lids for extra flair. The combination of rustic glass and warm light instantly adds charm and personality to any room.
Use different sizes of mason jars, or paint the jars in colors that match your decor for a personalized touch. Hang them at varying heights for visual interest or cluster several for a statement piece. For seasonal decor, fill jars with ornaments, flowers, or themed objects—think Halloween or holiday accents. They work equally well in kitchens, bedrooms, or patios.
Start by choosing your mason jars and deciding on the lighting—fairy lights, LED strips, or candles. Drill small holes in the lids if needed to accommodate wiring or cords. Attach hooks or eye screws to the lids for hanging, then string the lights or insert the candles. Use sturdy hooks or a wooden beam to hang your fixtures securely. Ensure cords are hidden or neatly arranged for safety and aesthetic appeal.
Customize with painted designs, quotes, or labels directly on the jars. Incorporate seasonal elements like faux snow or berries inside the jars for festive vibes. Switch out the lights or candles depending on mood or occasion. Creating a mix of jar sizes and styles keeps the lighting dynamic and interesting.
DIY mason jar lighting is a simple way to add a cozy, handcrafted touch that elevates your decor effortlessly. It’s an affordable project that invites creativity and personalization. Plus, it proves that good design doesn’t need to be complicated—sometimes, glass jars and a bit of string are all you need to transform your space.
5. Patterned Washi Tape Wall Accents for a Playful Touch
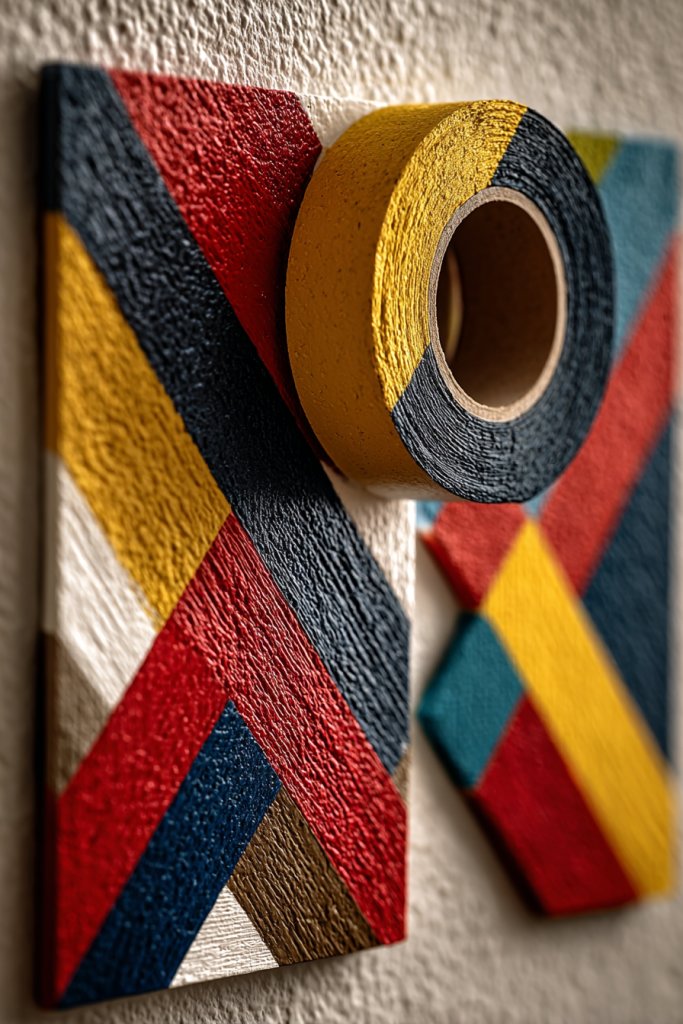
Ever want to add a bit of fun and personality to your walls without the commitment of paint or wallpaper? Washi tape is the answer—colorful, removable, and easy to use. It allows you to create playful geometric patterns, borders, or accents that can be changed as often as your mood. Perfect for renters or anyone who loves experimenting.
Imagine a wall decorated with bold stripes, chevrons, or intricate shapes made from vibrant washi tape. The tape’s matte finish contrasts beautifully with painted walls, adding a graphic element that’s both modern and whimsical. You can layer different patterns or colors to create depth and visual interest. It’s like having a custom mural that can be peeled off or rearranged at will.
Use washi tape to frame art, create borders around mirrors, or highlight specific areas of a wall. Seasonal or themed tapes—like holiday motifs or pastel patterns—keep your decor fresh. Combine multiple tapes for a layered, textured look, or keep it simple with a single bold stripe. It’s versatile enough to suit minimalist, boho, or eclectic styles.
Start with a clean, dry wall surface. Measure and mark your design lightly with a pencil to guide placement. Cut strips of washi tape to your desired lengths, then carefully apply, smoothing out air bubbles or wrinkles. Use a ruler or level for straight lines, or freehand for organic shapes. Remove or reposition tape easily if needed—no damage guaranteed. Finish by sealing the edges for a clean look.
Incorporate washi tape into other decor elements like picture frames or furniture accents for a cohesive look. Change the patterns seasonally or for special occasions—like creating a festive border for holidays. Combine with paint or stencils for extra detail. The key is to let your personality shine through with playful, colorful designs.
Washi tape wall accents are a fun way to express your style without permanent changes. They’re perfect for experimenting and updating your decor easily. It’s a quick, inexpensive project that adds a burst of color and creativity. Your walls will look fresh, lively, and uniquely you.
6. Macramé Wall Art for Boho Vibes
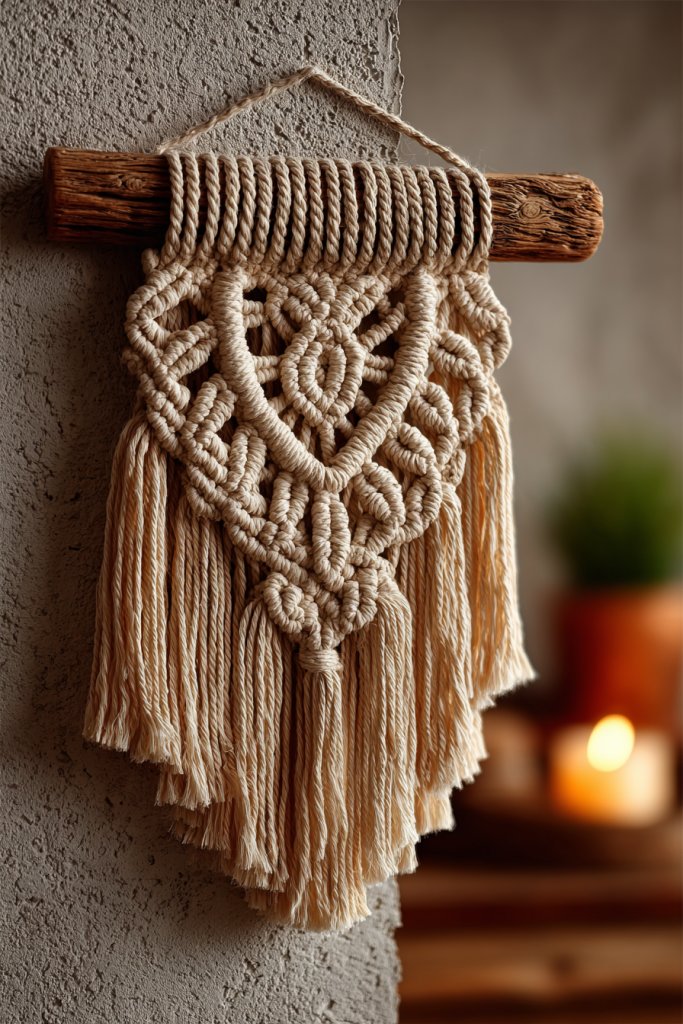
Craving a relaxed, artsy vibe that’s both stylish and tactile? Macramé wall art is your answer—an easy way to bring texture and a boho flair into your space. It’s perfect for adding visual interest without overwhelming your decor. Plus, crafting your own can be incredibly satisfying and budget-friendly.
Picture a large, intricate macramé piece hanging above a sofa or bed, its knots and fringes creating a layered, textured tapestry. The natural fibers and detailed knots give it an organic, handmade feel. Softly swaying with air movement, it adds a gentle motion that makes your room come alive. Earthy tones and chunky textures reinforce a cozy, laid-back atmosphere.
Use different knotting techniques and fibers—cotton, jute, or even metallic threads—to match your style. Create smaller pieces for a gallery wall or large statement hangings for focal points. Combine with other boho elements like woven baskets or vintage textiles. For seasonal touches, incorporate beads, shells, or feathers.
Start with a sturdy wooden dowel or ring and gather your macramé cord or rope. Follow tutorials or patterns to learn various knots—square, half hitch, or spiral. Measure and cut your cords, then work from the bottom up, tying secure knots. Finish with decorative fringes or beads, then hang on a wall with hooks or nails. Keep it taut and even for a professional look.
Personalize your piece with colored cords or incorporate charms and natural accents. Vary the knot sizes and spacing to add visual interest. Create a series of smaller macramé pieces for a gallery wall or combine with other textiles. It’s a craft that invites your creativity and patience, resulting in a truly unique decor piece.
Macramé wall art connects your decor to a timeless craft, making your space feel thoughtful and intentional. It’s a versatile project that fits any style, from boho to modern chic. Creating your own piece boosts confidence and adds a handmade touch that friends will admire. It’s a craft that makes your home as unique as your personality.
7. Framed Fabric or Wallpaper Swatches as Art Pieces
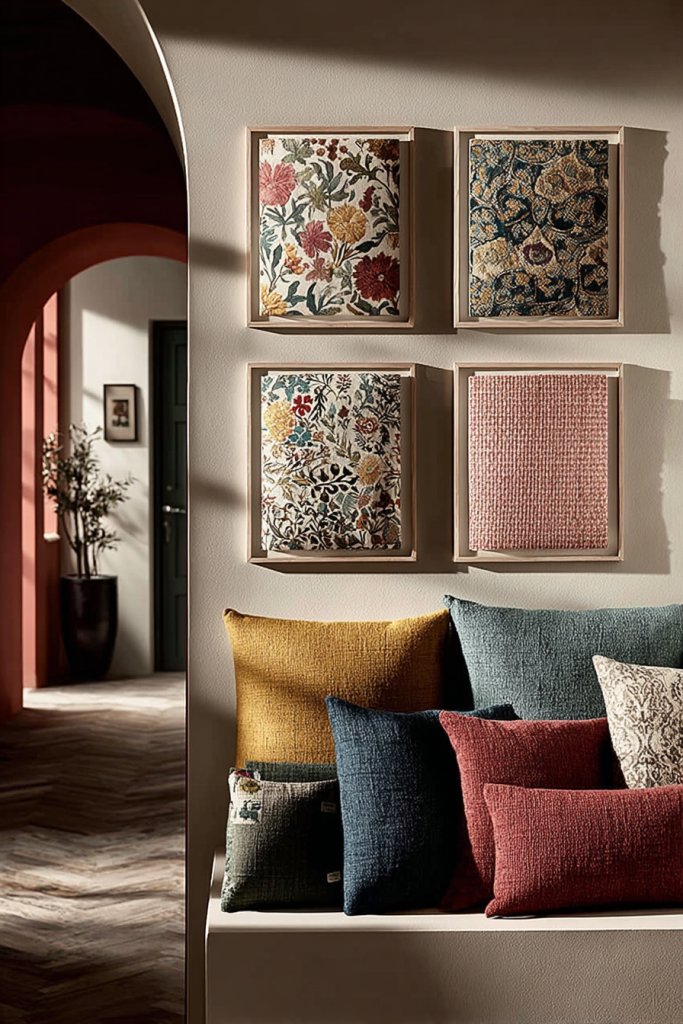
Looking for a quick, inexpensive way to add color and pattern to your walls? Framing fabric or wallpaper samples turns them into art, giving you a gallery-worthy display without the hefty price tag. It’s a clever way to showcase your favorite patterns and make your space more vibrant and personal. Who says art has to be expensive?
Imagine a wall filled with framed swatches—each showcasing bold florals, abstract designs, or subtle textures. The frames, in various finishes, add a polished look while highlighting the patterns inside. Mixing different sizes and orientations creates an eclectic, curated vibe. The textures and colors pop, making your wall a stunning focal point that sparks conversations.
Use matching or contrasting frame styles—white for a clean look or metallic for a modern edge. Rotate in seasonal or mood-based fabrics and wallpapers to keep the display fresh. Combine with other wall decor like photos or mirrors for a layered effect. It works well in bedrooms, living rooms, or hallways for a quick decor refresh.
Select fabric or wallpaper samples that resonate with your style. Cut them into uniform or varied sizes, then mount them in frames—either purchased or DIY. Use acid-free backing for textiles to prevent damage over time. Hang the framed swatches with proper hooks or picture hanging strips, spacing evenly for balance. Change out samples easily for a new look.
Create themes by grouping related patterns, or mix contrasting styles for an eclectic look. Incorporate meaningful fabrics—like a piece from a special event or a favorite vintage find. Add small labels or handwritten notes for a personalized touch. Rotate your collection based on seasons or mood shifts.
This simple art idea transforms everyday fabrics into a gallery of personal expression. It makes your decor feel fresh and intentional without needing expensive artwork. It’s a perfect project for beginners and seasoned decorators alike, proving that creativity doesn’t require a big budget or gallery space.
8. Hanging Planter Macramé Holders for a Touch of Greenery
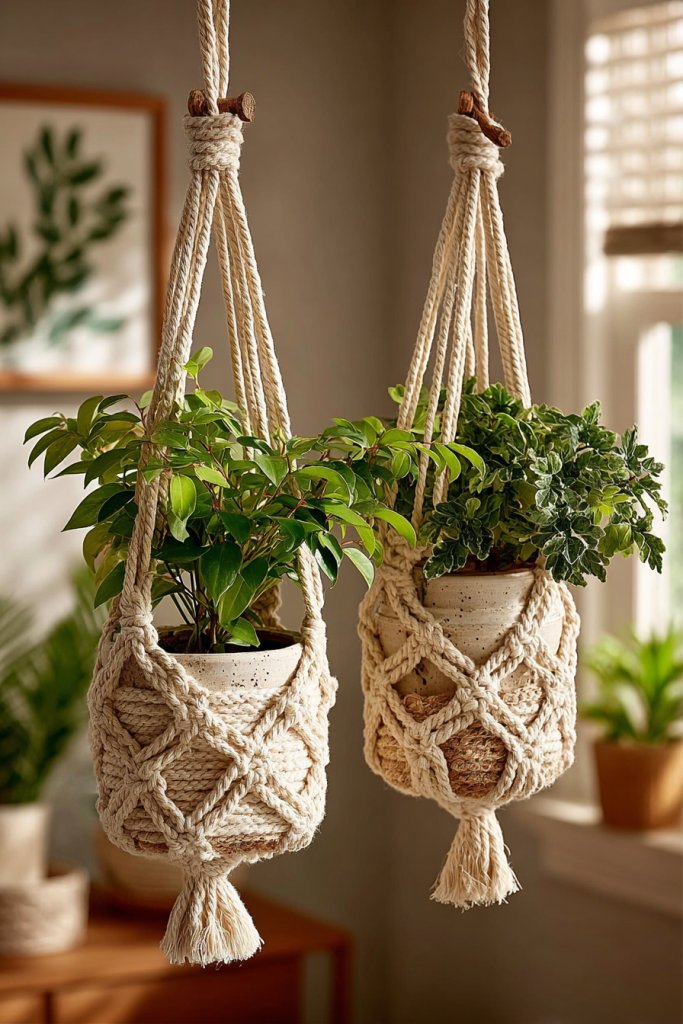
Want to add a touch of nature without cluttering your surfaces? Hanging macramé holders are a stylish way to introduce greenery, even if you’re short on space. They bring a boho vibe and a dash of freshness, making your home feel alive and inviting. Plus, they’re pretty easy to make and customize.
Visualize a delicate macramé hanger suspending a small potted plant, softly swaying with the breeze. The intricate knots and textured fibers contrast beautifully with the smooth leaves and pot. It creates a layered look, adding height and depth to your decor. The natural fibers add warmth and craftsmanship to the room, making it feel cozy and curated.
Experiment with different knot patterns, cord colors, and pot styles—ceramic, terracotta, or even woven baskets. Hang multiple holders at varying heights for a lush, jungle-like effect. Incorporate seasonal decorations like faux flowers or fairy lights for special occasions. Use metallic or wooden hooks to complement your overall aesthetic.
Start with a sturdy, adjustable cord or rope, and choose lightweight pots that won’t strain the holder. Follow tutorials to learn knots like square or spiral knots—plenty available online. Attach the holder to ceiling hooks or wall anchors securely. Place your plants inside and adjust for even hanging. Keep in mind the light needs of your plants for healthy growth.
Decorate the pots with paint, washi tape, or fabric covers for added flair. Change the plants seasonally or swap in faux varieties for low maintenance. Mix different textures and colors in your holders to create a vibrant display. It’s a DIY that combines greenery with craftiness.
Hanging macramé planters turn simple plants into statement decor pieces. They boost your home’s natural vibe and show off your crafting skills. It’s a small project that makes a big impact, inspiring you to incorporate more handmade touches into your decor. Your space will feel fresher and more alive, instantly.
9. Photo String Banners with Clipped Memories
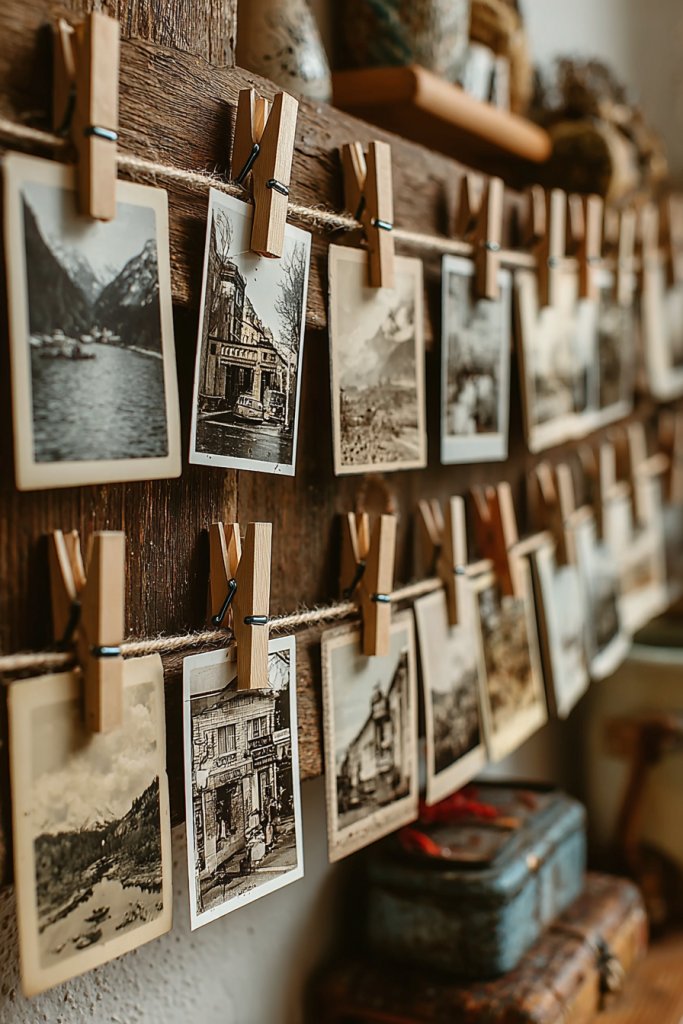
Want a fun and sentimental way to display your favorite memories? Photo string banners are an easy DIY project that adds a personal, whimsical touch to any room. They turn ordinary photos into a decorative feature that’s constantly evolving. Plus, they’re a great way to keep loved ones close.
Picture a length of twine or wire stretched across a wall, adorned with clipped photos, postcards, or artwork. Small clothespins or clips hold each item, allowing for easy updates. The photos hang loosely, creating a casual, playful vibe. The mix of images, colors, and textures makes the wall feel warm and personal, like a visual scrapbook.
Use different types of clips—wooden, metal, or colorful plastic—to match your decor style. Incorporate string lights or washi tape for added interest. Hang the banner in a bedroom, hallway, or above a desk for a personalized touch. Switch out photos seasonally or for special occasions to keep the display fresh.
Choose a sturdy string or wire and cut it to your desired length. Attach it to the wall with hooks, nails, or adhesive strips. Arrange your photos in a visually appealing order, then clip them onto the string. For a cohesive look, keep the spacing even, but feel free to mix sizes or orientations. Regularly update the photos to keep the display lively.
Decorate clips with washi tape, paint, or small charms for a customized look. Add decorative elements like paper flowers or small banners for extra flair. Mix in artwork or handwritten notes to make it more meaningful. Changing the display with seasons or milestones keeps your space feeling fresh.
Photo string banners are a simple yet impactful way to showcase your memories. They make your space feel more lived-in and loved, inspiring you to celebrate everyday moments. It’s a project anyone can do, turning your walls into a visual storybook of your life.
10. Decorative Peel-and-Stick Wall Borders or Decals
Looking for a quick way to refresh your space without the mess of paint or wallpaper? Peel-and-stick wall borders and decals offer an easy, damage-free way to add pattern, color, or theme to your walls. They’re perfect for renters or anyone craving an instant style upgrade. Who says you need to commit long-term?
Visualize a wall transformed with a bold, colorful border or playful decals—like stars, florals, or geometric shapes. They cling smoothly to surfaces and can be repositioned or removed without residue. The design instantly creates a focal point, adding personality and energy to your room. It’s like decorating with giant stickers that make a big impact.
Choose borders or decals in various themes—modern, whimsical, vintage—to suit your decor. Apply them around the ceiling, along the baseboard, or create a mural effect. Mix and match different patterns for a layered, eclectic look. These decals are versatile enough for bedrooms, nurseries, or accent walls.
Start by cleaning the wall surface thoroughly. Measure and plan your design layout using painter’s tape or chalk lines for guidance. Carefully peel the backing and apply the decal or border, smoothing out air bubbles with a credit card or smoothing tool. Reposition as needed before pressing firmly. For removal, slowly peel from one corner—no damage guaranteed.
Layer decals over painted walls or combine with other wall treatments for a custom look. Change the decals periodically for seasonal updates or new themes. Use different shapes and sizes to create a gallery effect. Add small decorative elements like stickers or stencils to personalize further.
Peel-and-stick borders and decals prove that decorating can be simple, fun, and damage-free. They instantly elevate a space and encourage experimentation without fear of permanence. Your walls will look fresh and lively, reflecting your personality in just minutes—no tools or mess required.
11. DIY Painted Terra Cotta Pots for Colorful Storage
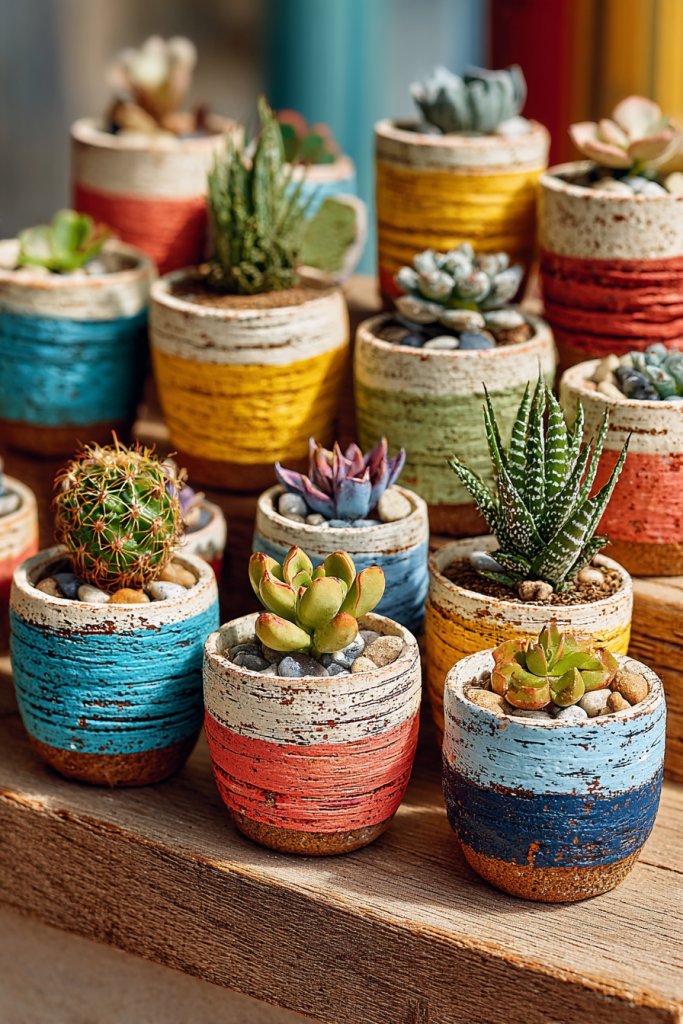
Tired of boring storage containers that blend into the background? Painted terra cotta pots are a simple, affordable way to add color and charm to your organization. They’re perfect for holding everything from stationery to jewelry or succulents—if you’re into faux plants, no judgment. Brighten up your space with a pop of color and a personal touch.
Picture small terracotta pots painted in vibrant hues, with patterns like stripes, polka dots, or even intricate designs. They sit on shelves, desks, or windowsills, adding cheerful accents to your decor. The matte finish of the clay combined with glossy paint creates a lovely contrast. These colorful pots turn simple storage into decorative statements that catch the eye.
Experiment with color schemes—pastels for a soft look, bold primaries for impact, or metallic accents for glam. Personalize with stencils, stickers, or freehand designs. Use them in themed setups—like a garden display or a desk organization station. Mix sizes and shapes for a playful, eclectic vibe that’s full of personality.
Start with clean, dry terracotta pots. Use painter’s tape to create patterns or edges, then apply acrylic or spray paint in thin, even coats. Let each layer dry thoroughly before adding more. Seal with a clear matte or gloss finish for durability. Use small brushes for details or freehand painting for a more organic look. Fill with your favorite items or plants.
Add labels or tags to identify contents easily. Switch up colors seasonally or for special occasions—think metallic gold for holidays or pastels for spring. Incorporate decorative stones or beads inside for added flair. Personal touches make these pots both functional and fun to look at.
DIY painted terra cotta pots turn everyday storage into a cheerful part of your decor. They’re a creative way to showcase your personality and brighten your space. Plus, they’re easy enough for beginners and customizable to any style. Brighten up your organization game and enjoy a colorful, personalized home.
12. Soft Faux Fur Rugs or Cushions for Texture
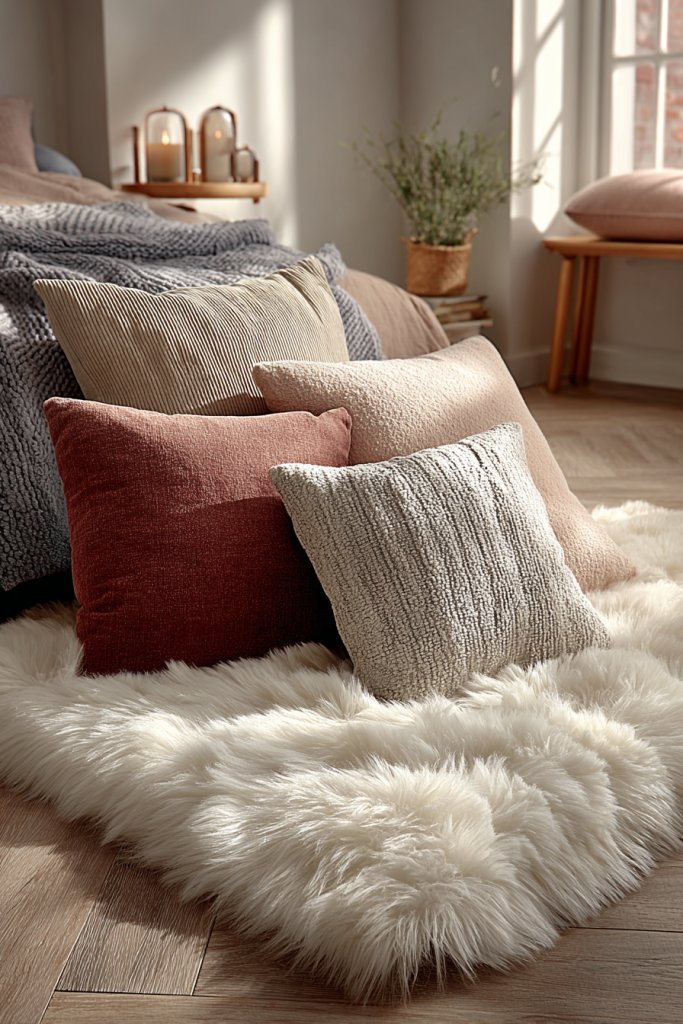
Feeling like your space needs a little extra warmth and softness? Faux fur rugs and cushions instantly add tactile comfort and a touch of luxury without the cruelty. They’re perfect for creating cozy zones in your living room or bedroom. Who doesn’t love sinking their toes into plush, fluffy goodness?
Imagine a thick faux fur rug in a neutral tone spread across your floor, inviting barefoot strolls. Or a set of fluffy cushions layered on a sofa, adding visual depth and softness. The varied textures catch the light differently, giving your space a layered, inviting feel. These elements soften sharp lines and add a touch of glamour.
Choose from long-haired, short-haired, or patterned faux fur in colors that complement your decor—think warm beige, icy white, or even fun pastel shades. Mix and match cushions of different sizes and textures for a curated look. Use rugs to define seating areas or add luxury to a reading nook. They work well in modern, boho, or glam styles.
Pick high-quality faux fur rugs or cushions from trusted brands for longevity. If sewing your own cushions, use a soft fabric backing and insert for plushness. For rugs, vacuum regularly and spot clean as needed. Layer rugs over other textures like woven or jute for contrast. Add non-slip pads underneath for safety. Keep them fluffed and maintained for lasting softness.
Add decorative accents like tassels or embroidery to cushions. Change cushion covers seasonally or for different moods. Pair with other textures like velvet or silk for a luxe layered look. Use neutral tones as a base and add pops of color or metallics for extra style. The goal is comfort with a sophisticated edge.
Faux fur accessories are a quick way to elevate your decor and make your space feel indulgently cozy. They invite relaxation and elevate the style quotient effortlessly. Plus, they’re easy to swap out or update, keeping your home fresh and inviting. Sinking into plush textures feels like a mini spa every day.
13. String Lights with Fabric or Paper Lantern Covers
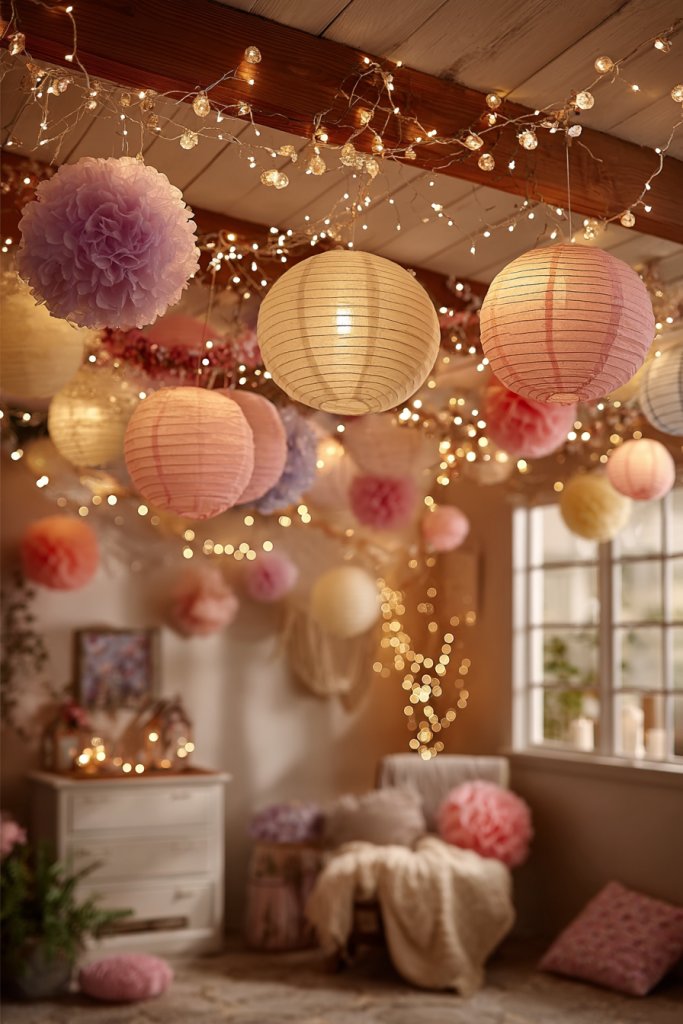
Want to create a dreamy, whimsical ambiance without expensive or complicated lighting? String lights are charming on their own, but adding fabric or paper lantern covers takes it to the next level. They soften the glow and add a decorative element that’s perfect for cozy nights or festive occasions. Who doesn’t want a little magic?
Picture delicate string lights hung across a ceiling, with soft fabric or paper lantern covers draped over each bulb. The covers diffuse the light, creating a warm, inviting glow. The varied shapes and textures—like ruffled fabric or patterned paper—add depth and interest. It’s a simple upgrade that turns plain string lights into a focal point.
Choose covers in different fabrics—lace, burlap, velvet—or paper patterns suited to your decor theme. Hang them over beds, windows, or outdoor patio areas for a magical effect. Mix and match shapes and sizes for a playful, eclectic look. Incorporate colors that complement your seasonal or party decor.
Create or purchase covers that fit your light bulbs snugly. Attach fabric or paper with double-sided tape, glue, or ties—whatever keeps it secure. Hang the string lights at the desired height, ensuring the covers are evenly spaced. Use hooks or clips for easy installation and removal. For safety, avoid covering heat-generating bulbs with flammable materials.
Decorate covers with embroidery, embellishments, or paint for a custom look. Change the covers seasonally or for special events—think metallics for holidays or pastel for spring. Add tassels or fringes for extra flair. Layer different textures and patterns to make your lighting setup uniquely yours.
Decorative string lights with fabric or paper covers turn ordinary lighting into a whimsical feature. They instantly add warmth and personality, making your space feel magical. It’s a simple DIY that boosts your interior style and mood, perfect for making everyday spaces feel special.
14. Reclaimed Wooden Crates as Stylish Storage Solutions
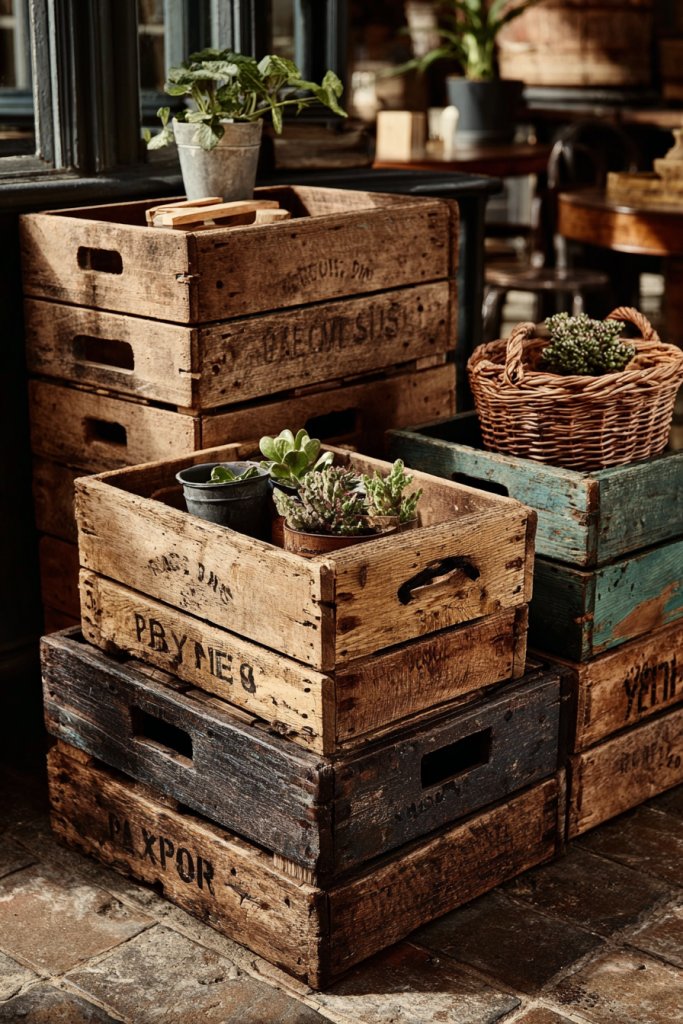
Looking for versatile, eco-friendly storage that also adds rustic charm? Reclaimed wooden crates are perfect for organizing your home while serving as decorative pieces. They’re budget-friendly, customizable, and can be styled in countless ways. Plus, they give new life to old wood—talk about sustainable decor!
Picture a stack of weathered crates filled with books, toys, or textiles, arranged neatly in a corner or under a window. The natural grain and imperfections tell a story, adding warmth and character to your space. Paint or stain them in different shades for a coordinated look, or leave the rustic finish for an authentic vibe. It’s a practical yet stylish statement.
Stack crates vertically or line them up horizontally depending on your space. Use them as coffee table bases, plant stands, or storage in closets. Decorate with stencils, stamps, or decals for a personalized touch. Incorporate metal handles or wheels for mobility and extra flair.
Select sturdy crates that can handle your storage needs. Clean thoroughly, then sand rough edges for safety. Paint or stain to match your decor—multiple coats may be needed for a smooth finish. Arrange them in your desired configuration, securing with screws or stacking for stability. Use them to organize anything from magazines to craft supplies.
Add decorative labels or tags for easy identification. Mix different sizes and orientations for visual interest. Incorporate seasonal decor—like faux foliage or fabric liners—to refresh the look. You can also mount crates on the wall for an open shelving effect that’s both functional and aesthetic.
Using reclaimed crates shows your eco-conscious side while adding a cozy, vintage vibe. They’re endlessly adaptable, giving you a stylish way to declutter. Building your own storage solutions boosts confidence and inspires creative reuse of everyday items. Your home will look organized, inviting, and full of character.
15. Colorful Patterned Pillows and Throws
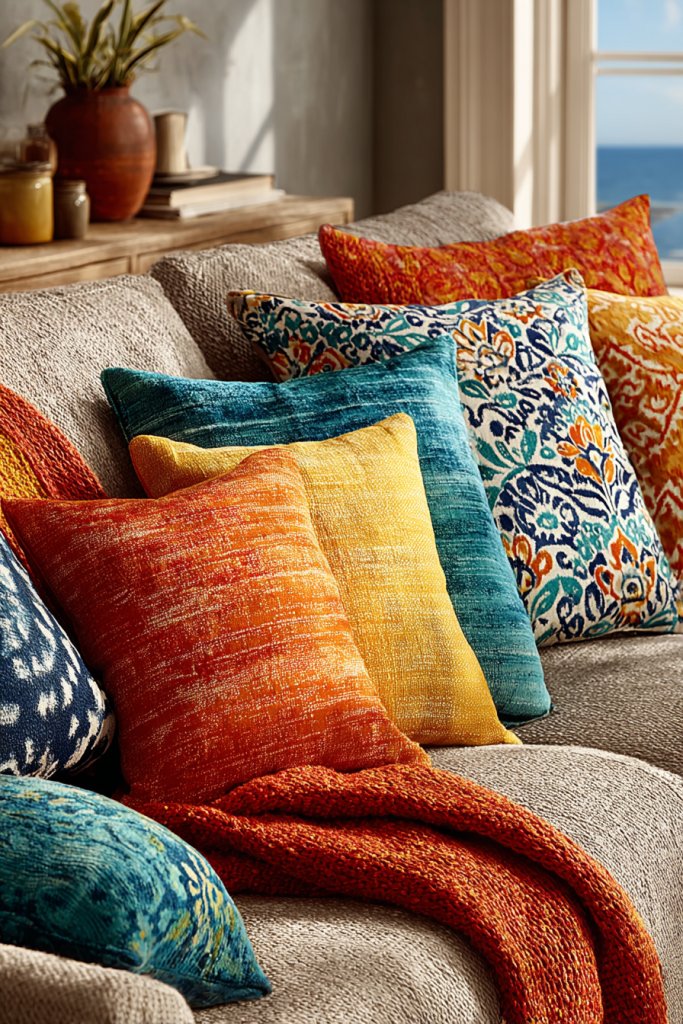
Feeling like your sofa or bed needs a quick style boost? Patterned pillows and throws are the easiest way to add color, personality, and comfort in seconds. They’re affordable accents that can change your entire room’s vibe. Ready for a cozy, colorful upgrade?
Visualize a sofa layered with vibrant pillows—geometric, floral, or abstract patterns—paired with a textured throw in complementary shades. The mix of colors and patterns creates a lively, inviting atmosphere. They soften sharp furniture lines and make your space feel warm and welcoming. Plus, they’re perfect for mixing and matching to reflect your style.
Combine different shapes, sizes, and patterns for a curated, eclectic look or keep it uniform for a sleek, modern vibe. Use seasonal colors—warm tones in winter, bright pastels in spring—to keep your decor fresh. Layer multiple throws on a sofa or bed for added texture and warmth. You can also swap pillow covers easily for quick updates.
Choose pillows in various sizes and patterns that complement your existing decor. Use removable covers in fabrics like cotton, linen, or velvet—easy to wash and change. Arrange them invitingly on sofas, chairs, or beds, mixing textures and patterns for visual interest. Add a cozy throw folded or draped for extra texture. Regular fluffing keeps them looking plush.
Create custom pillow covers with your favorite fabrics or DIY designs. Change pillow arrangements seasonally or for special occasions—think holiday-themed patterns or bright, cheerful hues. Incorporate embroidered or appliqué details for a handmade touch. Personalization makes your space uniquely yours.
Colorful patterned pillows and throws instantly refresh your decor and express your personality. They make your space feel lively and inviting, encouraging you to relax and enjoy. It’s a simple, impactful update that boosts your confidence in decorating and mixing styles.
16. Minimalist Geometric Wall Art Using Tape or Stencils
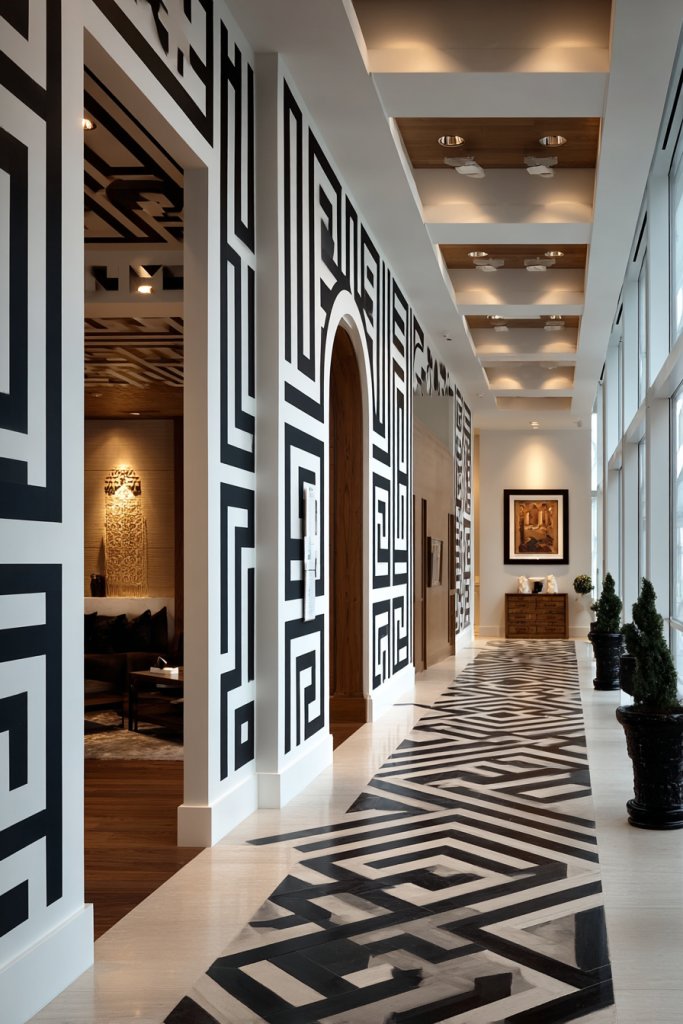
Craving sleek, modern decor without the hassle of buying art? Geometric wall art made with tape or stencils is a minimalist’s dream—clean lines, bold shapes, and endless possibilities. It’s a budget-friendly way to add a contemporary edge to any room. Ready to get artsy with precision?
Imagine a wall featuring crisp triangles, squares, or hexagons painted with painter’s tape or stencils in contrasting colors. The sharp edges and bold shapes create a dynamic visual effect that feels both modern and stylish. The monotone or limited palette keeps it sophisticated, while the geometric patterns add movement and structure.
Use different shapes and sizes to create a custom mural or accent wall. Stick to monochrome for a sleek look or mix colors for a playful vibe. Incorporate metallic or matte finishes depending on your style. Combine with other minimalist decor elements like simple furniture and clean lines for a cohesive aesthetic. It’s versatile enough to suit any room.
Plan your design by sketching out the shapes and placement. Use painter’s tape or stencil brushes to create crisp edges. Apply paint in thin layers, allowing each coat to dry thoroughly. Remove the tape or stencil carefully to reveal sharp lines. Touch up any imperfections, and seal with a clear matte finish if desired. Keep the process neat for a polished result.
Create custom color combinations or add metallic accents for extra flair. Layer multiple geometric patterns or combine with textured wall finishes for depth. Use your artwork as a backdrop for furniture or decor pieces. It’s a creative way to showcase your artistic side in a modern, understated way.
Geometric wall art demonstrates that simple tools and a steady hand can produce professional-looking results. It’s a stylish, customizable feature that elevates your decor with minimal effort. Mastering this technique inspires confidence in your DIY skills and love for clean, modern design.
17. DIY Curtain Tiebacks with Ribbons or Braided Cord
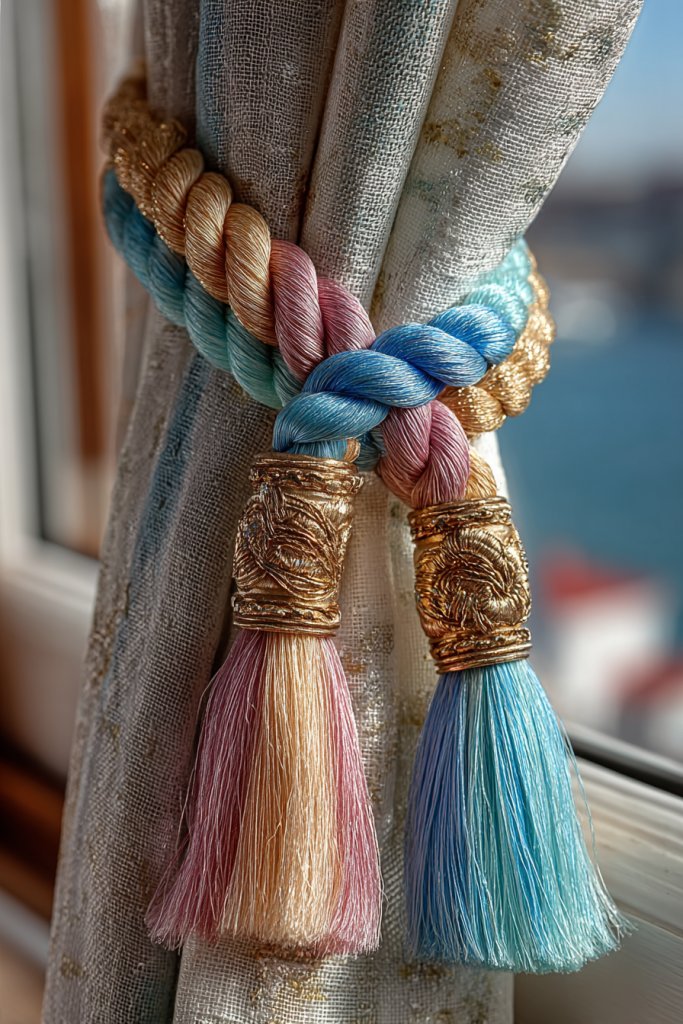
Tired of plain, boring curtain ties that do nothing for your window treatments? DIY ribbon or braided cord tiebacks are an easy way to add color and personality to your windows. They’re functional and decorative, giving your space a polished, custom look. Who knew a simple knot could make such a difference?
Picture a pair of curtains pulled back with vibrant silk ribbons or textured braided cords tied into elegant bows or knots. The fabric or cord adds a splash of color and texture, instantly elevating the window treatment. The ties can be coordinated with your decor palette or serve as a statement accent. It’s a small detail that packs visual punch.
Use different ribbon widths, textures, and colors—satin, grosgrain, or velvet—for varying effects. Braided cords in natural fibers or metallic finishes add a rustic or glam touch. Wrap the ties with beads or charms for extra flair. These DIY ties suit all window types and styles, from traditional to modern.
Measure the width needed for your curtains to gather them attractively. Cut ribbons or cords to length, allowing extra for tying. Attach the ties to hooks or tie them in decorative bows around the curtain rod or tieback holder. Secure with knots or bows, adjusting for a snug yet elegant hold. You can add embellishments for a personalized touch.
Mix and match different fabrics and textures to create a layered look. Change the ties seasonally—think velvet for winter, linen for summer. Add charms, tassels, or beads for a unique look. Keep some ties plain for everyday use, and switch to decorative ones for special occasions.
DIY curtain tiebacks are a small project that instantly upgrades your window decor. They give you a chance to showcase your style and add custom touches effortlessly. It’s rewarding to see your windows look polished and personalized, boosting your confidence in decorating skills.
18. Small Hanging Baskets for Jewelry or Keys
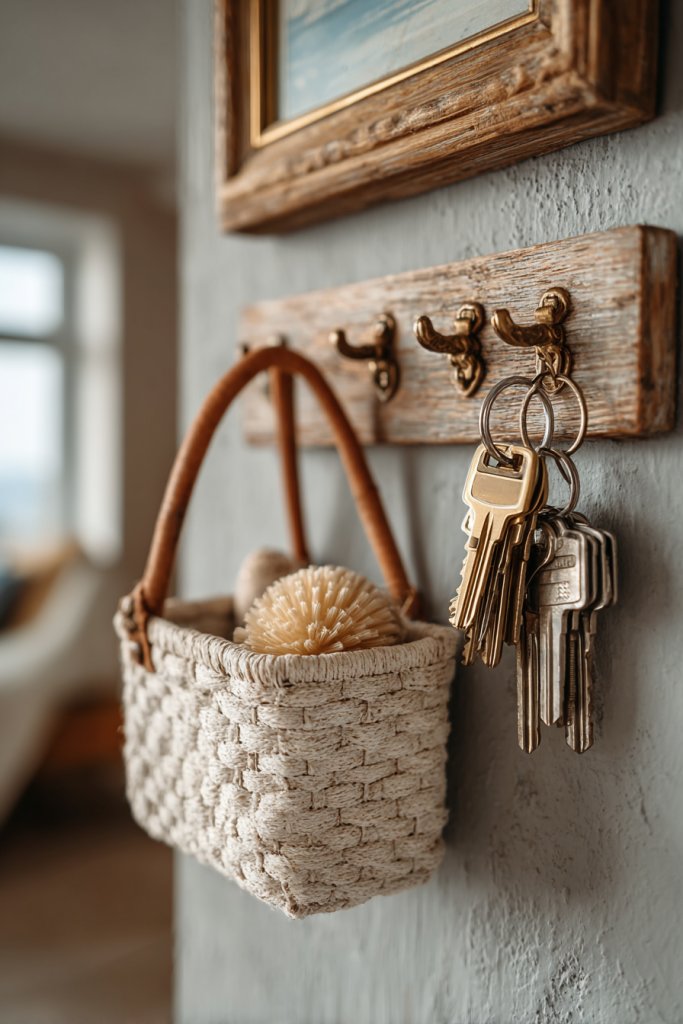
Lost keys or tangled jewelry can turn your mornings into a frantic search. Small hanging baskets or hooks near entryways or mirrors solve this problem with style. They’re a practical, decorative solution that keeps essentials organized and within reach. Who knew organization could look this good?
Imagine tiny woven or metal baskets suspended from hooks or a decorative board, holding your keys, rings, or bracelets. The baskets add texture and visual interest, especially when paired with a mirror or framed art. The arrangement is both functional and charming, making your space feel tidy and curated. It’s a simple addition that makes a big difference.
Choose baskets in different materials—rattan, wire, fabric—to match your decor. Mount them at varying heights for visual intrigue. Use themed baskets for seasonal decor—like pinecones in winter or seashells in summer. Incorporate hooks or small knobs for a clean, organized look in hallways, bathrooms, or bedrooms.
Install small hooks or knobs securely into the wall or door frames. Hang the baskets from these hooks, ensuring they’re stable and accessible. Use quick-drying adhesive for lighter baskets or screws for heavier ones. Arrange them to maximize space and ease of access, keeping daily essentials visible and tidy. Regularly clean and reorganize for best results.
Decorate baskets with paint, fabric liners, or labels to personalize them. Change the contents seasonally or as your needs evolve. Add small decorative elements like charms or ribbons for extra flair. Keep it functional but stylish, turning everyday organization into decor.
Organizing with small hanging baskets proves that practicality and style go hand in hand. It’s a simple, effective project that enhances your space’s functionality and aesthetic. The satisfaction of a clutter-free, attractive entryway or dresser area boosts confidence in your ability to create a well-organized home.
Conclusion
With a variety of adorable decor ideas at your fingertips, you now have the tools to transform any room into a cozy, charming oasis. Don’t hesitate to try out these creative touches and make your space uniquely yours. Embrace the fun of decorating and let your personality shine through—your dream room is just a few inspired ideas away!