Imagine stepping into a celebration that feels like stepping into a dream — that’s the magic of aesthetic birthday decorations! These stylish and thoughtfully curated ideas have taken the party scene by storm, offering a perfect blend of elegance, creativity, and personal flair that makes every birthday unforgettable.
In this article, you’ll find a treasure trove of decorating inspiration designed to elevate any birthday bash. From soft pastel themes to boho-chic setups and shimmering metallic accents, there’s something to suit every vibe and personality, ensuring your special day is both beautiful and memorable.
1. Elegant Balloon Garland Arch in Soft Pastel Shades
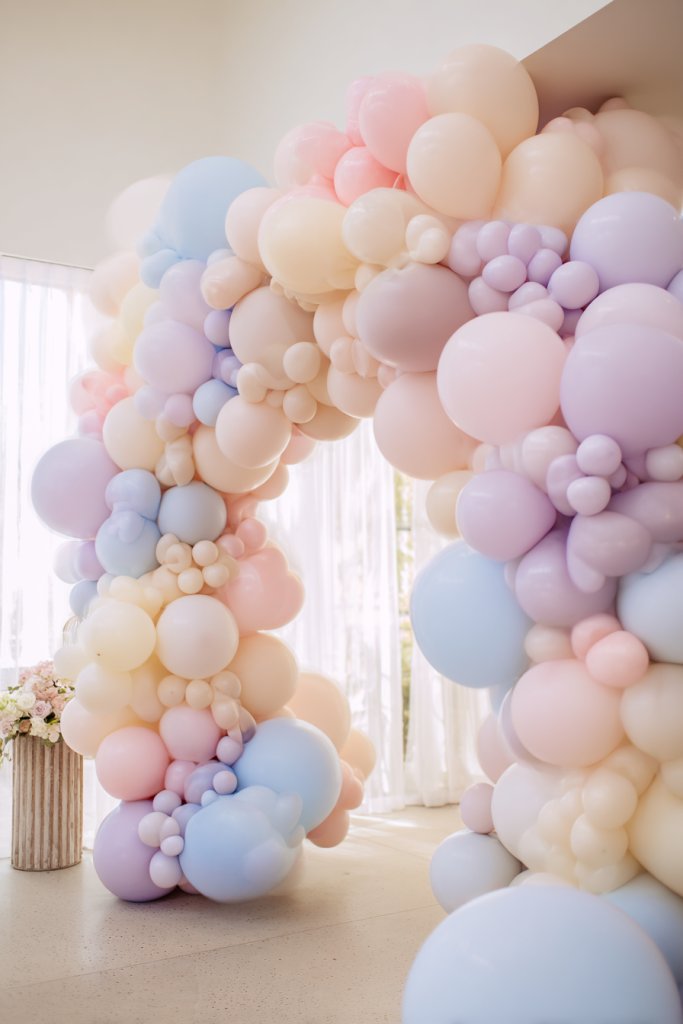
Ever planned a birthday party and felt like the entrance was missing that wow factor? Creating an inviting, whimsical vibe can be tricky without the right decor. You want something memorable but not overly complicated or expensive. A soft, dreamy entrance sets the perfect tone for the entire celebration, making guests feel special from the moment they arrive.
Imagine a lush arch of balloons in gentle blush, mint, lavender, and cream, intertwined with sprigs of greenery. The balloons cascade in a gentle curve, framing the doorway or photo zone beautifully. Soft pastel hues blend seamlessly, creating a sense of calm elegance. The texture of the balloons catches the light, giving a shimmering, almost cloud-like effect that feels like stepping into a fairy tale.
You can customize the arch with different color palettes to match any theme, from bold jewel tones for a modern vibe to muted neutrals for a minimalist look. For outdoor parties, add some floral accents or greenery for extra freshness. Indoors, pair with draped fabrics or fairy lights for a cozy feel. The size of the arch can be scaled up or down depending on space and budget, making it versatile for any setting.
Start with high-quality balloons in your chosen shades and a sturdy arch frame, which can be purchased or DIY’d with PVC pipes. Use a helium tank or air, depending on your desired look and longevity. Connect balloons with strong twine or balloon strip, creating a balanced, symmetrical shape. Add greenery or faux florals if desired for texture. Secure the arch firmly to prevent wobbling, especially if outdoors. Finish with a few accent balloons or greenery sprigs, and you’re good to go.
Add personalized touches like custom letter balloons spelling out the birthday person’s name or age. Incorporate small LED fairy lights woven into the arch for a magical glow at night. Use different shaped balloons or metallic finishes for a modern twist. You can also include small hanging elements like paper stars or mini tassel garlands to make it even more unique.
This balloon arch is a simple yet stunning way to elevate any birthday celebration. It’s budget-friendly, customizable, and surprisingly easy to assemble. With a little patience, you’ll create a centerpiece that guests will rave about. Ready to transform your party entrance into a dreamy gateway?
2. Rustic Wooden Signage with Hand-Painted Greetings
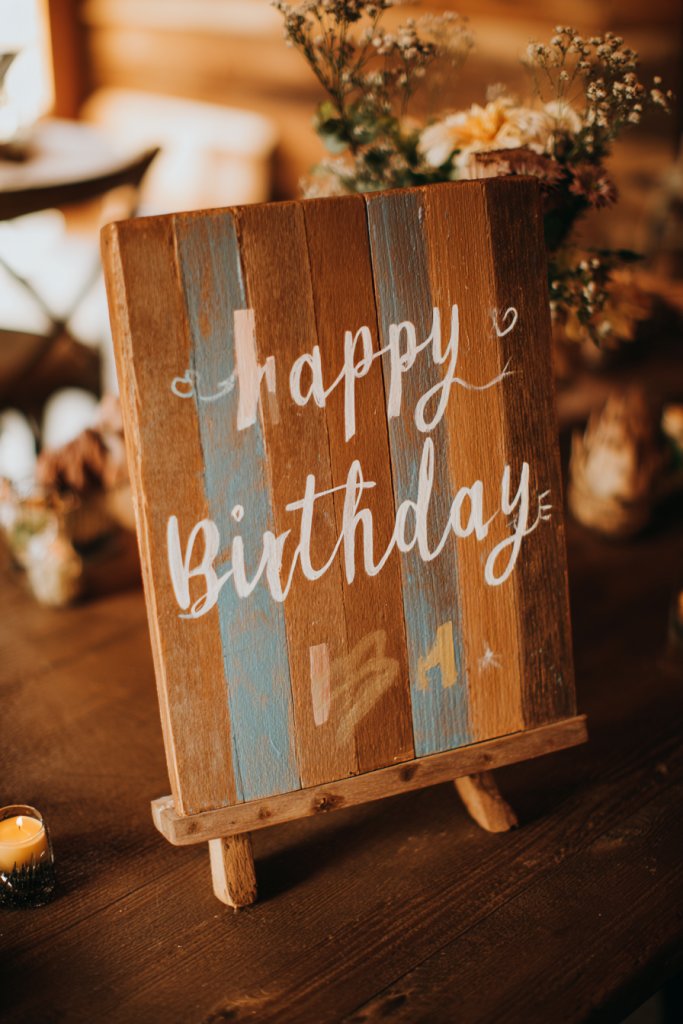
Looking to add a warm, personal touch to your birthday decor? Generic banners and printed signs can feel impersonal and uninspired. A handcrafted wooden sign with a heartfelt message instantly elevates the vibe, making guests feel welcomed and appreciated. Plus, it’s a fun DIY project that adds character and charm.
Picture a weathered wooden plank with smooth edges, painted with flowing calligraphy in pastel or metallic ink. The message, perhaps ‘Happy Birthday’ or a personalized greeting, is accented with delicate brush strokes or tiny illustrations. It’s placed near the entrance or as a backdrop, giving a rustic, cozy feel. The natural wood grain adds texture, making the sign feel authentic and handcrafted. Soft lighting or fairy lights enhance its warmth at night.
For a vintage vibe, choose reclaimed wood or distressed paint finishes. For a more modern look, opt for sleek, stained wood with minimalist lettering. Seasonal themes can be incorporated with painted motifs like snowflakes or floral designs. You can also customize the size—from small table signs to large statement pieces—based on your space. Incorporate decorative elements like twine or burlap for added rustic charm.
Start with a sturdy wooden board or a reclaimed piece of wood. Use painter’s tape to plan your design before painting. Acrylic paints or chalk paint work well for vibrant, durable lettering. For a professional finish, use stencils or calligraphy brushes. Seal the sign with a clear matte or gloss finish for weather resistance if outdoors. Attach a rope or twine at the top for hanging or place it on an easel for a freestanding display. Take your time to ensure neat, smooth lettering.
Personalize with the birthday person’s name, age, or a favorite quote. Add small embellishments like faux flowers, greenery, or tiny LED fairy lights for extra charm. Incorporate seasonal details—think autumn leaves or spring blossoms—to match the party theme. You could also create a series of signs with different messages for various areas of the party or photo zones.
A hand-painted wooden sign makes your celebration feel heartfelt and unique. It’s a simple touch that leaves a lasting impression. Plus, once created, it can be reused for future parties or as decor in the recipient’s room. Ready to craft a sign that’s as memorable as the party itself?
3. Fairy Light Curtain Backdrop for a Magical Atmosphere
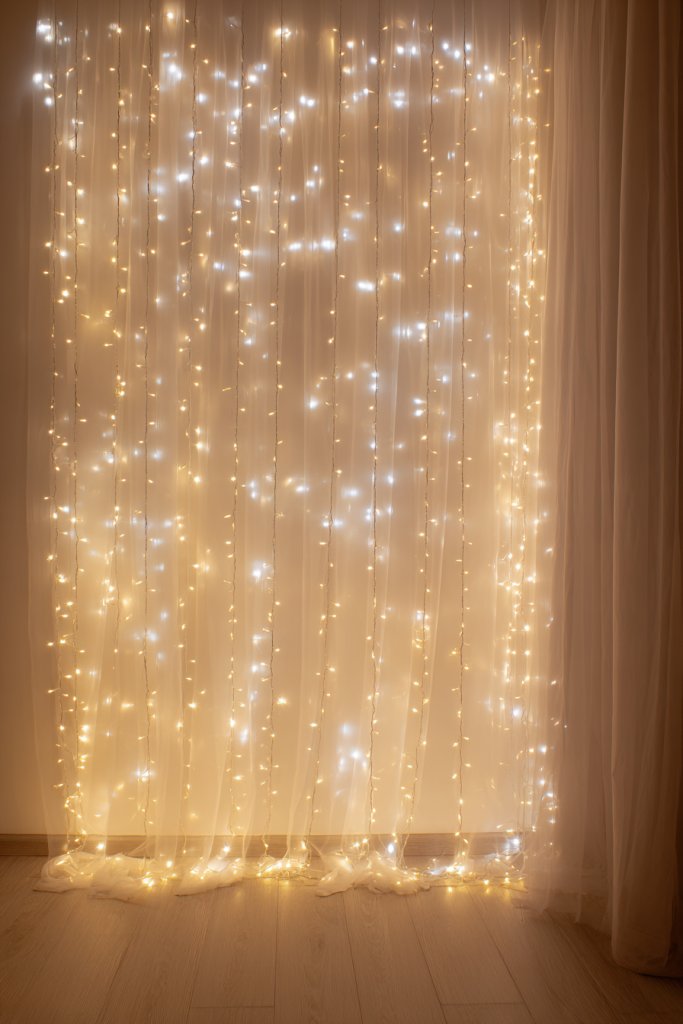
Ever wanted to create a scene straight out of a fairy tale for your birthday? Typical backdrops can feel dull or uninspired, especially when you’re craving that magical, dreamy vibe. Fairy lights offer an easy way to transform any space into an enchanted wonderland that guests will love. It’s a simple trick but makes a huge visual impact.
Think of a long curtain of tiny warm white fairy lights cascading from ceiling to floor or draped across a wall. The soft glow creates a cozy, intimate atmosphere, perfect for photos or just relaxing. The lights shimmer gently, mimicking stars or fireflies, evoking a sense of wonder. You can hang the curtain behind the main table, a photo booth, or any focal point, instantly elevating the decor to a magical level.
For a more dramatic effect, use multiple layers of fairy lights or combine with sheer fabrics for a dreamy effect. Wrap the lights around a decorative trellis or a rustic wooden frame for added texture. During different seasons, swap out warm white for colored or twinkle lights to match your theme. For outdoor parties, secure the lights with clips or hooks, and consider weatherproof options for durability.
Begin by choosing a sturdy curtain rod, tension wire, or installing hooks along the ceiling. Carefully string the fairy lights, ensuring even spacing and secure attachment points. Use clips or zip ties to keep the lights in place. Plug in and test the lights before hanging to avoid surprises. For extra effect, add some lightweight fabric or tulle behind the lights for a layered, textured look. Keep extension cords hidden behind the backdrop for a clean finish.
Add small decorative elements like paper lanterns or star-shaped cutouts for more visual interest. Incorporate colored bulbs or dimmable options for adjustable ambiance. For a personalized touch, hang small photos or mementos among the lights. Use remote-controlled or dimmable fairy lights to change the mood from lively to romantic effortlessly.
This fairy light backdrop is a guaranteed crowd-pleaser and easy to assemble. It’s versatile enough to fit any theme and instantly makes your space feel magical. Plus, it’s a fantastic DIY project that adds a personal touch. Get ready to impress your guests with a dreamy setting they’ll never forget.
4. Minimalist Geometric Table Centerpieces
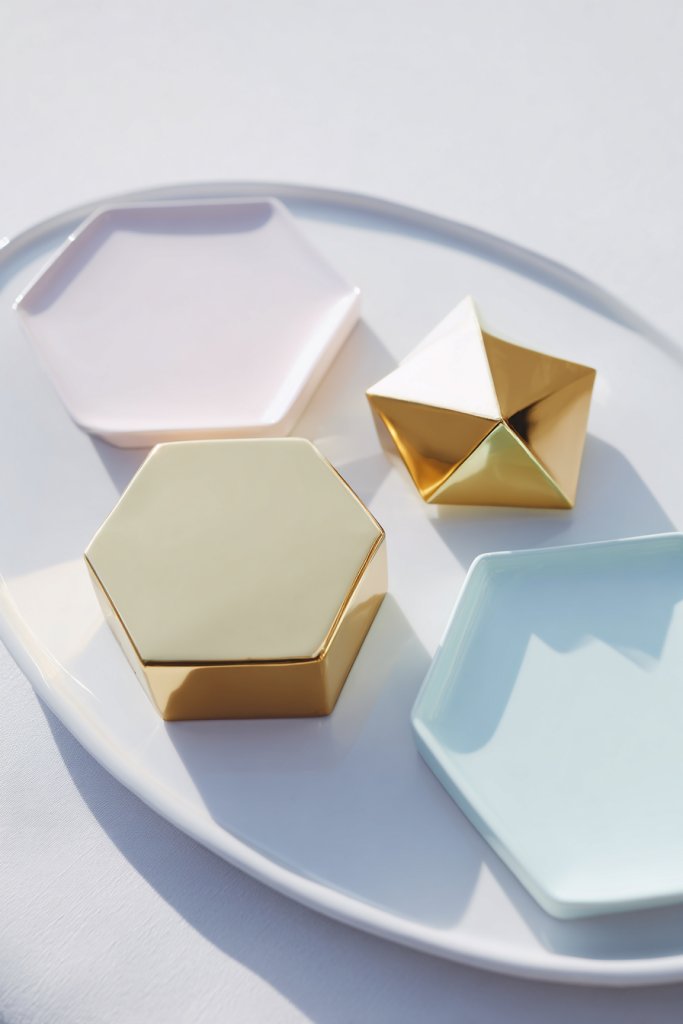
Tired of the same old floral arrangements cluttering your table? Minimalist geometric decor offers a sleek, modern alternative that can elevate your birthday setup. It’s perfect for those who prefer a clean, contemporary aesthetic without sacrificing visual interest. Plus, it’s easy to assemble and versatile enough to match various themes.
Picture simple concrete or metallic geometric shapes—like cubes, spheres, or pyramids—arranged in a balanced composition. These forms add a sculptural element to your table, creating a striking contrast against plain tablecloths. Pair them with candles or LED lights embedded within or beside for a subtle glow. The neutral tones of concrete or metallic finishes bring a sophisticated, stylish vibe that feels effortlessly chic.
Switch shapes and finishes to match your theme—gold or copper for glam, matte black for modern, or pastel-coated for a softer look. Incorporate different sizes for visual interest, or stack shapes for layered height. For outdoor settings, use weather-resistant materials or add decorative trays underneath. You can also combine geometric pieces with textured textiles or fabric runners for added depth.
Gather geometric decor pieces from craft stores or DIY with cement, wood, or metallic paints. For a quick setup, purchase pre-made shapes online. Arrange them symmetrically or asymmetrically, depending on your style, on a decorative tray, wooden block, or directly on the table. Use small LED tea lights or pillar candles for a warm glow, placing them strategically around the shapes. Keep the arrangement low-profile to avoid blocking guest conversations.
Add small personalized details, like engraved initials or custom colors, to make the decor unique. Incorporate themed accents—like miniature figurines or themed symbols—within the shapes. Switch up the arrangement seasonally or for different occasions by changing colors or adding seasonal touches like mini pumpkins or faux snow. The key is balancing simplicity with a dash of personality.
Geometric centerpieces bring a modern, artistic edge to your celebration without overwhelming the space. They’re perfect for stylish, minimalist parties and are surprisingly easy to customize. Once set up, they become a memorable part of your decor story. Ready to add a touch of sleek sophistication to your table?
5. Hanging Paper Lanterns in Coordinated Colors
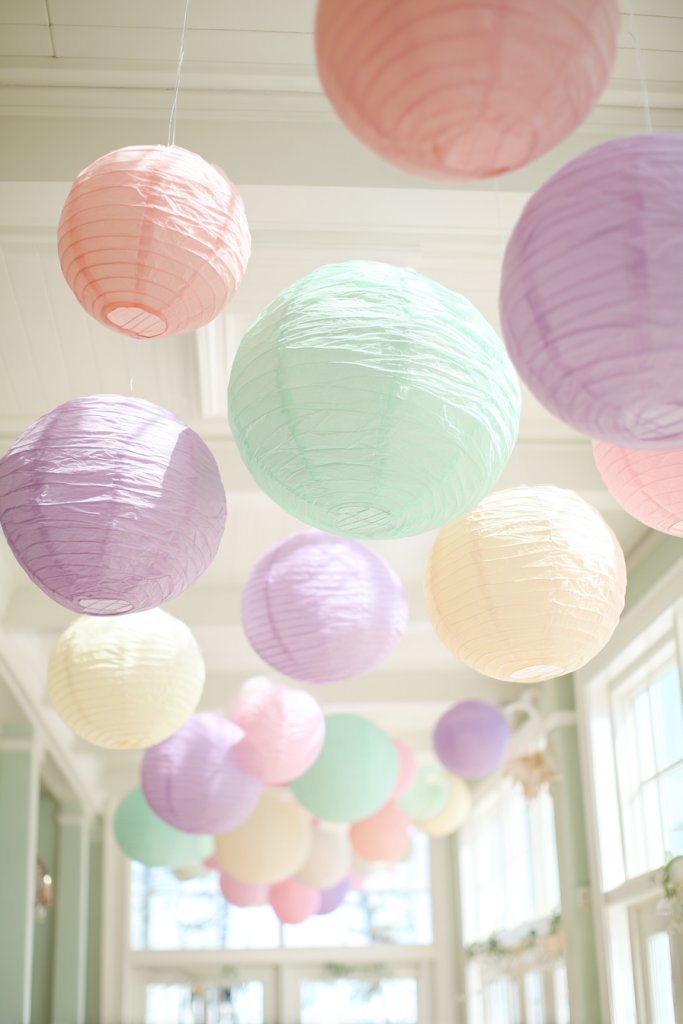
Looking to add a festive yet elegant touch to your birthday party? Conventional decorations can feel dull, but hanging paper lanterns bring instant color and charm. They’re affordable, easy to install, and can transform a plain ceiling into a lively celebration space. Plus, they add a soft, diffused glow that’s perfect for evening parties.
Visualize a cluster of paper lanterns in various sizes floating in mid-air, in shades matching your theme—peach, blush, mint, or bold hues like red or navy. Hung at different heights, they create a dynamic, layered look that draws the eye upward. When lit, the lanterns emit a gentle, warm light, casting playful shadows across the space. They flutter slightly in the breeze if outside or near open windows, adding movement and life.
Coordinate lantern colors with your overall theme—pastels for a soft, romantic vibe, or bright, bold colors for a lively party. Mix sizes and shapes to add visual interest. For outdoor parties, string them from trees or pergolas; indoors, hang from the ceiling using clear fishing line or decorative ribbons. You can also add tassels or fringe to the lanterns for extra flair.
Purchase ready-made paper lanterns in your chosen colors and sizes. Use sturdy hooks or adhesive strips to hang them securely from the ceiling or beams. Arrange them in clusters or lines, spacing evenly for a balanced look. Light them with LED string lights or battery-operated LED candles inside for safety. For outdoor setups, secure the strings with stakes or hooks and ensure they hang freely without obstruction.
Add decorative elements like glitter, tassels, or metallic accents to the lanterns for added sparkle. Incorporate themed banners or garlands alongside for a cohesive decor scheme. Consider customizing lanterns with cutouts or labels for a personalized touch. Use dimmable lighting or colored bulbs to change the mood as the party progresses.
Hanging paper lanterns instantly uplift any space with minimal effort. They’re versatile, customizable, and create a festive atmosphere that guests will love. Whether indoors or outside, they’re an easy way to add color and charm. Ready to give your party a playful, eye-catching ceiling?
6. Floral Photo Wall with DIY Paper Flowers
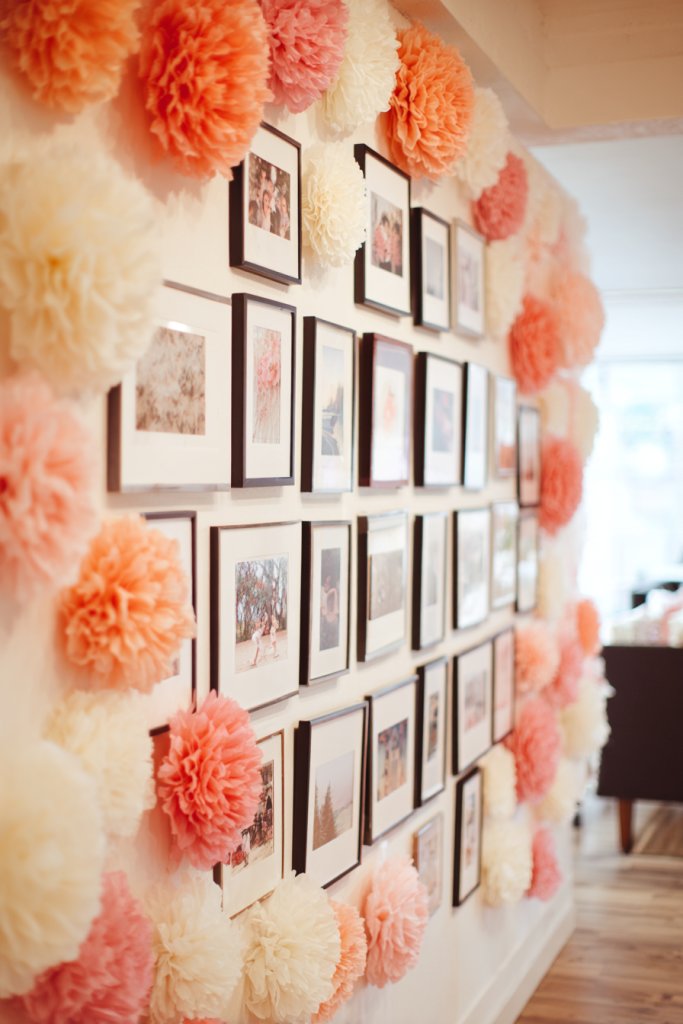
Ever wish your photo display could be more vibrant and personalized? Standard photo walls can look static and uninspired, but adding DIY paper flowers brings a fresh, lively touch. It creates a beautiful backdrop that showcases memories while doubling as decor. Plus, it’s a fun craft project that adds a handmade vibe to your celebration.
Visualize a wall decorated with hundreds of paper flowers in bright colors—roses, peonies, daisies—crafted with textured paper and layered for depth. Intertwined with photos in various sizes and shapes, the flowers frame your favorite memories beautifully. The combination of vibrant blooms and cherished moments creates a joyful, dynamic scene. Soft lighting highlights the textured paper, adding dimension and warmth.
Use seasonal color schemes—warm oranges and reds for fall, pastel tones for spring—matching your theme. Incorporate different flower types and sizes for variety. For a more boho vibe, add macramé or fabric banners around the display. You can also make it modular, so it’s easy to update with new photos or flowers for future celebrations. Consider using a large canvas or a foldable backdrop for easy setup.
Create or purchase pre-cut paper flowers in your chosen colors and styles. Attach them to a backing wall or a fabric backdrop using glue or removable adhesive strips. Mix in photos printed on glossy or matte paper, framing them if desired. Arrange the flowers and photos in a balanced, flowing pattern. Incorporate fairy lights or small decorative accents to enhance the visual appeal. Keep the display at eye level for easy viewing and photo opportunities.
Personalize with custom text, like the birthday person’s name or a favorite quote, integrated into the floral design. Use themed embellishments like butterflies or stars among the flowers. Incorporate a few 3D elements like faux greenery or textured leaves for extra dimension. You can also add small framed photos or keepsakes within the floral arrangement for a personal touch.
A floral photo wall turns simple images into a stunning visual story. It’s a lively, colorful feature that draws attention and creates a warm, inviting atmosphere. Perfect for all ages, it’s easy to update and reuse. Ready to craft a picture-perfect backdrop for your celebration?
7. Boho-Chic Dreamcatcher Mobiles
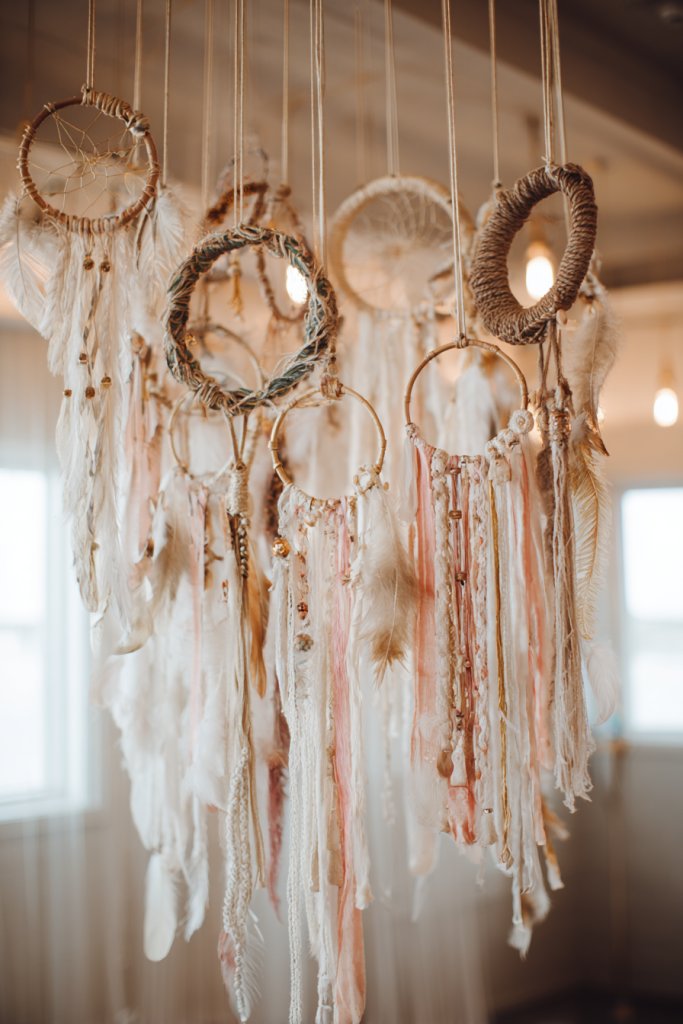
Craving a boho-inspired, laid-back vibe for your birthday? Typical decorations can feel too formal or stiff, but dreamcatchers add a relaxed, artistic touch that’s both stylish and meaningful. Hanging mobiles with feathers and beads create a dreamy atmosphere perfect for photos and ambiance. They’re an easy way to infuse personality into your decor.
Picture large, handcrafted dreamcatchers with intricate webbing, adorned with feathers, beads, and tassels hanging from the ceiling. The soft, natural tones and flowing designs evoke a free-spirited, earthy aesthetic. As they sway slightly with movement or air currents, they add a gentle, calming rhythm to your space. The layered textures and delicate details make the decor feel lively yet relaxed.
Choose natural materials like wood, jute, or cotton for a true boho look. Mix and match different sizes and designs for visual interest. Incorporate shells or crystals for a beachy vibe, or add faux greenery for a fresh touch. Hang the mobiles at varying heights in corners, above dining tables, or near photo zones. For outdoor settings, secure with weatherproof cords or hooks.
Create or purchase dreamcatchers with a sturdy hoop, woven web, and dangling feathers or beads. Hang them from ceiling hooks or sturdy curtain rods. Use lightweight cords or ribbons to suspend each mobile, adjusting heights for a layered effect. Test their sway and placement to ensure balance. For a DIY project, weave your own web with embroidery thread and decorate with found objects or faux feathers.
Add charms or initials to the web for a personal touch. Incorporate themed elements like seashells, mini dreamcatchers, or fabric tassels aligned with your party theme. Use colored cords or painted hoops to match your decor palette. You can also cluster multiple smaller dreamcatchers for an eye-catching mobile installation.
Dreamcatcher mobiles are a charming, versatile decor element that adds a whimsical, boho flair. They’re easy to customize and can be reused for other celebrations or room decor. With a little creativity, you’ll craft a dreamy atmosphere that guests will remember. Ready to hang your own piece of boho magic?
8. Color-Coordinated Cupcake and Dessert Table Decor
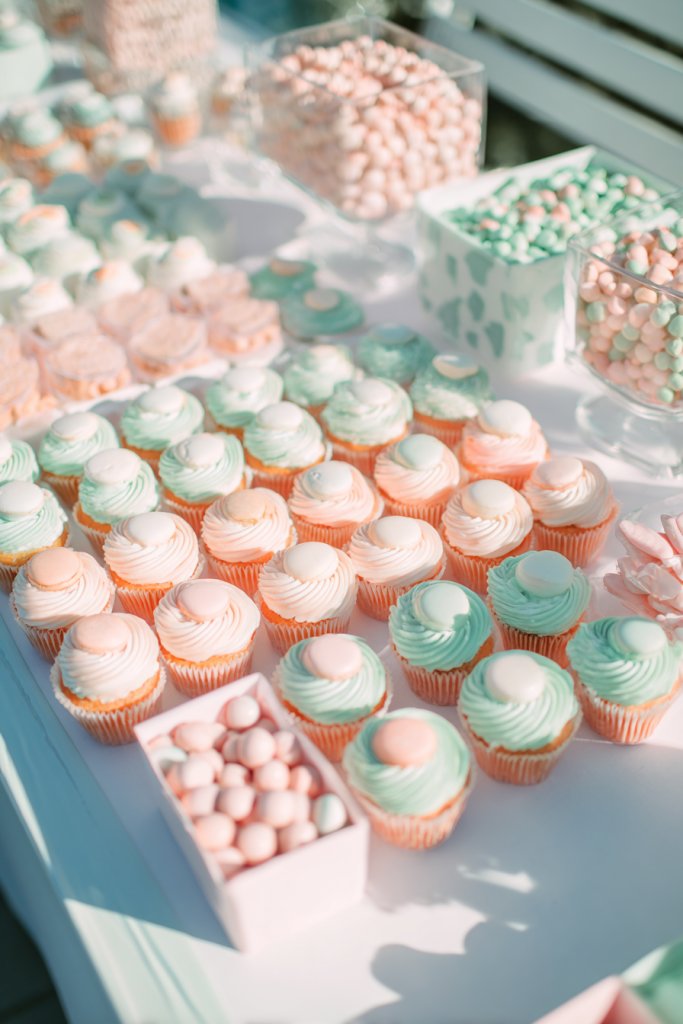
Who doesn’t love a beautiful dessert table that’s also Instagram-worthy? But often, these setups end up looking cluttered or mismatched. Achieving a cohesive, aesthetic look takes effort, but it’s totally doable. Coordinating colors and decorative elements transforms an ordinary dessert station into a central visual feature.
Imagine tiered cake stands and trays in matching pastel or metallic hues, displaying cupcakes, cookies, and candies. Decorate with banners, ribbons, or paper doilies in your color scheme. Use matching napkins and tablecloths to unify the look. Fresh fruit or edible flowers can add natural pops of color while enhancing the overall theme. The arrangement invites guests to indulge while maintaining a polished, curated vibe.
Adjust the decor to fit your theme—glam metallics for a chic party, bright colors for a fun vibe, or neutral tones for elegance. Incorporate themed toppers or custom labels to personalize each treat. Use different heights and shapes to create visual interest. For outdoor parties, consider weatherproof displays or covering desserts with clear domes.
Choose matching cake stands and trays that fit your dessert variety and space. Decorate with fabric banners, paper fans, or garlands that coordinate with your color palette. Use decorative cupcake wrappers, toppers, and themed utensils for added detail. Arrange desserts in a balanced composition, leaving enough space for easy access. Incorporate small decorative elements like faux greenery or metallic accents to elevate the display.
Add custom signs or labels with the birthday person’s name or age. Incorporate themed toppers or mini flags. Use edible gold or glitter for a touch of luxury. Personalize the decor further with monogrammed napkins or custom cake toppers, making the dessert table a true reflection of your style.
A cohesive dessert table elevates the entire celebration and impresses guests. It’s easier than it looks to create a wow factor with color coordination and thoughtful details. Once set, it becomes a highlight of your party that everyone will remember. Ready to craft a stunning sweet station?
9. Eco-Friendly Mason Jar Lanterns as Centerpieces
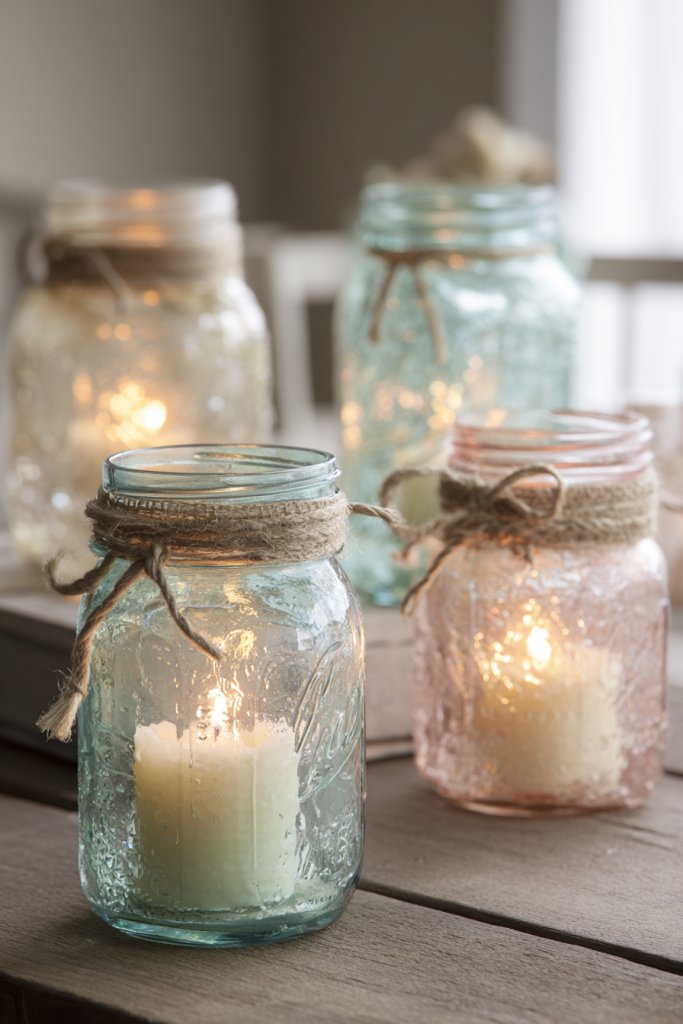
Searching for charming, sustainable decor options? Traditional centerpieces can be costly and throwaway, but mason jar lanterns offer a reusable, eco-friendly alternative. They add a rustic, cozy vibe and are surprisingly simple to assemble. Plus, they double as ambient lighting, perfect for evening celebrations.
Visualize clear mason jars filled with fairy lights or small candles, decorated with twine, lace, or dried flowers tied around the neck. When lit, the jars cast a warm, flickering glow, creating an inviting atmosphere. Placed along tables or hung from trees, they add a touch of countryside charm. The combination of natural materials and gentle lighting creates a peaceful, romantic scene.
Decorate with seasonal elements—pinecones and cinnamon sticks for winter, dried lavender or citrus slices for summer. For a more polished look, paint or stain the jars in metallic or pastel shades. Use different sizes for visual interest, pairing small jars with larger ones. For outdoor parties, secure hanging jars with sturdy wire or hooks, ensuring they’re stable in wind.
Gather mason jars, fairy lights, candles, or LED tealights. Decorate the jars with twine, fabric, or paint for a personalized touch. Place candles inside or wrap fairy lights around the exterior. For hanging setups, attach wire or sturdy string to the jar’s lid or handle. Arrange them at varying heights on tables or suspend from overhead structures. Light them just before guests arrive for a magical glow.
Add tags or labels with the guest of honor’s name or a sweet message. Incorporate seasonal decorations—mini pumpkins, pine needles, or flowers—inside or outside the jars. Use colored lights or dimmers to adjust the ambiance. You can also fill jars with small keepsakes or treats for guests to take home, adding a personal touch.
Mason jar lanterns are a budget-friendly, eco-conscious decor idea that’s both practical and charming. They’re perfect for creating a warm, intimate vibe that guests will love. Plus, they’re easy to make and reuse, making them a smart choice for any celebration. Ready to light up your party with sustainable style?
10. Whimsical Cloud and Star Hanging Decor
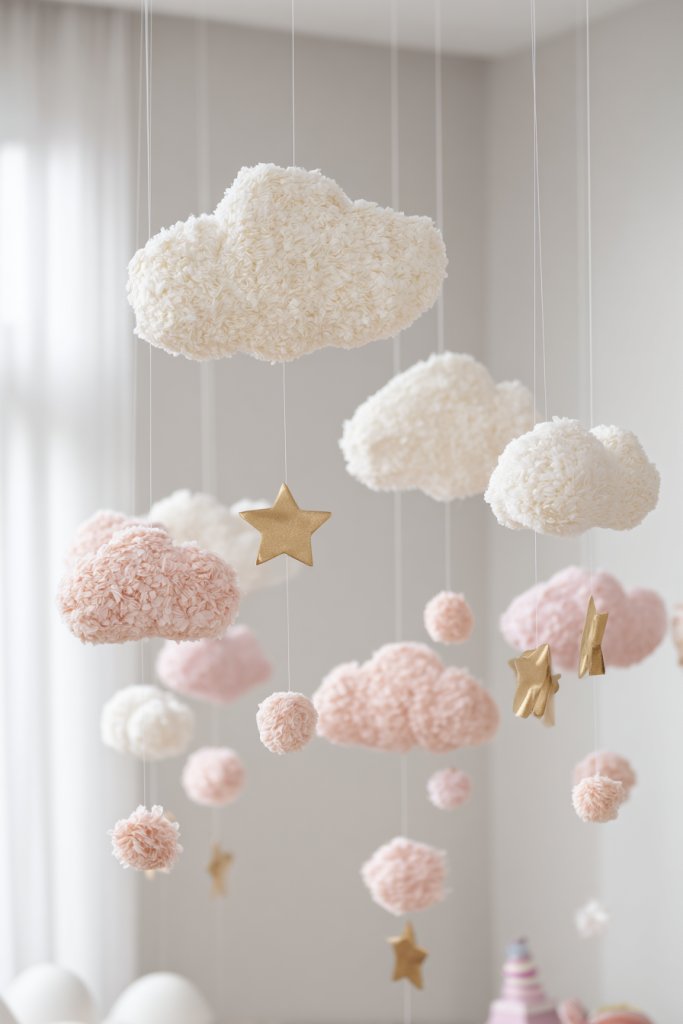
Want to create a dreamy, sky-inspired atmosphere for your birthday? Typical decorations often lack that whimsical, ethereal touch that makes a celebration memorable. Cloud and star shapes suspended from the ceiling instantly evoke a sense of wonder and fantasy. They transform a plain space into an enchanted sky your guests will love.
Imagine fluffy cloud cutouts made from felt or cardstock, hung at varying heights with delicate ribbons or transparent threads. Interspersed with shiny star shapes, these elements create a floating, celestial scene. When illuminated softly or with fairy lights, they cast gentle shadows, enhancing the dreamy effect. The arrangement feels light, airy, and perfect for a whimsical party theme.
Choose materials like soft felt, foam, or textured paper for clouds, and metallic or glittery paper for stars. Incorporate different sizes to add depth and interest. For a more dramatic look, cluster multiple clouds and stars in one area, or spread them evenly across the ceiling. Add small LED lights or glow-in-the-dark accents for extra magic at night. This decor style works well indoors or outside under a canopy.
Cut cloud shapes from foam or cardstock using templates, then decorate with glitter, faux snow, or fabric for texture. Attach each piece with clear fishing line or lightweight string to ceiling hooks or adhesive strips. Space the clouds and stars at different heights for a natural, floating effect. Lightly secure the strings to prevent swaying or tangling. Use battery-operated fairy lights to add a gentle glow.
Personalize clouds with painted names, initials, or small messages. Add glow-in-the-dark paint or glitter to enhance the celestial feel. Include themed elements like tiny planets, moons, or shooting stars for variation. For an extra touch, hang small paper lanterns or mini LED star lights among the clouds.
This cloud and star decor creates an enchanting atmosphere that captivates all ages. It’s easy to customize and assemble, offering a whimsical touch that’s both charming and memorable. Once hung, it turns your space into a dreamy sky full of wonder. Ready to bring the stars a little closer?
11. Neon Sign with Personalized Birthday Message
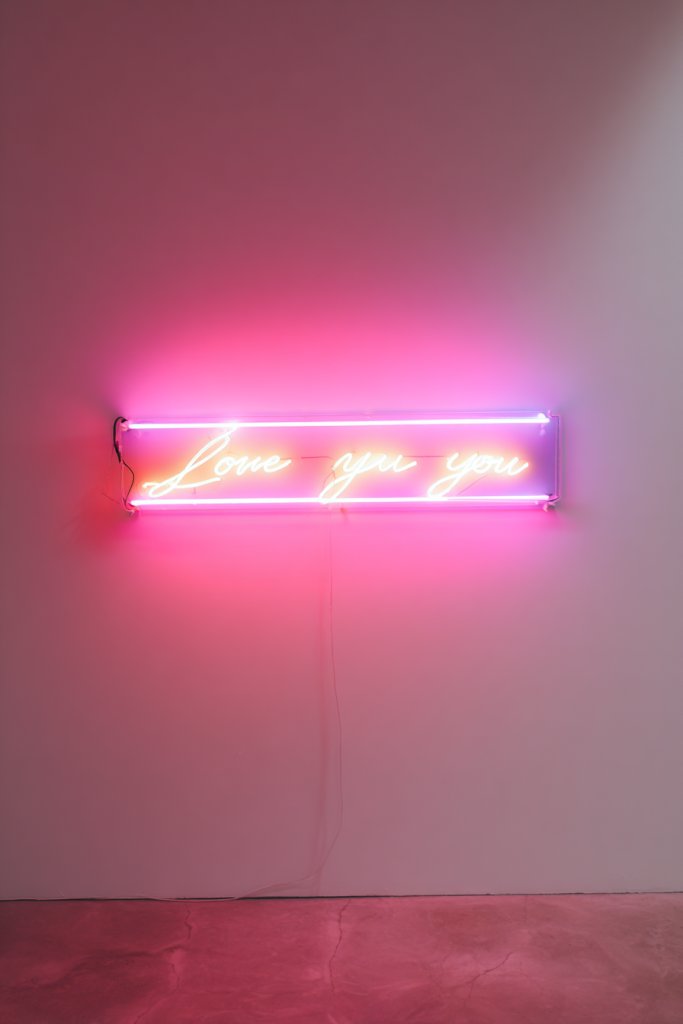
Looking to add a modern, statement piece to your party? Neon signs are all the rage, offering a bold, eye-catching focal point. Customizable with names, phrases, or fun sayings, they instantly elevate your decor. Plus, they make fantastic photo backdrops that turn social media posts into mini works of art.
Visualize a sleek neon sign spelling out ‘Happy Birthday’ or the birthday person’s name, glowing in vibrant colors like pink, blue, or green. The sign hangs on a wall or is mounted on a decorative frame, casting a colorful, ambient light. Pair it with neutral backgrounds or contrasting decor elements to make the sign pop. Guests gather nearby for photos, creating memorable moments under its glow.
Choose colors and fonts that match your theme—playful, elegant, or edgy. Install the sign in a central location, like behind the main table or photo booth. You can also add decorative elements like balloons, banners, or draped fabrics around it. For outdoor parties, ensure the sign is weatherproof or set up under a canopy. Use dimmable or remote-controlled options for mood adjustments.
Order a custom neon sign from a reputable supplier, providing your preferred text and color. Install the sign on a sturdy wall or frame using hooks or brackets. Keep electrical cords neatly concealed behind furniture or along walls. Test the sign before the party to ensure all wiring and colors work perfectly. For safety, keep it away from flammable materials and ensure proper ventilation.
Add small decorative elements like fairy lights or balloons to complement the sign. Incorporate your theme colors into surrounding decor for cohesiveness. Use the sign as a photo prop or background for selfies and group shots. Personalize further with custom messages or hashtags for a social media-ready setup.
A neon sign instantly transforms any space into a modern, lively party zone. It’s a guaranteed hit for photos and memories that last. With minimal effort, you’ll create a striking focal point that guests will rave about. Ready to light up your celebration?
12. Vintage Suitcase Display for Gift and Favor Stations
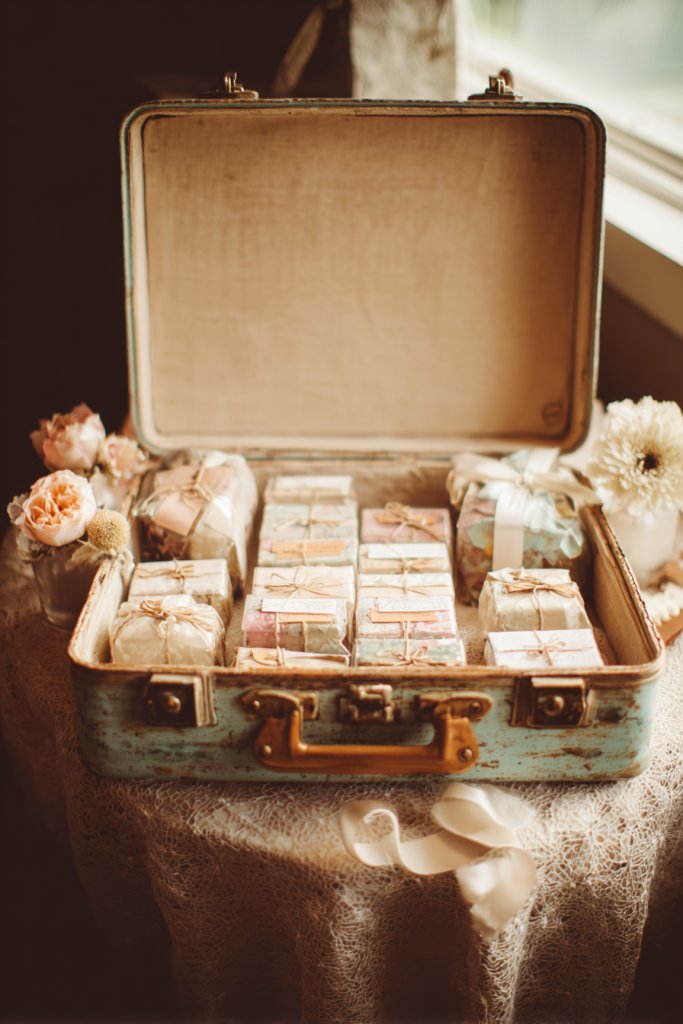
Tired of the typical gift table clutter? Want to add a nostalgic, charming touch that doubles as decor? Vintage suitcases are perfect for creating a unique display for gifts, favors, or even as part of a photo zone. They evoke a sense of adventure and old-world charm, making your celebration stand out.
Imagine a stack of weathered suitcases in varying sizes, stacked or opened to reveal treats or favors. The distressed leather and metal accents add character, while the open suitcases display wrapped gifts or small keepsakes. Placed near the entrance or gift table, they create a storytelling element that invites guests to explore and discover. Soft lighting inside or around the suitcases enhances their nostalgic appeal.
Choose suitcases in coordinating colors or distressed finishes for a vintage look. Decorate with ribbons, faux flowers, or small lanterns to match your theme. Use them as standalone displays or incorporate them into larger setups with other vintage pieces. For outdoor parties, secure the suitcases on stable surfaces or use decorative stands for stability. They can also serve as creative backdrops for photos.
Source vintage suitcases from thrift stores, flea markets, or online marketplaces. Clean and condition them if needed, or leave the distressed look for authenticity. Arrange them in a stack or side-by-side, opening some for display. Fill with tissue paper, shredded paper, or fabric to cushion gifts or favors. Add small tags or labels for easy guest interaction. For added charm, attach vintage-inspired tags or wax seals.
Personalize with themed stickers, tags, or labels. Incorporate small decorative elements like faux pearls or lace for a romantic touch. Use seasonal accessories—mini pumpkins for fall or faux snow for winter—to match your celebration. Create a cohesive look by coordinating the suitcase colors with your overall decor palette. Guests will love the nostalgic vibe and thoughtful presentation.
Vintage suitcases are a charming, versatile way to add personality to your gift and favor station. They’re a conversation starter and make for beautiful photos. Once set up, they add a touch of wanderlust and adventure to your celebration. Ready to pack your party with vintage charm?
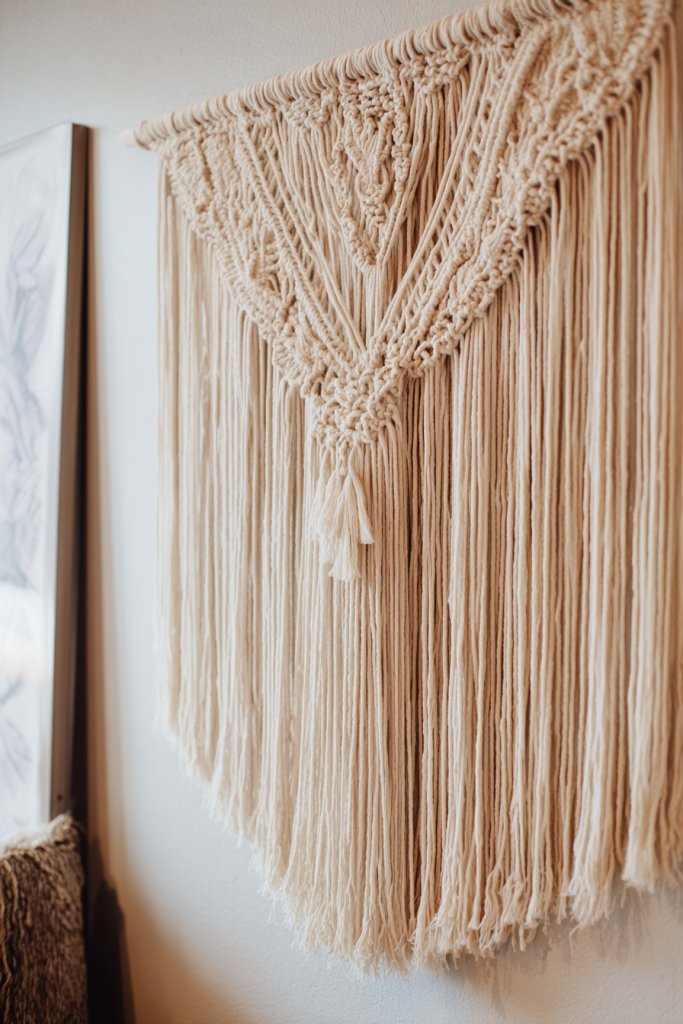
13. Macramé Wall Hangings for a Textured Look
Searching for a decor element that adds texture and boho charm? Macramé wall hangings are the perfect solution. They’re trendy, versatile, and bring a soft, handcrafted vibe into any celebration space. Plus, they’re easy to customize and can be reused in other areas of your home afterward.
Envision a large, intricate macramé piece with knotted fringe hanging from a decorative rod or directly mounted on the wall. The textured cords and patterns create visual depth, catching light and shadows beautifully. Pair it with a backdrop of neutral or pastel-colored walls to highlight its craftsmanship. The overall effect is cozy, artistic, and layered, making your decor feel warm and inviting.
Choose macramé pieces with different knot styles and sizes—simple or complex—to match your aesthetic. Incorporate natural materials like cotton, jute, or hemp for a rustic look. For a more polished appearance, add tassels or beads. Hang the piece in a prominent spot, such as behind the main table, doorway, or photo zone. For outdoor events, ensure secure mounting and consider weather-resistant options.
Buy a ready-made macramé wall hanging or create your own with basic knotting techniques. Use a sturdy rod, hooks, or nails to hang the piece at eye level. Mix and layer smaller macramé hangings for a gallery wall effect. Incorporate LED fairy lights or string lights behind or around the piece for a subtle glow. Keep the mounting secure, and adjust the height for optimal visual impact.
Personalize with painted or embroidered accents, or add small decorative charms. Coordinate colors with your party theme—earth tones, pastels, or bold hues. Use the macramé as a backdrop for photos or as part of a larger boho corner. Reconfigure or add new pieces for future celebrations, making it a lasting decor element.
Macramé wall hangings add a handcrafted, artistic touch that elevates your decor effortlessly. They’re customizable, reusable, and trendy—perfect for creating a cozy, inviting atmosphere. Once hung, they become a focal point that guests will admire. Ready to knot your way to stylish decor?
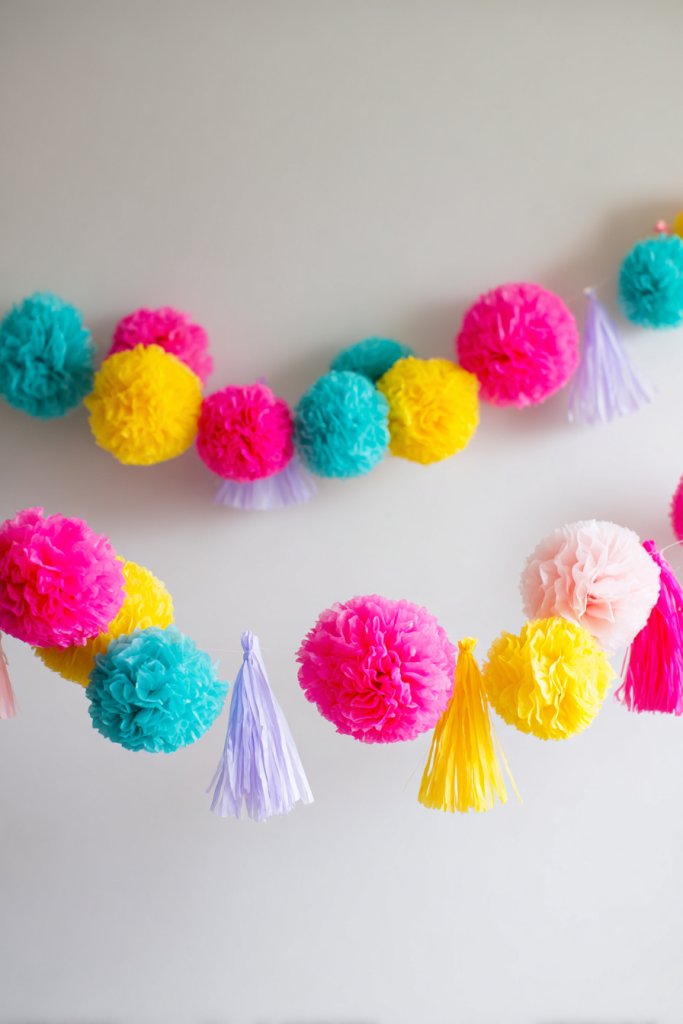
14. Colorful Paper Pom-Poms and Tassels Garland
Want to add a burst of color and energy to your birthday decor? Paper pom-poms and tassels are fun, inexpensive, and instantly festive. They’re perfect for filling empty wall space or creating a playful ceiling canopy. Plus, they’re super easy to make or buy pre-made, saving time and effort.
Imagine a long string of vibrant pom-poms and tassels in shades matching your theme—bright pinks, yellows, blues, or multicolored. They drape across the room or ceiling in a lively, flowing pattern, adding movement and visual interest. When lit with warm ambient lighting, they cast a cheerful glow that energizes the space. The textures and colors create a playful, joyful environment that encourages celebration.
Mix and match pom-poms and tassels in different sizes and colors for a dynamic look. Hang them at varying heights or cluster them for a more dramatic effect. Use clear fishing line or decorative ribbons for hanging. Incorporate metallic or glittery accents for extra sparkle. For outdoor parties, secure the garland to trees or beams with clips or zip ties, ensuring it stays in place.
Create your own pom-poms with tissue paper or buy pre-made ones from craft stores. For tassels, use tissue paper, yarn, or fabric strips wrapped around a core, then tied and trimmed. Attach each element to a long string or ribbon, spacing evenly or in random clusters. Hang the garland across walls, doorways, or ceilings. Use hooks, nails, or adhesive strips for easy installation. For a professional look, add metallic or glitter accents.
Customize with initials, small charms, or themed cutouts attached to the garland. Incorporate coordinated color schemes or add metallic accents for a luxe touch. Use themed or personalized tags for a special touch. Change up the arrangement for different celebrations, making it a versatile decor staple. It’s a cheerful, budget-friendly way to make your space lively.
Colorful pom-poms and tassels instantly lift the mood of any party. They’re easy to craft or source, and their vibrant hues add a playful vibe. Once hung, they become a joyful backdrop that invites guests to celebrate. Ready to infuse your space with color and fun?
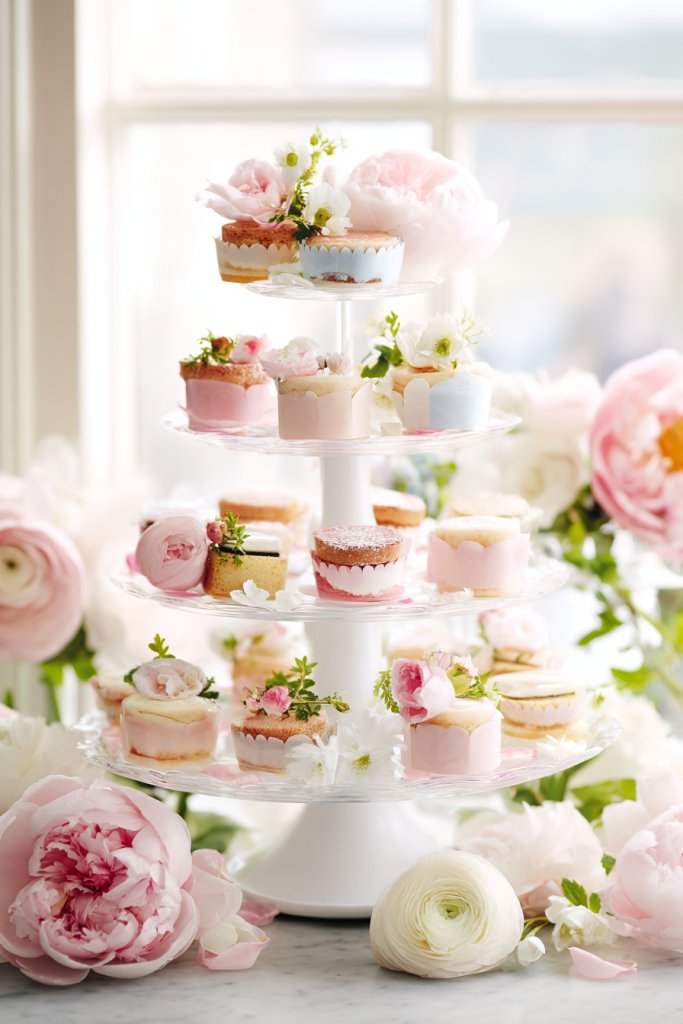
15. Themed Cake Stand Arrangements with Fresh Flowers
Want your dessert display to look as good as it tastes? Standard cake tables can feel underwhelming, but themed cake stand arrangements paired with fresh flowers elevate the entire presentation. They add elegance, color, and a personalized touch that makes your celebration truly special. It’s a simple detail that transforms the entire look.
Visualize tiered cake stands in coordinating colors or materials—white porcelain, gold accents, or rustic wood—arranged in varying heights. Decorate each tier with fresh flowers matching your theme—roses, peonies, or daisies—placed strategically around the cakes or desserts. The combination of natural blooms and delicate pastries creates a romantic, sophisticated scene. Soft lighting or candlelight enhances the freshness and elegance.
Use different styles of cake stands—vintage, modern, or boho—to match your decor. Incorporate seasonal florals—sunflowers for summer, poinsettias for winter—to match your theme. Mix textures like lace, burlap, or silk ribbons for added depth. For outdoor parties, consider weatherproofing the florals or covering desserts with glass domes. Keep the arrangement balanced to draw attention to the centerpiece.
Select cake stands that complement each other and fit your space. Arrange desserts on each, layering with flowers and greenery for a lush effect. Use floral foam or oasis to keep flowers fresh and in place. Incorporate small decorative accents like fruit or edible flowers for extra color. Secure the arrangements with tape or floral picks if needed. Keep the display at eye level for maximum impact.
Incorporate custom cake toppers or monograms for a personal touch. Use themed flowers or colors to match your celebration. Add small decorative elements like candles or figurines around the tiers. Change the floral arrangements seasonally or for different themes, keeping the display fresh and exciting. This setup becomes a centerpiece that captures attention and admiration.
A well-styled cake stand arrangement sets a tone of elegance and thoughtfulness. It’s an effortless way to add color and life to your dessert table. Once styled, it becomes a visual highlight guests will remember and photograph. Ready to serve up style with your sweet treats?
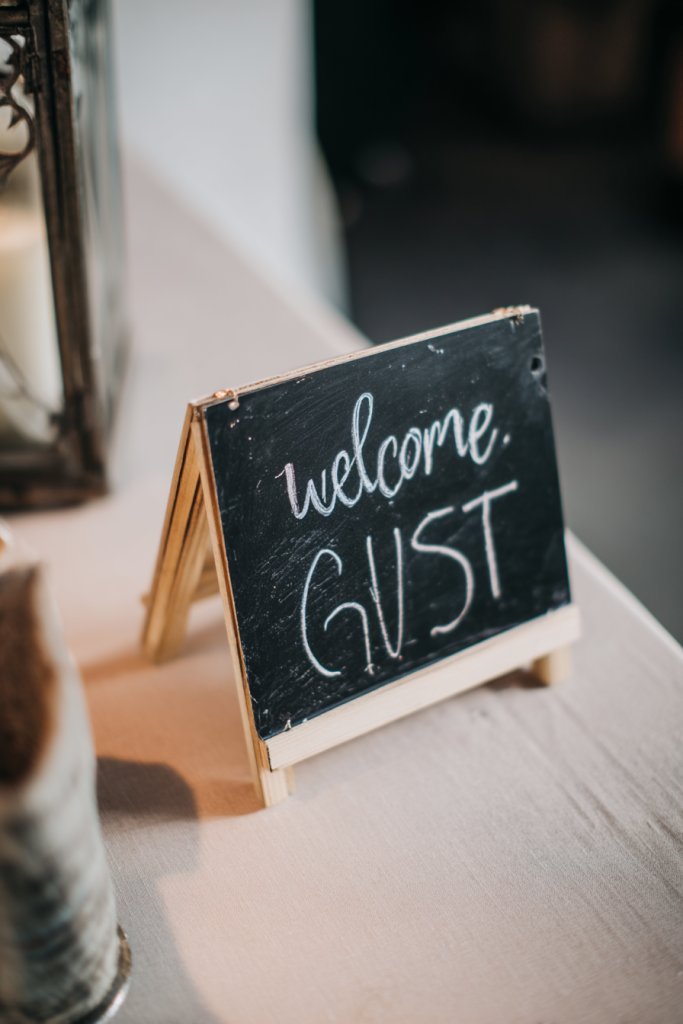
16. Chalkboard Signs for Interactive Decor
Looking for a versatile way to engage your guests? Chalkboard signs offer a fun, interactive element that also enhances your decor. They can display messages, directions, or quotes, adding personality and a personal touch. Plus, they’re reusable and customizable, making them a practical choice for any celebration.
Picture a sleek black chalkboard with handwritten messages in colorful chalk—’Welcome!’, ‘Make a Wish’, or funny quotes. Place it near the entrance, gift table, or photo booth to guide and entertain guests. Enhance the sign with decorative borders, doodles, or themed illustrations that match your party’s vibe. When lit softly or paired with string lights, it creates a cozy, welcoming atmosphere.
Choose from framed chalkboards, mini signs on stakes, or free-standing boards for flexibility. Use different chalk colors, metallic pens, or erasable markers for variety. Change messages throughout the event to keep things fresh and fun. Incorporate themed decorations or borders to match your celebration style. For outdoor parties, ensure the chalkboard is weatherproof or covered.
Select a durable chalkboard or chalkboard paint on a sturdy surface. Use high-quality chalk or markers for clear, vibrant writing. Write messages before the event, or have someone update them live for added interaction. Decorate the borders with washi tape, stickers, or small illustrations. Position the signs strategically for maximum visibility and engagement. Regularly wipe and refresh to keep messages neat.
Personalize with the guest of honor’s name, age, or favorite quotes. Use themed illustrations or doodles that match your party’s motif. Incorporate small props like mini chalkboards or decorative frames. Use the signs for fun activities, games, or photo prompts. They become functional decor that also sparks conversation.
Chalkboard signs are a playful, adaptable decor element that easily connects guests and adds a personal touch. They’re a budget-friendly way to keep your theme alive throughout the event. Once set up, they serve as functional art that guests will enjoy engaging with. Ready to write your way to charming decor?
17. Vintage Tea Light Holders for Cozy Ambiance
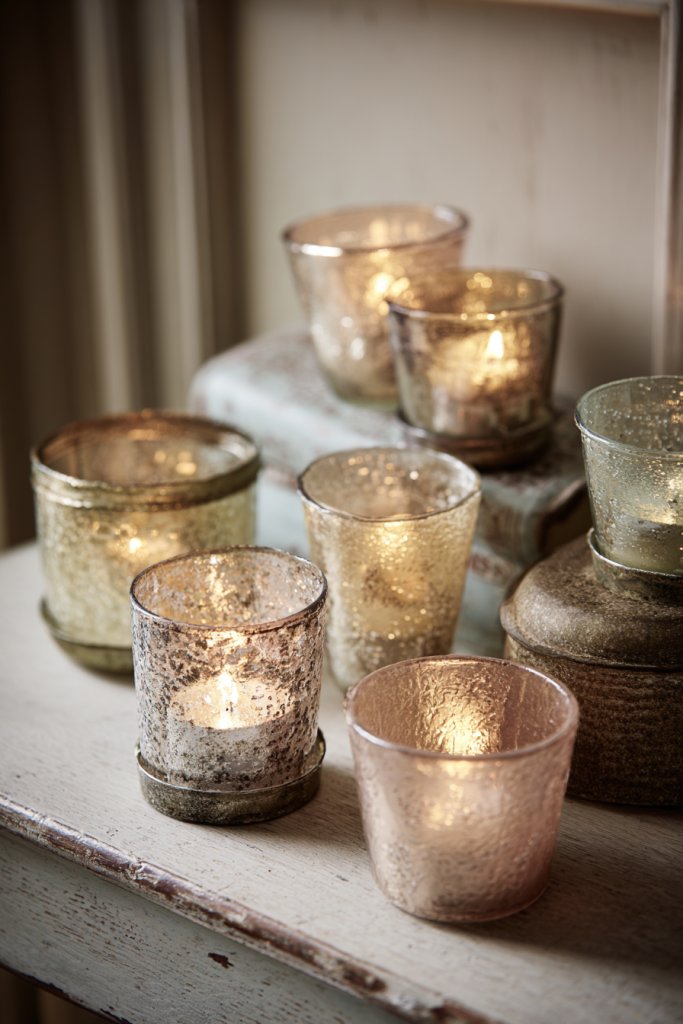
Want to create a warm, inviting atmosphere without overwhelming your space? Vintage-inspired tea light holders are perfect for casting a soft glow and adding a touch of nostalgia. They’re subtle, stylish, and versatile enough to suit any theme—rustic, shabby chic, or boho. Plus, they’re simple to arrange and reuse.
Imagine antique brass or glass holders scattered across tables or along pathways, each holding a flickering tea light. The warm candlelight creates a cozy ambiance, softening the space and encouraging relaxed conversations. Some holders may feature intricate patterns or aged finishes that add character. Grouped together, they evoke a vintage charm that’s both romantic and timeless.
Mix different styles—antique, distressed, or minimalist—to create visual interest. Use holders in coordinating metallic tones or mixed metals for a curated look. Incorporate them into a centerpiece or line them along walkways and window sills. For outdoor settings, ensure they are wind-resistant or secured with stable bases. Combine with textiles like lace or burlap for added texture.
Source vintage or vintage-style tea light holders from thrift shops, antique stores, or online. Clean and restore if necessary, or leave weathered for authenticity. Arrange them on tables, mantels, or string them along ledges using wire or ribbon. Use flameless LED candles for safety, especially in outdoor or windy conditions. Light them before guests arrive for a warm, welcoming glow.
Add small decorative elements like dried flowers, faux pearls, or themed charms inside the holders. Personalize with engraved initials or custom paint for a personal touch. Incorporate seasonal accents—pinecones, holly, or mini pumpkins—to match your theme. Mix with other vintage decor for a cohesive, nostalgic setting. These holders become a charming, reusable part of your decor collection.
Vintage tea light holders add a cozy, romantic touch that’s easy to achieve and reuse. They fill your space with soft, flattering light that’s perfect for evening celebrations. Once arranged, they create a memorable ambiance your guests will rave about. Ready to warm up your party?
18. Monochrome Balloon Bouquets for a Bold Statement
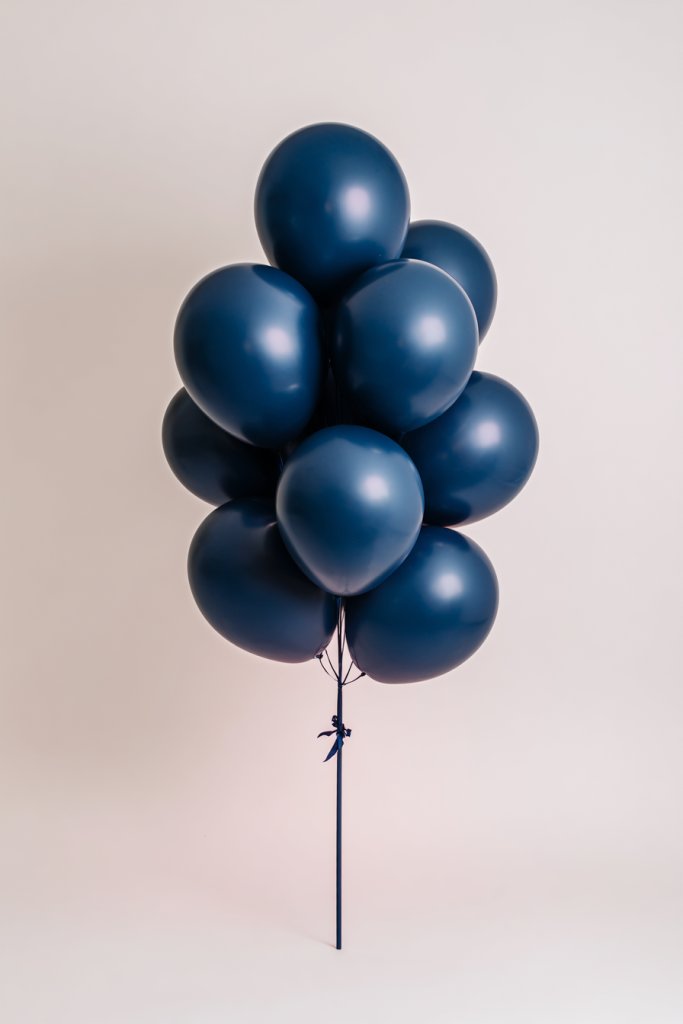
Want to make a statement without overloading your decor? Monochrome balloon bouquets offer a bold, clean look that commands attention. They’re perfect for creating a modern, minimalist vibe or making a striking pop of color. Plus, they’re quick to assemble and highly customizable.
Visualize a cluster of balloons in a single hue—metallic gold, sleek black, or pastel pink—grouped tightly or spread out for impact. The balloons are arranged at varying heights, anchored by decorative weights or held by guests. The uniform color creates a dramatic, cohesive focal point that draws the eye immediately. When lit with soft lighting, they add a subtle shimmer or matte finish that elevates the space.
Choose balloons in different finishes—matte, metallic, or gloss—to add texture. Use oversized balloons for a more dramatic effect or smaller ones for a delicate look. Pair with matching ribbons or streamers in the same monochrome palette. For outdoor parties, secure balloons with weights or tie them to sturdy fixtures. Incorporate additional decor like banners or signage in matching colors.
Buy high-quality helium or air balloons in your chosen color. Use a balloon pump or helium tank for quick filling. Tie balloons with matching ribbons or strings, and arrange them in clusters or bouquets. Secure the balloons with weights or attach to walls or furniture using removable hooks. For a floating effect, inflate with helium and allow them to drift at ceiling height. For ground-level impact, cluster them on tables or in corners.
Add personalized tags or small decorative charms to the ribbons. Combine different shades of the same monochrome palette for a subtle gradient effect. Use themed or metallic balloons for a luxe finish. Incorporate LED lights inside or behind the clusters for a glowing effect. These bouquets become striking decor elements that transform your space.
Monochrome balloon bouquets are a bold, simple way to create visual impact. They’re versatile, customizable, and perfect for modern celebrations. Once arranged, they add a polished, cohesive look that guests will admire. Ready to elevate your decor with a single color?
19. Personalized Photo Booth with Themed Backdrop
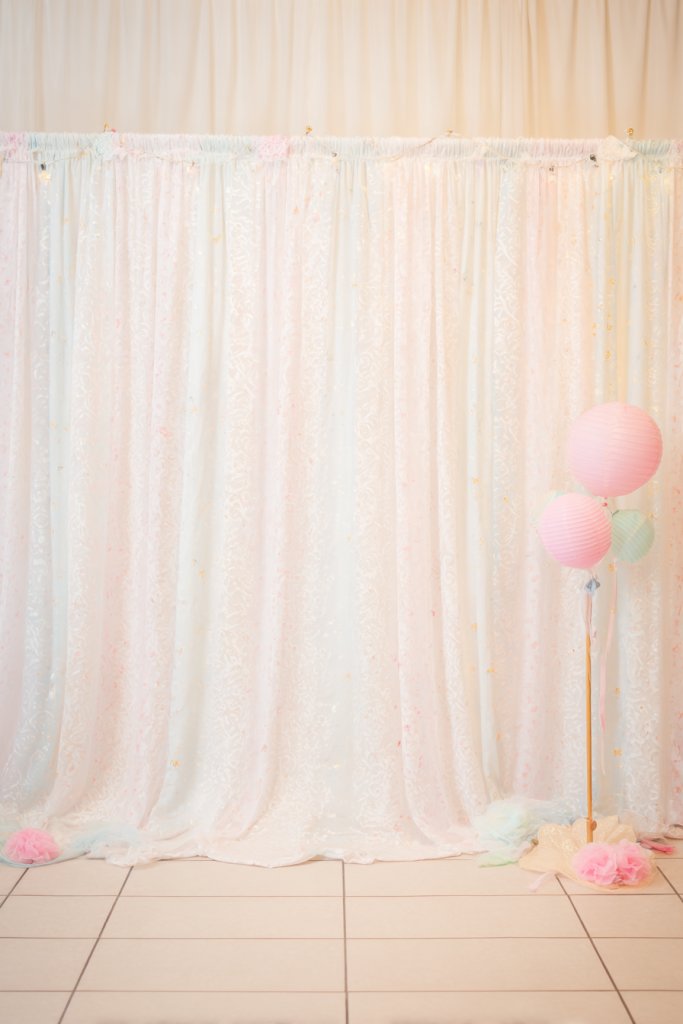
Looking to capture memories and add fun to your party? A personalized photo booth with a themed backdrop is a must-have. It offers guests a dedicated space to take selfies and group shots, creating lasting keepsakes. Plus, it’s a chance to showcase your creativity and theme in a fun, interactive way.
Imagine a backdrop decorated with custom banners, fabric drapes, or paper flowers matching your theme—think floral, geometric, or abstract. Add a variety of props like hats, glasses, and signs for guests to use. The scene is lively, colorful, and inviting, encouraging everyone to strike a pose. When equipped with good lighting and a camera, it becomes a focal point for fun and photos.
Choose a backdrop material—fabric, paper, or cardboard—that fits your theme. Incorporate themed props and accessories, or personalize signs with names or hashtags. You can make it portable with a collapsible frame or set it up as a permanent fixture. For outdoor settings, ensure the backdrop is weatherproof or sheltered. Adjust lighting with ring lights or LED panels for perfect shots.
Create or order a themed backdrop that complements your decor. Set up a sturdy frame or wall mount, and secure the backdrop material tightly. Provide a variety of props—funny hats, glasses, boas—and a camera or smartphone with a tripod. Add good lighting to ensure clear, bright photos. Encourage guests to use a designated hashtag if sharing online. Keep the area tidy for optimal photos.
Personalize with custom signs, banners, or photo overlays. Incorporate themed props, or add a personalized logo or message. Use colorful or themed lighting to enhance the backdrop’s look. Consider printing a custom photo template for instant prints or digital sharing. It becomes a highlight of your celebration and a way for everyone to have fun.
A personalized photo booth captures the spirit of your celebration and provides entertainment. It creates fun photo memories that last beyond the party. With a little setup, you’ll have a professional-looking setup that impresses guests and adds a personal touch. Ready to strike a pose?
20. Tiered Floral and Candle Centerpieces
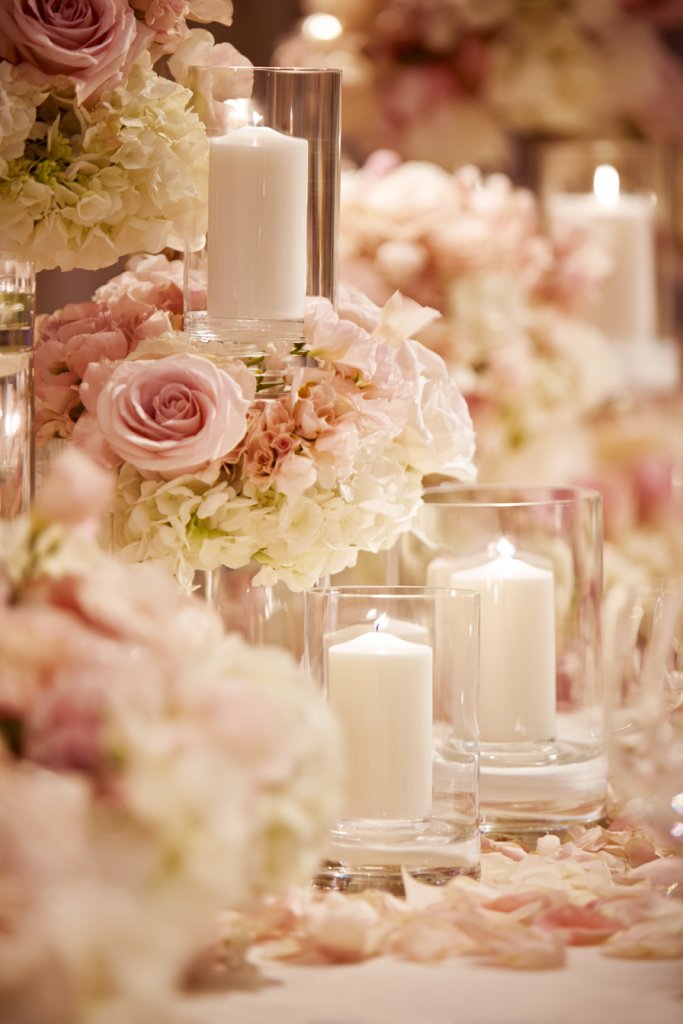
Want a centerpiece that’s lush, romantic, and eye-catching? Tiered floral and candle arrangements combine elegance with a layered look that’s perfect for any birthday. They add depth and sophistication while serving as a focal point on your tables. Plus, they’re customizable to match your style and theme.
Picture a set of tiered trays or stands holding an arrangement of fresh or faux flowers—roses, peonies, or orchids—intermixed with candles. The layered heights create a dramatic, cascading effect that draws attention. The flickering candlelight adds warmth and intimacy, making your table inviting and romantic. The combination of blooms and candles sets a mood that’s both elegant and cozy.
Use different colors and types of flowers to match your theme—bright and cheerful for summer, deep and rich for fall. Incorporate metallic, glass, or ceramic trays for varied textures. For outdoor parties, opt for flameless candles or battery-operated LED lights for safety. Add greenery or decorative stones around the base for extra detail. Keep the arrangement balanced and at an appropriate height for easy guest interaction.
Arrange flowers in small bouquets or floral foam placed on each tier. Incorporate candles—either real or LED—around the flowers, ensuring safety. Use decorative trays or stands that complement your decor style. Decorate with ribbons or fabric drapes for a finished look. Place the centerpiece in the middle of the table, ensuring it doesn’t obstruct conversation. Refill or refresh flowers and candles as needed.
Add themed accents like miniature figurines, monograms, or personalized tags. Use seasonal flowers or colors to keep it fresh and relevant. Incorporate fairy lights or small decorative elements like crystals for extra sparkle. Personalize with a custom base or tray that matches your decor palette. It’s a timeless, romantic centerpiece that elevates your celebration.
Tiered floral and candle arrangements create a luxurious, inviting atmosphere. They’re versatile, elegant, and customizable, ensuring they fit your theme perfectly. Once styled, they serve as a beautiful focal point guests will remember. Ready to add layered elegance to your table?
21. Hanging Tassel and Ribbon Curtain Entrance
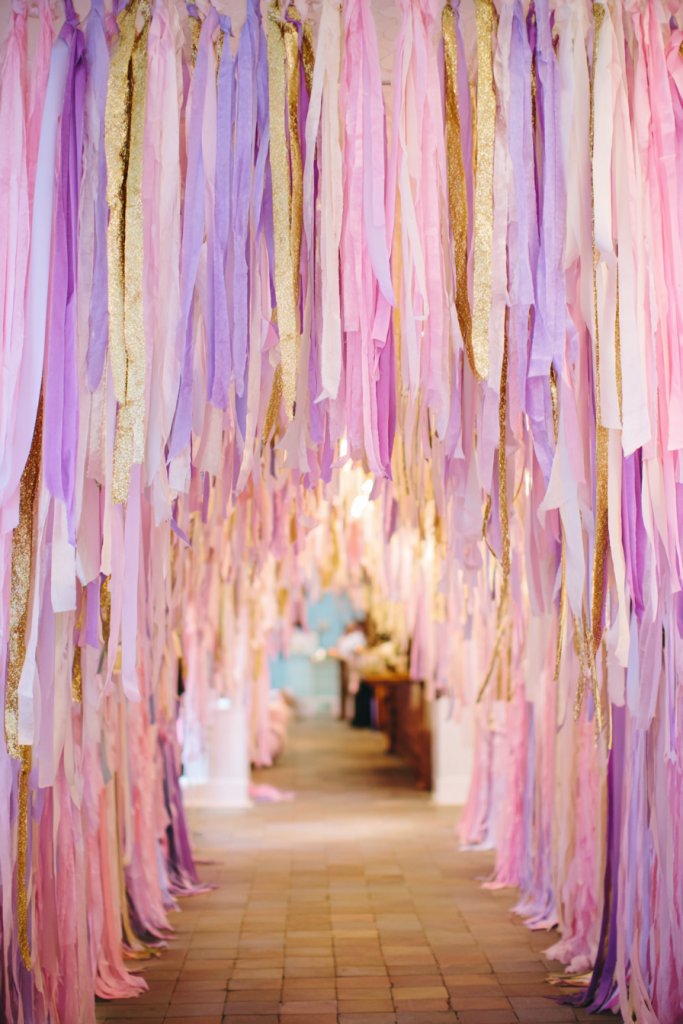
Looking to make a grand, memorable first impression? An entrance decorated with hanging tassels and ribbons instantly sets a festive tone. It’s a playful, colorful way to welcome guests and adds a personal, creative touch. Plus, it’s easy to customize with your chosen colors and styles.
Imagine a lush curtain of fabric ribbons and tassels in coordinating colors—metallics, pastels, or bold hues—swaying gently at the entryway. The length and density create a sense of anticipation, drawing guests into the celebration space. When guests walk through, they’re greeted by a vibrant, textured backdrop that feels both fun and inviting. It transforms a plain doorway into a lively, celebratory gateway.
Use different ribbon textures—silk, satin, or burlap—and mix lengths for a layered effect. Incorporate metallic or glitter accents for extra sparkle. Hang the curtain from a decorative rod, doorway frame, or ceiling hooks. For outdoor parties, secure with sturdy ties and ensure the tassels won’t blow away. Match the curtain to your overall decor palette for cohesiveness.
Cut ribbons and tassels in various lengths and attach them to a sturdy rod or string using knots or clips. Space them evenly or in clusters for a fuller look. Secure the curtain above the entrance with hooks or nails, ensuring it hangs freely and doesn’t sag. Use decorative elements like small flowers or charms among the tassels for added detail. Adjust for symmetry and fullness for a balanced look.
Add personalized charms, small banners, or themed tags to ribbons. Incorporate metallic or holographic ribbons for a luxe effect. Use seasonal or themed colors—like reds and greens for holidays or pastels for spring. Keep it in place with ties or hooks that can be reused for future celebrations. It’s a simple yet impactful way to welcome guests.
A tassel and ribbon curtain entrance is a fun, customizable feature that instantly elevates your decor. It’s a cheerful, inviting way to start the celebration with flair. Once installed, it becomes a memorable photo backdrop and a symbol of your festive spirit. Ready to create a vibrant gateway?
Conclusion
With a wide array of aesthetic birthday decoration ideas at your fingertips, you’re equipped to transform any space into a captivating celebration zone. Don’t hesitate to experiment with different styles and colors to make your birthday truly unique. Embrace your creativity and turn your dream birthday into a stunning reality — the celebration awaits!