Dreaming of a beautiful, functional kitchen without breaking the bank? Small kitchens are incredibly popular because they challenge us to get creative with limited space, proving that style and efficiency can go hand in hand even on a budget.
In this article, you’ll find a variety of clever ideas to maximize your small kitchen’s potential. From smart storage solutions to budget-friendly decor tips, these ideas will inspire you to transform your space into a cozy, stylish haven that feels much larger than it actually is.
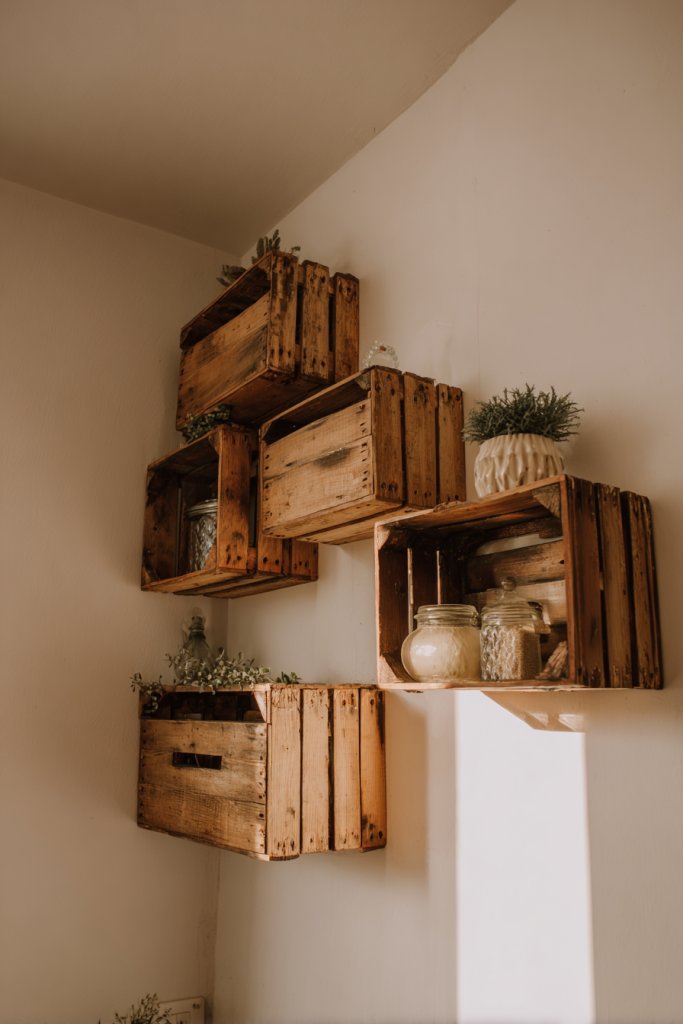
1. Creative Open Shelving Using Repurposed Wooden Crates
Ever feel like your tiny kitchen is drowning in clutter and desperate for organization? Small spaces often mean limited storage, making it hard to keep things tidy without sacrificing style. You crave a solution that adds personality while increasing function. The idea of mismatched shelves or cluttered counters just doesn’t cut it anymore.
Imagine rustic wooden crates stacked at different heights on a wall, painted in soft pastel shades or left natural for a vintage vibe. Inside, you can display colorful dishware, neatly stacked cookbooks, or charming jars filled with ingredients. The open design keeps everything within reach, and the varied textures add visual interest. It feels warm, inviting, and perfectly imperfect.
This concept can be customized for modern, farmhouse, or eclectic styles by choosing different paint colors or finishes. For smaller kitchens, hang fewer crates or opt for floating shelves made from reclaimed wood. During holidays or seasons, swap out displayed items to reflect current festivities. You can even incorporate small hooks on the crates for utensils or tea towels.
Start by sourcing mismatched wooden crates from flea markets, thrift stores, or your own basement. Sand down rough edges and paint or stain them to match your decor. Use sturdy brackets or heavy-duty hooks to mount them at varying heights on your wall. Arrange them in a balanced composition, ensuring they’re securely fastened to support weight. Finally, decorate with your favorite dishware, plants, or decorative accents.
Add stenciled labels or decals to each crate for a personalized touch, especially if you turn them into mini storage. Incorporate fairy lights or LED strip lighting behind the crates to create a cozy glow. Use fabric-lined baskets inside the crates for softer textures or to hide less attractive items. Mix in some vintage finds like enamelware or ceramics for extra charm.
Repurposing crates turns ordinary storage into a focal point, giving your kitchen a custom-crafted look. It’s budget-friendly and highly adaptable, so you can evolve the display over time. With a little creativity, your small kitchen can feel spacious, organized, and uniquely yours. Ready to get crafty and redefine your space?
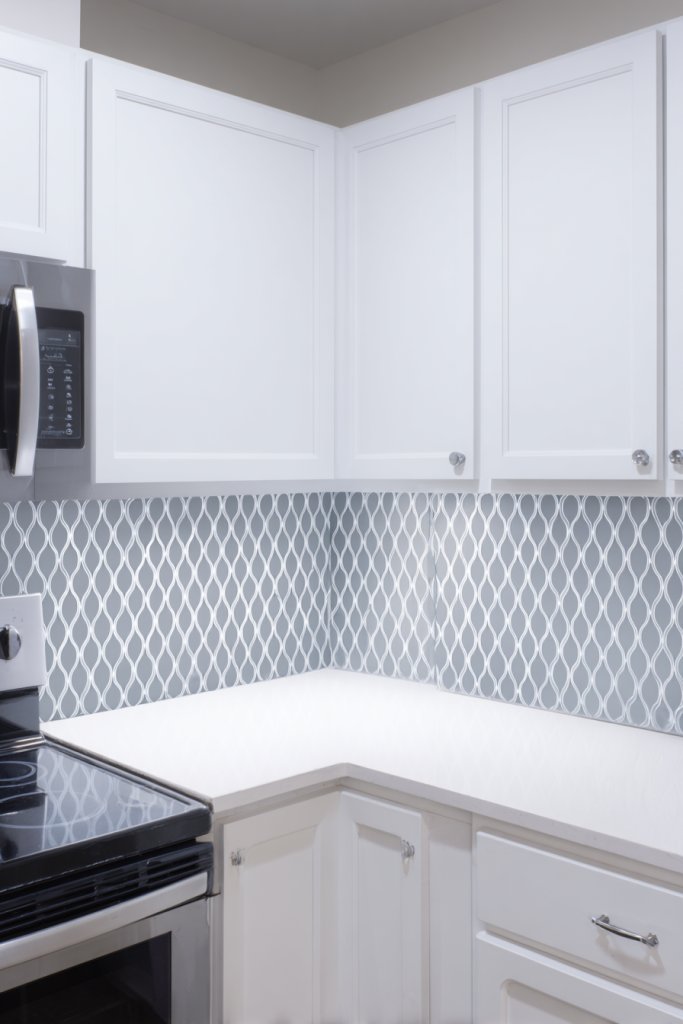
2. DIY Peel-and-Stick Backsplash for Instant Style
Tired of dull, outdated kitchen backsplashes that make your space look tired? Updating a backsplash traditionally involves messy grout, tile cuts, and a hefty price tag. But what if you could give your kitchen a fresh, trendy look without all the hassle? Enter peel-and-stick tiles—your DIY magic wand.
Picture a sleek, geometric pattern in black and white or shimmering metallic finishes transforming your wall. The tiles cling seamlessly to existing surfaces, instantly adding depth and style. As you step back, you notice how the new pattern catches the light and elevates the overall vibe. It’s like giving your kitchen a mini makeover overnight.
Choose from a variety of patterns, textures, and colors to match your aesthetic. For a subtle look, opt for neutral tones with a textured finish. For a bold statement, go for bold colors or metallic accents. This approach works well in rental spaces since you can remove the tiles without damage. Seasonal decor can be added by swapping out accent pieces or border designs.
Start by cleaning your existing backsplash thoroughly to ensure good adhesion. Measure and cut the peel-and-stick tiles to fit your space, using a utility knife for precision. Peel off the backing and carefully stick each tile, pressing firmly to eliminate air bubbles. Use a level and a ruler for straight lines. Smooth out any wrinkles or bubbles with a squeegee or credit card. Finish by trimming edges and corners for a polished look.
Add a personal touch by mixing different tile styles or colors for a custom mosaic effect. Use decorative border strips or metallic accents to frame the area. Incorporate peel-and-stick decals or small wall stickers for added flair. Consider a coordinating paint color on adjacent walls to make the backsplash pop even more.
This simple upgrade can dramatically change your kitchen’s appearance with minimal effort and cost. It’s perfect for renters or anyone wanting a quick refresh. Plus, it’s easily reversible if you decide to change styles later. Who knew a peel-and-stick could be so powerful in transforming your space?
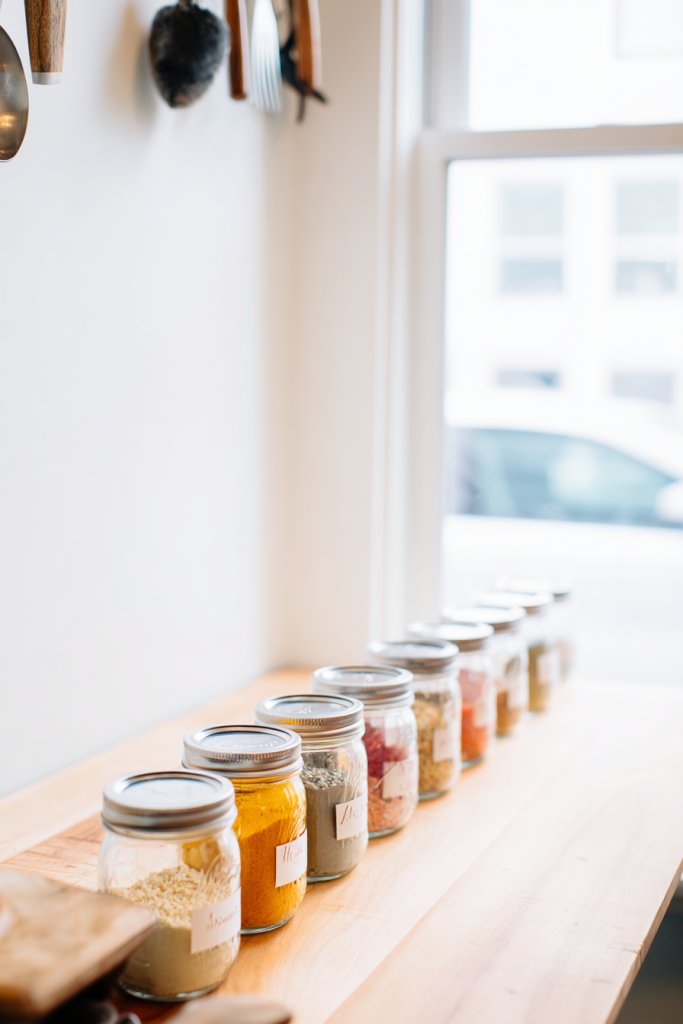
3. Repurposed Mason Jars as Stylish Storage Containers
Cluttered countertops and messy cabinets drive you crazy, right? Finding a way to organize spices, grains, or utensils without sacrificing style is a challenge. Mason jars have been a kitchen staple for ages, but why not elevate their look? Repurposing them turns everyday storage into charming decor.
Imagine clear glass jars filled with colorful spices lined up on open shelves or tucked into a drawer. The uniform shapes and sizes create a neat, cohesive look. Label them with simple tags or chalkboard paint for a rustic vibe. The transparency means you can see what’s inside instantly, saving time when cooking.
Use different lid colors or materials—wood, metal, or painted—to match your decor theme. For a more modern look, opt for sleek, minimalist labels; for farmhouse charm, go with handwritten tags. Store everything from pasta and rice to nuts and dried herbs. You can also use jars for utensils, straws, or even bathroom supplies for a cohesive home look.
Clean and dry your mason jars thoroughly. Decorate the lids if desired, using spray paint or decoupage techniques. Label each jar with a label maker, chalkboard paint, or handwritten tags. Arrange them on open shelves, inside cabinets, or in baskets. For added stability, use adhesive putty or small risers to keep jars in place. Regularly check for dust or residue, wiping down as needed.
Create themed sets—like all baking ingredients or breakfast supplies—by grouping similar items. Customize labels with fun fonts or colors to match your personality. Incorporate decorative elements like twine, fabric covers, or painted lids for extra flair. You could even add small LED lights underneath shelves for soft illumination.
Using mason jars as storage combines practicality with aesthetic appeal, making your kitchen feel more inviting. It’s a cost-effective way to upgrade your organization game while adding a touch of vintage charm. Over time, you’ll enjoy the satisfying sight of a beautifully organized space that’s easy to maintain. Ready to jar up your style?
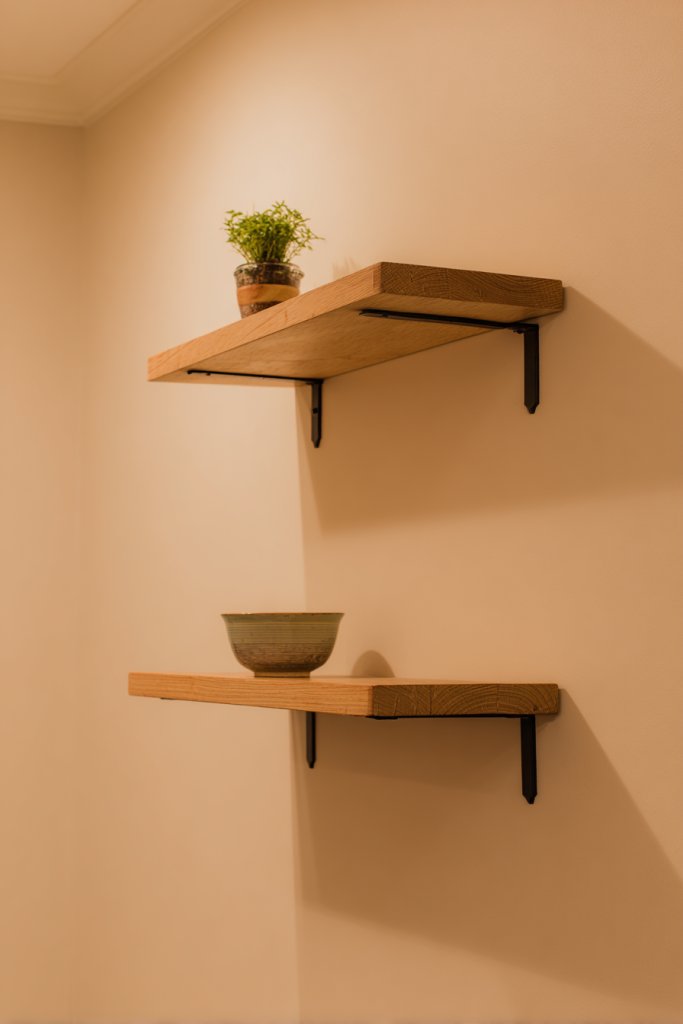
4. Install Floating Shelves with Budget-Friendly Brackets
Limited counter space and cluttered cabinets make your kitchen feel cramped. You want more storage but without sacrificing style or breaking the bank. Floating shelves are a sleek solution to display your essentials and add visual interest. Budget-friendly brackets make it easy to DIY without costly hardware.
Visualize a set of minimalist wood or metal floating shelves mounted above your countertop or sink. They hold everything from spice jars and mugs to decorative bowls and small plants. The clean lines and open design give your kitchen a modern, airy feel. The shelves appear to ‘float’ effortlessly, creating a sense of openness and order.
Choose different materials—wood, metal, or acrylic—to match your decor style. Vary the length and spacing of the shelves for visual rhythm. For seasonal updates, swap decorative items or add small baskets. In small kitchens, limit the number of shelves to avoid overcrowding, while larger spaces can support multiple tiers.
Pick inexpensive brackets made of metal or plastic, ensuring they support the weight of your items. Measure and mark wall spots with a level for even placement. Drill and insert wall anchors if needed, then attach brackets securely. Place the shelves on the brackets and secure them with screws or adhesive as recommended. Decorate with your favorite functional and decorative pieces.
Paint brackets in colors that complement or contrast with your shelves for a playful look. Use decorative hardware or edge trims for extra detail. Arrange items in a visually pleasing way—group similar items or display colorful dishware for impact. Add small hooks underneath for hanging utensils or towels.
Floating shelves are an affordable, stylish upgrade that instantly lifts your kitchen’s vibe. They’re easy to install and customize, letting you craft a space that reflects your personality. With a little effort, your small kitchen will look bigger and more organized, making every meal prep feel special.
5. Paint Cabinets in Bright, Cheerful Colors
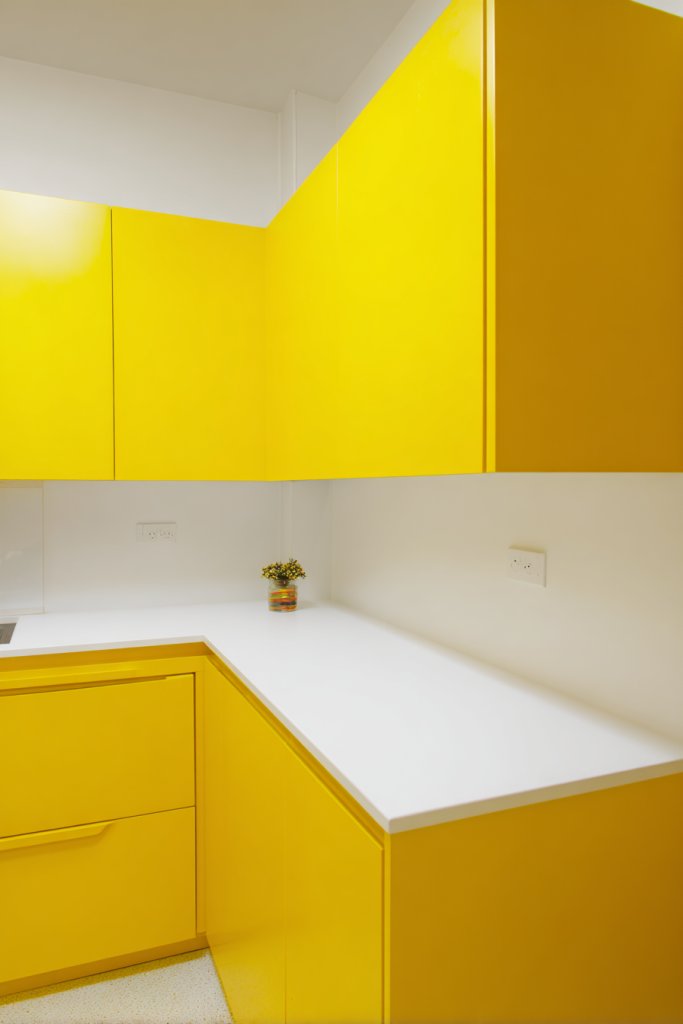
Dull, outdated kitchen cabinets can make the whole space feel drab and uninspiring. You want to breathe new life into your small kitchen without a full renovation. Bright, cheerful paint can instantly refresh your cabinets and set a lively tone. It’s a cost-effective way to transform your space.
Picture cabinets painted in a sunny yellow, coral, or sky blue, contrasting beautifully with neutral walls. The vibrant color brings energy and warmth, making the space feel welcoming. The glossy or matte finish adds a modern or vintage touch, depending on your style. Open shelves showcase colorful dishware or glassware, adding to the cheerful vibe.
Choose colors based on your personality or the mood you want to create. For a calm, relaxing kitchen, soft pastels work well; for bold statements, go for deep blues or reds. If your cabinets are already in good shape, a fresh coat of paint is all you need. For maintenance, opt for washable, stain-resistant paints suitable for kitchen use.
Start by cleaning and sanding cabinets to remove grease and create a smooth surface. Use painter’s tape to protect adjacent walls and hardware. Apply a primer if your cabinets are dark or stained, then paint in thin, even coats with a high-quality brush or roller. Let each coat dry thoroughly before applying the next. Finish with a protective sealant for durability. Replace or update hardware for an extra touch.
Add decorative elements like stenciled patterns or painted borders for a custom look. Mix and match hardware finishes—brushed nickel, matte black, or vintage brass—to enhance the color scheme. Incorporate decals or stencils with fun designs for a playful touch. Change out accessories like towels or mats to match the new color palette.
A fresh coat of paint on cabinets can completely redefine your kitchen’s personality. It’s a budget-friendly project that offers big visual impact. Your space will feel brighter, more inviting, and totally personalized. Now, you’re ready to enjoy a lively, stylish kitchen on any budget.
6. Upcycle Old Furniture as Kitchen Island or Storage
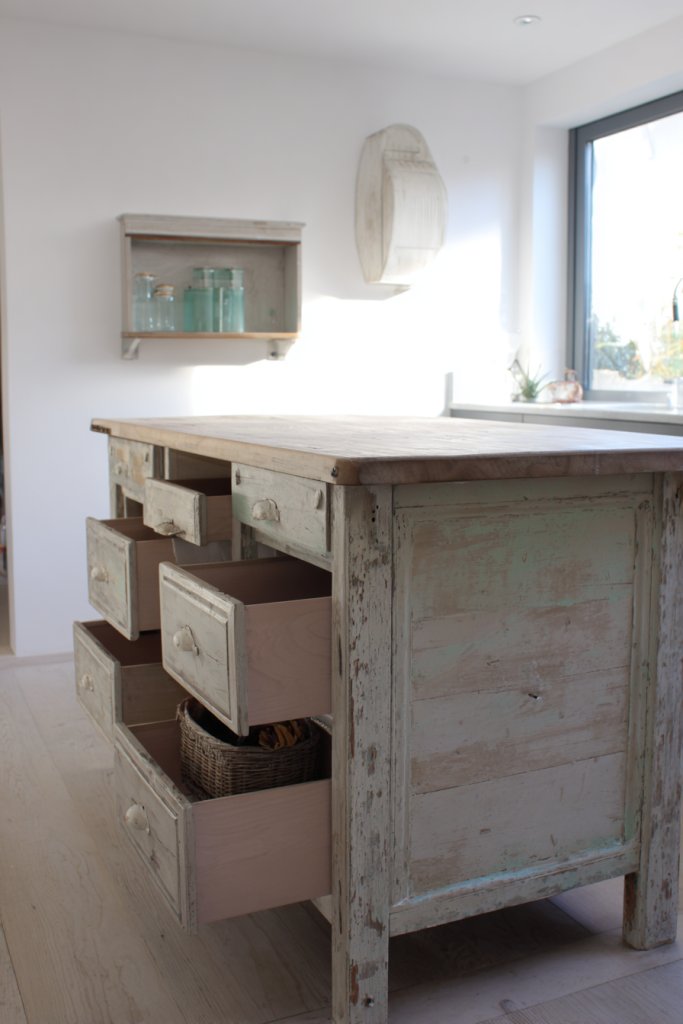
Your small kitchen lacks counter space and storage, and you’re tired of cluttered countertops. Buying a new island or extra storage can be expensive and bulky. But what if you could upcycle an old piece of furniture into a functional, stylish addition? It’s eco-friendly, budget-conscious, and uniquely yours.
Envision a vintage dresser painted in a vibrant hue, topped with a rustic wooden countertop. It serves as a kitchen island, providing extra prep space and hidden storage. Decorative hardware and open shelves display cookware or utensils, adding personality. The mismatched charm blends vintage and modern elements, making your kitchen feel warm and lived-in.
Transform different furniture pieces—dresser, sideboard, or even an old table—based on your space and style. For a farmhouse look, keep the wood natural or whitewashed. For a more modern vibe, paint in bold colors or sleek finishes. Add wheels for mobility or keep it stationary, depending on your layout. Use baskets, bins, or hooks for added organization.
Start by selecting a sturdy piece from thrift stores or your attic. Sand and clean thoroughly. Paint or stain it to match your decor, sealing with a protective coat. Attach caster wheels if mobility is desired. Add a durable countertop material like butcher block or laminate. Incorporate hooks or open shelving for utensils and accessories. Secure it well to prevent wobbling.
Decorate with themed hardware, personalized labels, or decorative knobs. Use fabric or wallpaper on drawer fronts for a custom touch. Incorporate small LED strip lights underneath for ambiance. Personalize the top with a decorative tray or a soft cloth for functional styling.
Repurposing furniture not only saves money but also injects character into your kitchen. It’s a project that’s rewarding and endlessly customizable. Over time, this piece becomes a focal point, reflecting your style and creativity. Your small kitchen will thank you for the upgrade!
7. Use Adhesive Shelf Liners for a Clean, Cohesive Look
Ever opened a cabinet and found sticky, stained, or scratched shelves? Keeping your kitchen surfaces clean and stylish is a constant battle. But replacing or refurbishing shelves can be costly or time-consuming. Adhesive shelf liners offer an easy, affordable way to give your cabinets a fresh look.
Imagine sliding a decorative liner with a subtle pattern or bold color into your drawers and shelves. It instantly brightens the space and adds personality. The smooth surface not only looks good but also makes cleaning a breeze. When you open your cabinet, the coordinated look makes everything feel more organized and intentional.
Choose from a wide range of patterns—geometric, floral, or textured—to match your style. For a minimalist look, pick neutral tones; for a playful vibe, select bright colors. These liners work well in drawers, cabinets, and even inside small kitchen appliances. Change them seasonally or whenever you feel like a refresh.
Measure your shelves carefully before cutting the liners to size. Clean the surfaces thoroughly to remove dust and grease. Peel off the backing and carefully smooth the liner onto the surface, starting from the center outwards to prevent bubbles. Use a utility knife to trim excess at edges. For curved or irregular surfaces, cut small notches or use flexible liners designed for curved edges.
Layer different patterns or colors within a single drawer for a creative mosaic effect. Use coordinating drawer pulls or knobs to tie everything together. Add small decorative stickers or decals for a customized look. Keep extra liners on hand for quick updates or repairs.
This simple upgrade can make your entire kitchen feel more polished and organized without breaking the bank. It’s a quick fix that offers big visual rewards and easy maintenance. With just a few minutes, you turn worn-out surfaces into stylish statements, boosting your confidence in DIY projects.
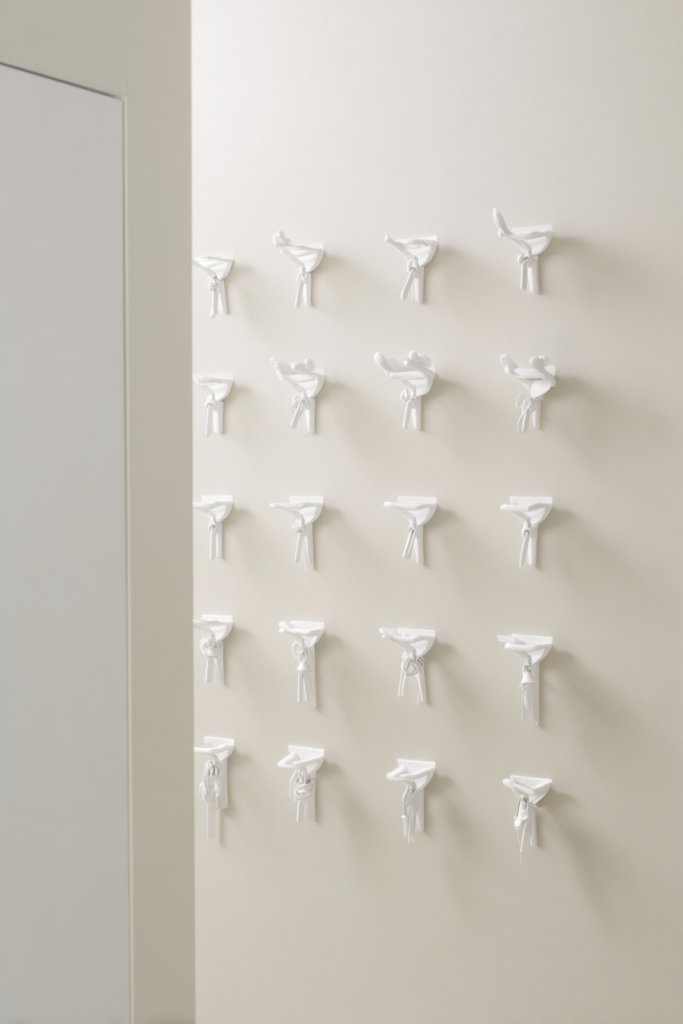
8. Hang Hooks and Racks on Cabinet Doors for Extra Storage
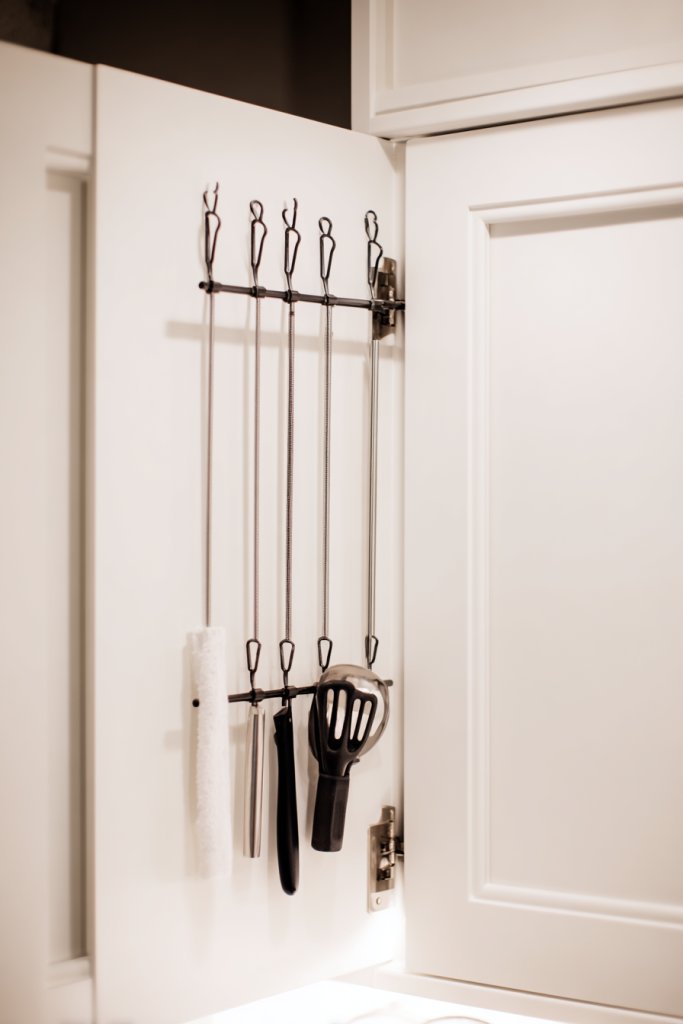
Counter space is precious, yet your utensils, towels, or small tools seem to take over every available surface. You need a smart way to maximize your kitchen’s vertical space without cluttering counters. Hanging hooks on cabinet doors is a simple, budget-friendly solution to keep essentials within reach.
Visualize a row of hooks installed inside cabinet doors, holding mugs, potholders, or utensils. The hooks are discreet but highly functional, freeing up drawer and counter space. The door surface becomes a mini storage zone that keeps your workspace tidy. A few well-placed hooks add a rustic or modern touch, depending on your style.
Choose different hook styles—metal, plastic, or wooden—to match your decor. For a minimalist look, opt for sleek, black hooks; for farmhouse charm, go with distressed finishes. Use them inside or outside cabinet doors, depending on your needs. You can also install racks for larger items like cutting boards or bakeware.
Select durable hooks that won’t damage your cabinet finish. Measure and mark where you want to place each hook for even spacing. Drill small pilot holes if necessary, then screw the hooks securely into the door surface. Distribute weight evenly to prevent warping or damage over time. Test each hook’s holding capacity before hanging heavy items.
Decorate hooks with colorful rubber or fabric covers for a playful look. Use labels or tags for organization, especially if you have multiple similar hooks. Pair hooks with small baskets or containers for added storage options. Change up the arrangement seasonally or whenever you redecorate.
This quick trick turns underused space into a functional hub, making your kitchen more efficient. It’s an inexpensive way to customize your storage and keep essential tools at your fingertips. Over time, it becomes second nature to grab what you need without rummaging through drawers.
9. DIY Magnetic Knife Strip from Recycled Materials
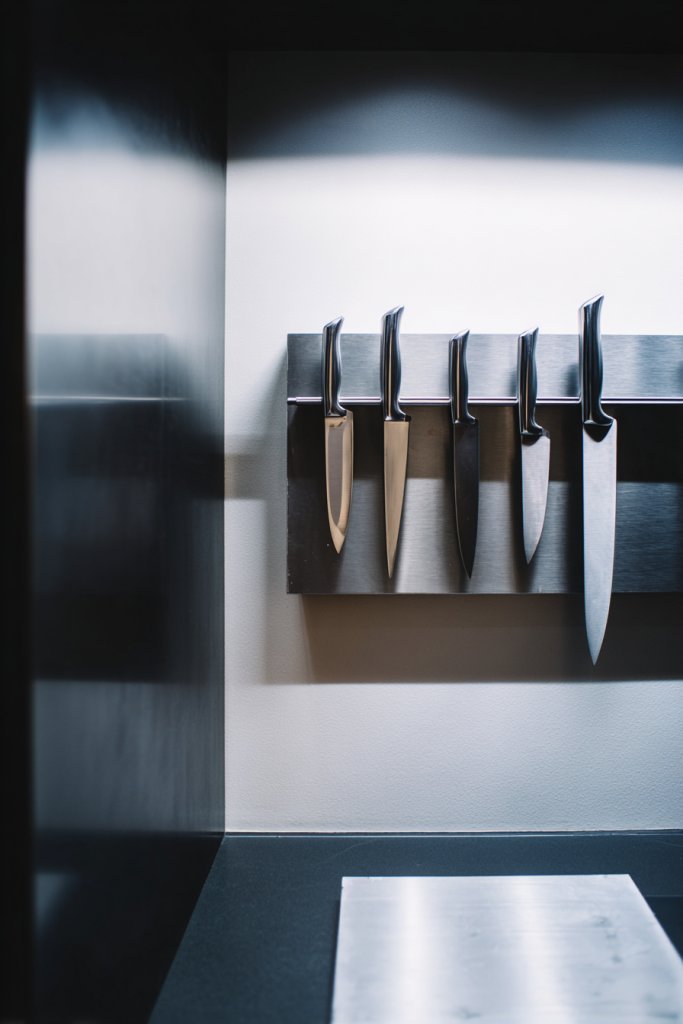
Having a cluttered countertop with knives scattered everywhere is both unsafe and unsightly. You want a better way to keep your knives accessible and organized without sacrificing counter space. A DIY magnetic knife strip is a clever, budget-friendly solution to keep blades safe and within arm’s reach.
Picture a sleek wooden strip mounted on the wall, with shiny knives neatly aligned. The magnetic surface holds each blade securely, eliminating the need for bulky knife blocks. The clean, minimalist look blends with modern or rustic kitchens. It also frees up drawer space and adds a touch of industrial charm.
Create your strip from reclaimed wood, painted planks, or even metal scraps for an industrial look. Customize the length to fit your space and number of knives. You can add hooks or small metal clips for utensils or small tools. Mount it at a comfortable height for easy access and safety.
Sand and paint or stain your chosen material to match your style. Attach strong magnets or a magnetic strip adhesive to the back. Drill mounting holes or use heavy-duty adhesive for wall attachment. Ensure the strip is level before fixing it in place. Test with a few knives to confirm strong holding power. Regularly clean the magnetic surface to remove metal dust.
Decorate the wooden strip with stenciled patterns or painted borders for a personalized touch. Label sections for different types of knives or tools. Incorporate decorative hardware or mounts for small utensils. Keep the design simple but functional for long-term use.
A DIY magnetic strip keeps your knives sharp, organized, and safe, boosting your kitchen efficiency. It’s a project anyone can do with basic tools and materials, giving you confidence in your DIY skills. Plus, it’s a stylish upgrade that makes your kitchen feel more professional and tidy.
10. Incorporate Under-Cabinet LED Strip Lighting
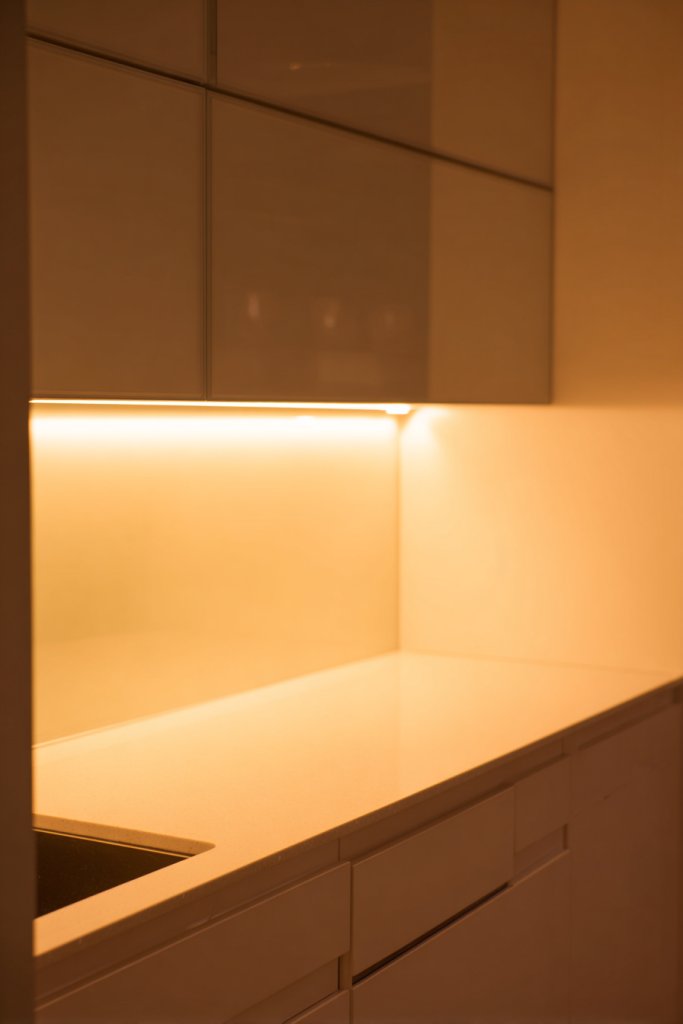
Poor lighting can make even the simplest kitchen tasks frustrating. Overhead fixtures often cast harsh shadows, and under-cabinet areas remain dark and uninviting. You want a practical, affordable way to brighten your workspace and add ambiance. LED strip lighting is the perfect solution.
Visualize a soft glow under your cabinets illuminating your countertops. The LED strips are discreet, flexible, and can be installed along the underside of cabinets or shelves. The light is even, bright, and energy-efficient, creating a warm, inviting atmosphere. It’s like giving your kitchen a subtle, modern facelift.
Choose from different color temperatures—warm white, cool white, or color-changing options—to set the mood. Install dimming features for adjustable brightness, perfect for cooking or entertaining. For a sleek look, hide the strips behind molding or trim. Use them in small kitchen nooks or larger open-plan spaces for maximum effect.
Measure the length of your cabinets and cut the LED strips accordingly. Clean the mounting surface thoroughly. Peel off the adhesive backing and press the strips firmly into place. Connect the strips to a power source, using extension cords if needed. Test the lighting before finalizing placement, and hide wires for a clean look. Use remote controls or smart home systems for convenience.
Sync the lighting with music or set different colors for various occasions. Add small motion sensors for automatic lighting when you open cabinets. Use decorative clips or covers to hide exposed wiring. Incorporate the lighting into your existing decor theme for a cohesive look.
Under-cabinet LED lighting transforms your kitchen into a bright, functional space perfect for cooking and gatherings. It’s an easy upgrade that adds value and style. With minimal investment, you’ll enjoy a more inviting, efficient environment every day.
11. Use Command Hooks for Temporary and Flexible Organization
Cluttered counters and disorganized cabinets make cooking stressful and space feel cramped. Permanent storage solutions aren’t always practical, especially if you rent or like to change things up. Command hooks offer a versatile, damage-free way to organize your kitchen quickly. They’re perfect for temporary setups or seasonal rearrangements.
Imagine hanging pots, pans, or utensils on the inside of cabinet doors or on a wall using sleek Command hooks. They come in various sizes and styles, blending seamlessly into your decor. The hooks hold everything securely, yet can be removed without damaging paint or surfaces. It’s a flexible, clutter-free setup that adapts to your needs.
Use different hook types—adhesive, suction, or clip-on—for specific needs. Hang lightweight items like measuring cups, dish towels, or small tools. Create a mini organizational zone near your prep area for frequently used utensils. Change hooks based on season or mood, making your kitchen feel fresh and personalized.
Clean the surface thoroughly before applying hooks to ensure good adhesion. Follow the manufacturer’s instructions for placement and weight limits. Choose strategic locations—near the stove, sink, or prep area—for maximum convenience. Remove hooks carefully to avoid paint damage, especially when repositioning. Regularly check adhesion and replace if needed.
Combine hooks with small baskets or magnetic strips for extra storage. Use decorative washi tapes or painted hooks for a pop of color. Label hooks or baskets to keep things organized. Change the arrangement seasonally or for special occasions, keeping your space dynamic.
Command hooks turn your kitchen into a flexible, clutter-free zone without permanent damage. They’re an easy, budget-friendly way to customize your storage. Over time, you’ll see how simple adjustments can make your daily routines smoother and your space more inviting.
12. Create a Chalkboard Wall or Panel for Notes and Recipes
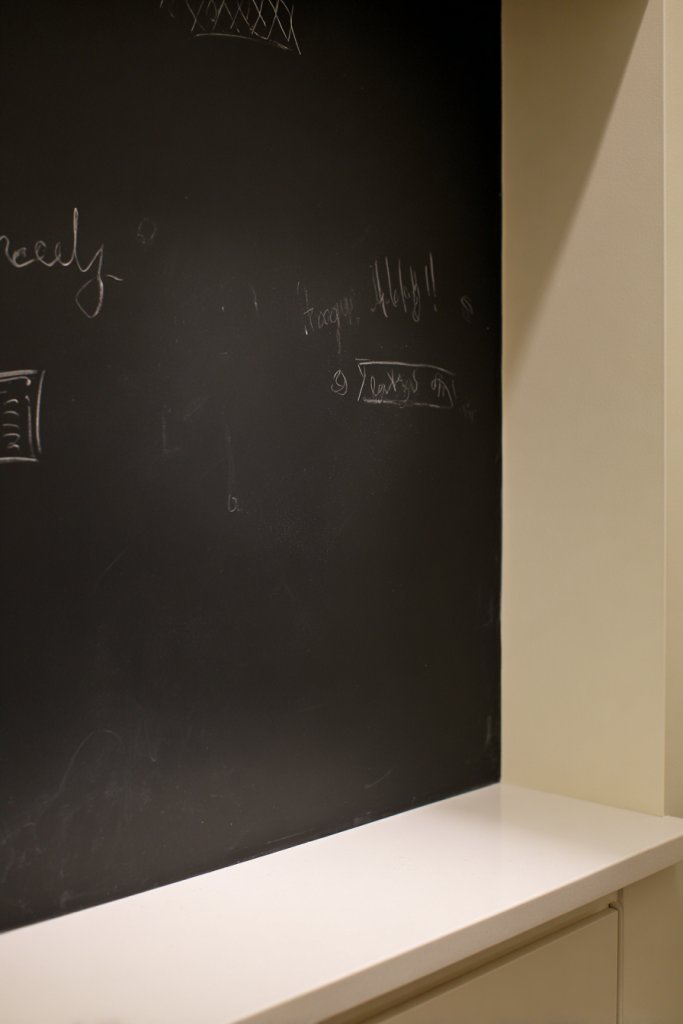
Forget to buy ingredients or leave messy notes on your fridge? Small kitchens often lack dedicated spaces for reminders and recipes. A chalkboard wall or panel provides a functional, creative spot for notes, grocery lists, or meal ideas. It’s a fun way to stay organized and decorate at the same time.
Imagine a small section of wall painted with chalkboard paint, framed with colorful trim or simple molding. You can jot down daily menus, shopping lists, or inspirational quotes. The chalkboard becomes a dynamic element that adds personality and practicality. Doodles, sketches, or seasonal messages make it even more engaging.
Use plain black chalkboard paint for a classic look or experiment with colors like green or navy. Frame the panel with wood or metal for a finished appearance. For a more permanent solution, install a chalkboard panel that doubles as a backsplash. Change the message regularly to keep things fresh and fun.
Prepare the wall surface by cleaning and sanding to ensure smooth paint application. Use painter’s tape to create clean edges. Apply multiple thin coats of chalkboard paint, allowing each to dry thoroughly. Once dry, prime the surface with chalk and wipe clean. Use chalk or chalk markers for writing. Maintain the surface with periodic cleaning.
Decorate the frame with washi tape, stencils, or decals for added style. Personalize the space by adding small ledges for holding chalk or erasers. Incorporate magnetic strips or hooks nearby for hanging recipes or utensils. Switch up the message to reflect seasons or special events.
A chalkboard wall makes your kitchen more interactive and organized, all while adding a creative flair. It’s a simple project that turns a blank wall into a functional feature. Your family and guests will love the personal touch and the easy way to keep everyone on the same page.
13. Add a DIY Curtain or Fabric Cover for Under-Sink Storage
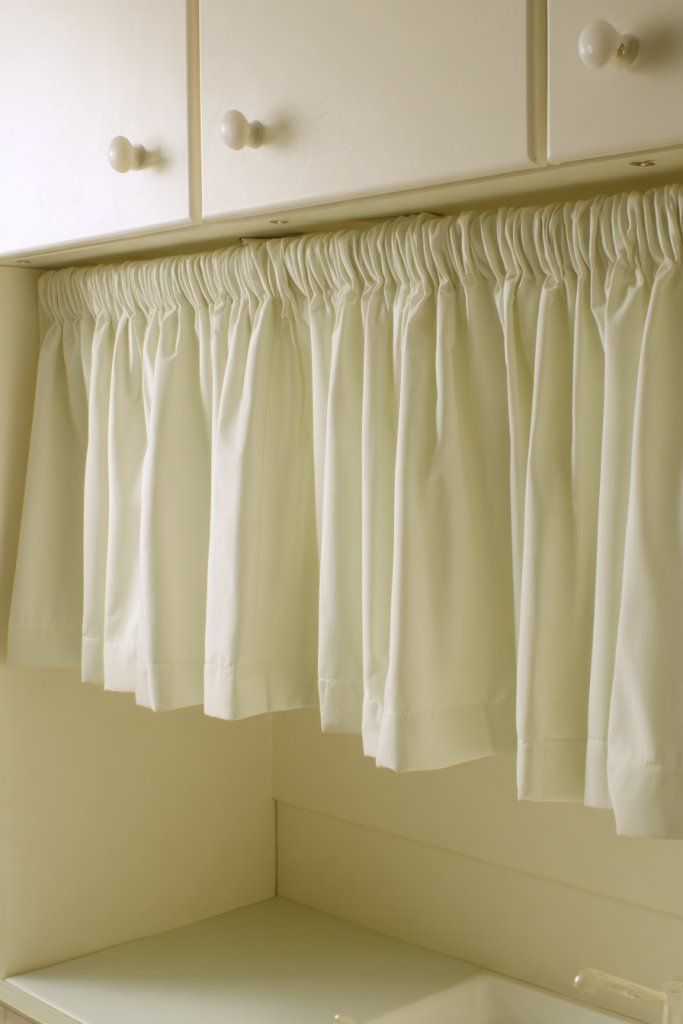
Cluttered, unattractive under-sink areas spoil the look of your kitchen. You want a way to conceal the mess while adding a cozy, personalized touch. DIY curtains or fabric covers are a budget-friendly, stylish solution that hides cleaning supplies and pipes. Plus, they’re easy to swap out for seasonal updates.
Imagine a soft, patterned fabric curtain hanging from a tension rod or hooks, neatly concealing cleaning bottles and tools. The fabric adds warmth and softness to your space, contrasting with the hard surfaces of cabinets and pipes. When open, it reveals a tidy, organized nook. You can choose fabrics that match your decor or add playful prints for fun.
Use lightweight cotton, linen, or even waterproof vinyl for easy cleaning. Choose colors and patterns that complement your kitchen’s color scheme—florals for farmhouse, geometric for modern, or plain for minimalist. Install a tension rod or sew a simple curtain with a rod pocket. For extra charm, add decorative trim or tassels.
Measure your under-sink opening and cut your fabric to size, leaving extra for hems. Sew or hem the edges for a polished look. Attach a tension rod or curtain rings with hooks, ensuring it can slide easily. Hang the curtain and adjust the height for full coverage. Keep some extra fabric for quick replacements or seasonal changes.
Add decorative elements like embroidered initials, fabric paint, or appliqué patches for a personalized touch. Use coordinating ties or ribbons for a more finished look. Incorporate waterproof liners or lining fabric for durability. You could also add small pockets or loops for extra storage or accessories.
A fabric cover transforms a dull, cluttered space into a charming, hidden storage spot. It’s an easy project that adds personality and keeps your kitchen looking neat. Plus, it’s a budget-friendly way to customize your space without major renovations. Your under-sink area will look intentional and stylish.
14. Refresh Countertops with Peel-and-Stick Vinyl Sheets
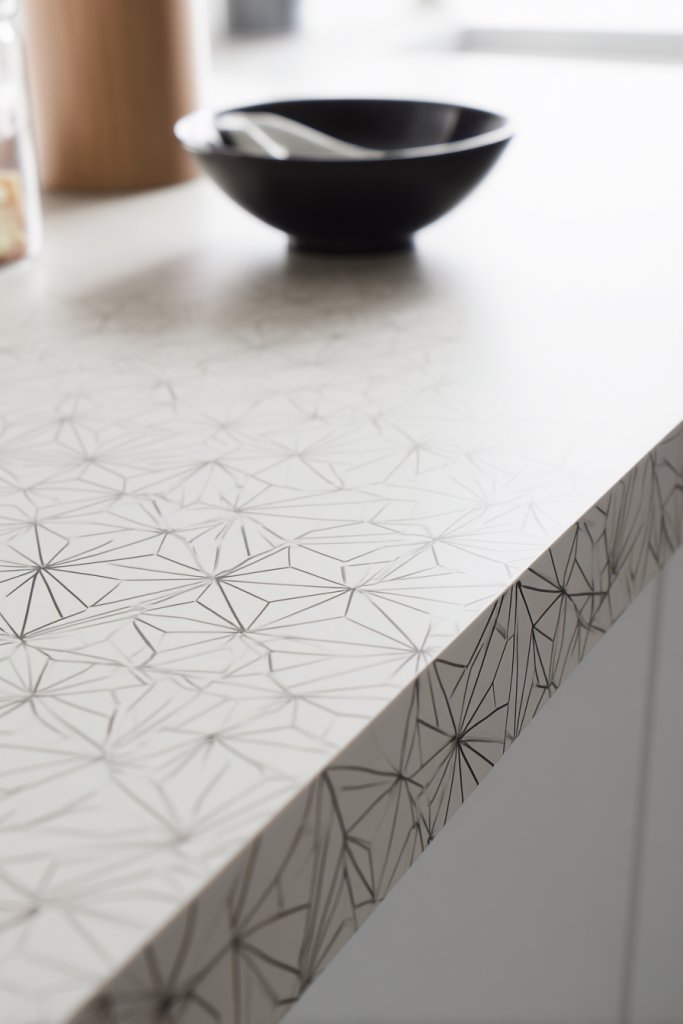
Dull, scratched, or stained countertops can drag down the look of your entire kitchen. Replacing them is expensive and disruptive, but you still crave a quick upgrade. Peel-and-stick vinyl sheets offer an affordable, peel-and-effect way to mimic high-end materials like stone or wood. It’s a simple DIY fix that transforms your space.
Visualize a countertop covered with a marble or wood grain vinyl sheet, perfectly aligned and seamless. The pattern adds depth and richness, making your small kitchen feel more luxurious. The surface is smooth, durable, and easy to clean—perfect for everyday use. It’s like a mini renovation in a matter of hours.
Choose from various patterns—marble, granite, wood, or concrete—to match your style. For a cohesive look, coordinate the vinyl with your backsplash or flooring. Use adhesive tools for a bubble-free finish. For curved or irregular edges, cut the vinyl with a sharp blade and use a heat gun to conform to contours. It’s suitable for countertops, islands, or even table surfaces.
Clean and dry the countertop thoroughly. Measure and cut the vinyl sheet to size, leaving some extra for edges. Peel off the backing and carefully apply it, smoothing out bubbles with a squeegee or credit card. Pay attention to corners and edges, trimming excess for a neat fit. Seal the edges with a clear sealant if desired for extra protection. Regular cleaning with non-abrasive products keeps it looking fresh.
Add a border strip or contrasting trim for a finished look. Incorporate decals or painted accents for a unique touch. Use coordinating accessories, like colorful utensils or mats, to enhance the new surface. Change patterns seasonally or for special occasions to keep your kitchen feeling fresh.
Updating your countertops with peel-and-stick vinyl is a quick, budget-friendly way to elevate your kitchen’s style. It’s a DIY project that offers impressive results with minimal effort. Your space will look more polished, inviting, and personalized, making every meal prep more enjoyable.
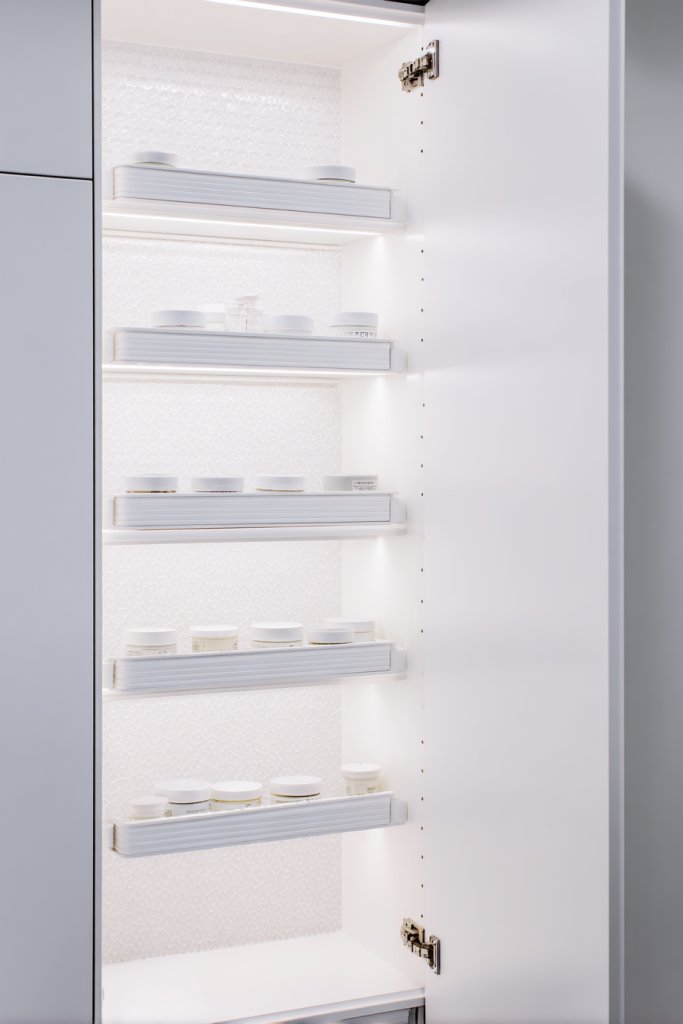
15. Use Baskets and Bins for Organized Pantry Storage
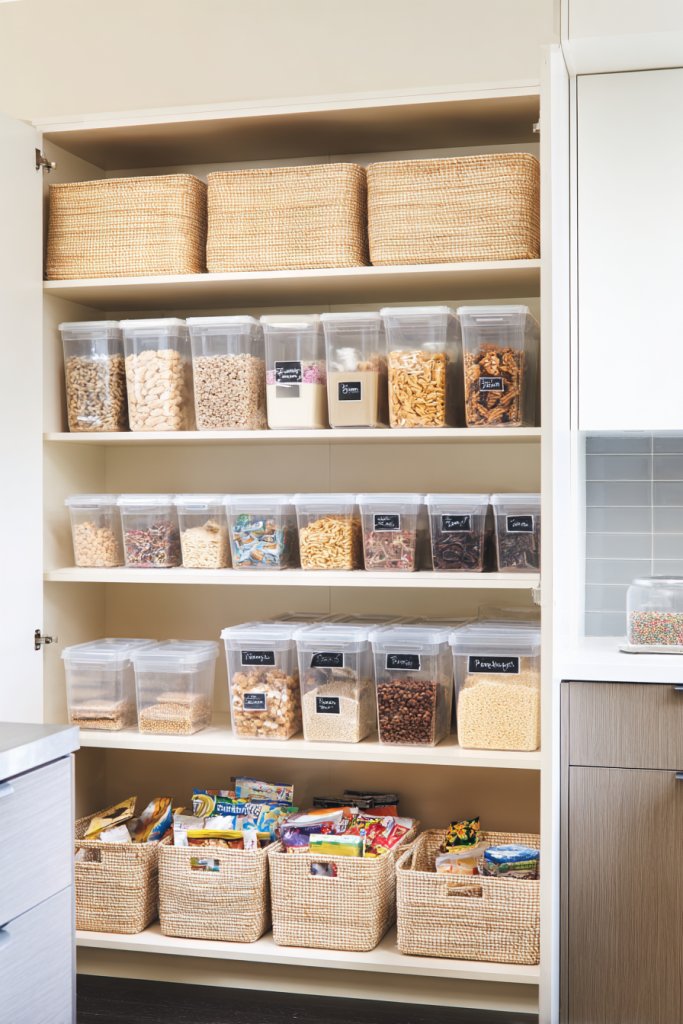
Ever open your pantry and feel like you’ve just stepped into a chaotic treasure hunt? Keeping everything tidy without spending a fortune feels impossible sometimes. You want your snacks, grains, and canned goods to be accessible, but also neatly organized. The struggle is real, especially when space is tight. Luckily, simple storage hacks can turn that mess into a manageable oasis.
Imagine stacking woven baskets filled with colorful pasta, cereals, and spices, each labeled clearly with chalkboard tags. Small plastic bins hold baking supplies or snack packs, all grouped by category. The shelves look clean and inviting, with everything visible at a glance. Brightly colored fabric liners add a pop of personality while softening the look. It’s a visual feast of order and functionality.
Adjust your containers based on your style—metal wire baskets for an industrial vibe, or woven baskets for a cozy country feel. Use clear bins to easily spot contents, or opt for opaque ones for a cleaner look. During holidays, swap out labels and liners for seasonal colors. In tiny apartments, stackable bins maximize vertical space, while in larger pantries, larger baskets create zones for different food groups.
Start by measuring your shelves and identifying what needs organizing most. Purchase a variety of baskets and bins—preferably stackable and with handles for easy access. Label each container with markers, chalk, or printable labels for quick identification. Group similar items, like baking ingredients or breakfast cereals, into designated containers. Place frequently used items at eye level, and store less-used supplies higher or lower. Regularly reassess and tidy up to keep everything in check.
Add decorative touches like fabric liners with patterns you love or chalkboard labels you can update. Use color coding to differentiate categories or family members’ favorite snacks. Incorporate small chalkboard tags or tags with your initials for a personal touch. To make it more fun, assign each family member a color or basket for their snacks. This not only keeps things organized but also adds a playful element to your kitchen.
A well-organized pantry boosts your confidence in meal prep and reduces stress during busy mornings. It proves that even on a tight budget, smart storage solutions can make a big difference. Soon, you’ll be showing off your tidy space to friends and family, proud of your DIY skills. Remember, organization is a process—start small and watch your pantry transform into a sleek, functional space.
16. Hang a Tension Rod for Pot and Lid Storage
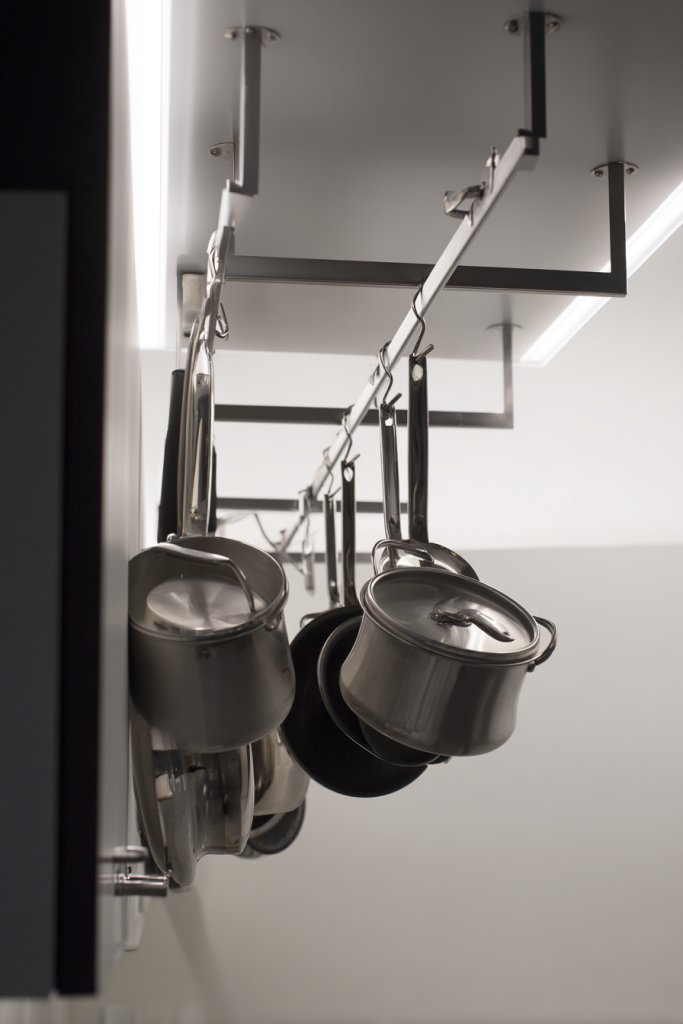
Ever feel like your pots and pans are taking over your cabinets or cluttering your stovetop? Finding a simple, inexpensive way to keep lids and cookware within reach is a game-changer. No one wants to dig through a mountain of lids or wrestle with stacking pots every time they cook. The solution is surprisingly straightforward—and budget-friendly.
Picture a sleek tension rod installed inside a cabinet, with pots stacked neatly beneath it. Overhead, lids hang from hooks or resting on the rod, organized by size or type. When you open the cabinet, everything is in plain sight—no more digging or knocking over stacks. The space feels open, clean, and efficiently used. It’s like giving your cookware its own dedicated closet.
Adjust the tension rod height based on your cabinet’s depth and your cookware size. For larger kitchens, install multiple rods or use a wall-mounted version for easy access. You can also hang utensils or potholders on the same rod for added convenience. For a rustic look, choose a wood dowel painted in a fun color. In small apartments, this method saves precious space and keeps counters clear.
Start by measuring the inside width of your cabinet, ensuring the tension rod will fit snugly. Choose a durable, rust-resistant rod—metal or coated options work well. Install it at a height that allows easy stacking of your pots, then hang lids from hooks or rest them on the rod. Use small S-hooks or clips to hang utensils or other small tools. Secure the rod tightly so it doesn’t slip or fall when loaded. This quick upgrade is simple yet effective.
Color-coordinate your cookware and lids for a fun visual effect—think bright reds, blues, or pastels. Add decorative hooks or painted brackets for a more customized look. Use labeled clips to identify lids or pots for different types of cooking. For a more polished finish, consider installing a magnetic strip nearby for knives or metal utensils. Personal touches make your storage both stylish and functional.
This easy hack turns a cluttered cabinet into a chef’s dream, inspiring you to get creative in the kitchen. It’s a small change with a big impact—saving time and reducing frustration. Plus, it shows that budget-friendly solutions can be both practical and attractive. Once you try this, you might wonder why you didn’t do it sooner—and that’s the goal!
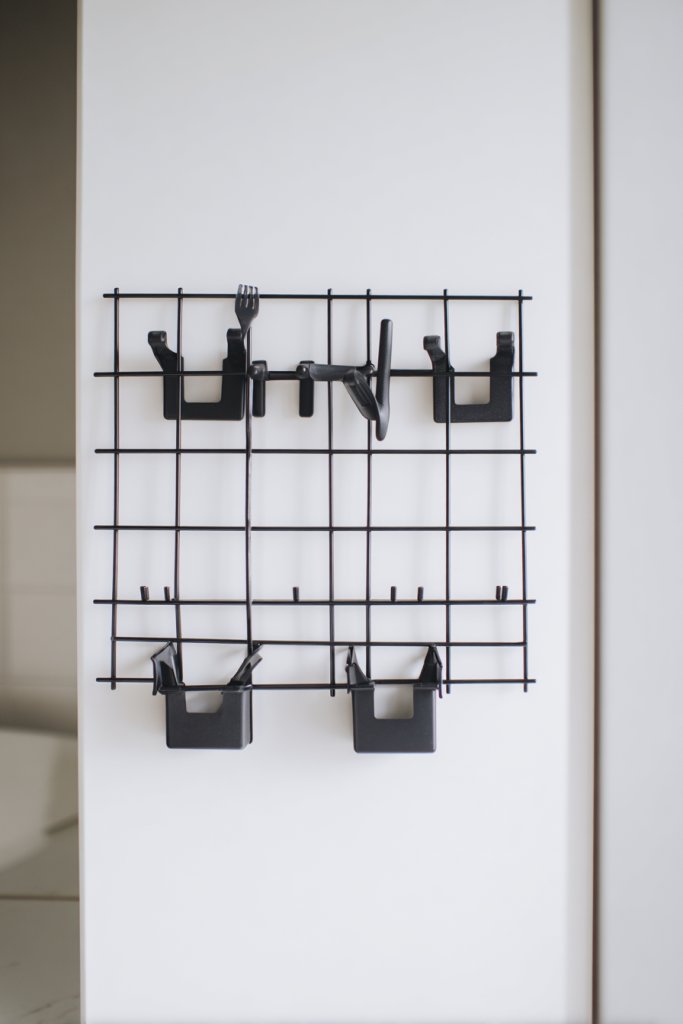
17. Install a Wire Grid Panel for Customizable Organizer Space
Cluttered countertops and scattered utensils can make your kitchen look chaotic, even if you’re a pretty decent cook. You want a way to keep your tools handy without sacrificing style or spending a fortune. An organized, customizable solution that adapts to your needs is exactly what you need—without drilling holes or breaking the bank.
Imagine a sleek wire grid panel mounted on the wall, with hooks holding spatulas, measuring spoons, and small baskets for spices or towels. The open structure adds an industrial chic vibe to your kitchen while keeping everything within arm’s reach. Accessories can be easily moved or added as your needs change. It’s like having a personalized command center for your cooking essentials.
Choose a matte black, stainless steel, or colorful painted grid to match your decor. Attach small baskets or containers to hold specific items, or hang hooks at different heights for versatile storage. Use it in a small apartment kitchen or a larger space—scale up or down based on your available wall area. Add labels or tags for quick identification, and change the layout whenever you want a fresh look.
Start by selecting a durable, rust-resistant wire grid panel that fits your wall space. Mount it securely using screws or hooks—most kits come with hardware. Arrange hooks and baskets based on your storage needs, grouping similar items together. Use S-hooks or clips to hang utensils, or attach small containers for spices and condiments. Keep frequently used items at eye level for quick access. Regularly update the layout as your collection of tools grows or changes.
Personalize your grid with colorful hooks, baskets, or labels for a cohesive look. Incorporate decorative elements like patterned fabric liners inside baskets or chalkboard tags for easy updates. Mix and match different sizes of containers for variety. Add a small cork board or memo clip for recipes or reminders. This flexible setup makes your kitchen more organized and uniquely yours.
Installing a wire grid transforms your kitchen into a functional, stylish space that’s easy to maintain. It encourages a tidy mindset and inspires you to keep everything in its place. Plus, it’s a DIY project that proves you don’t need fancy tools or professional help. Once set up, you’ll feel more confident and motivated to cook up a storm.
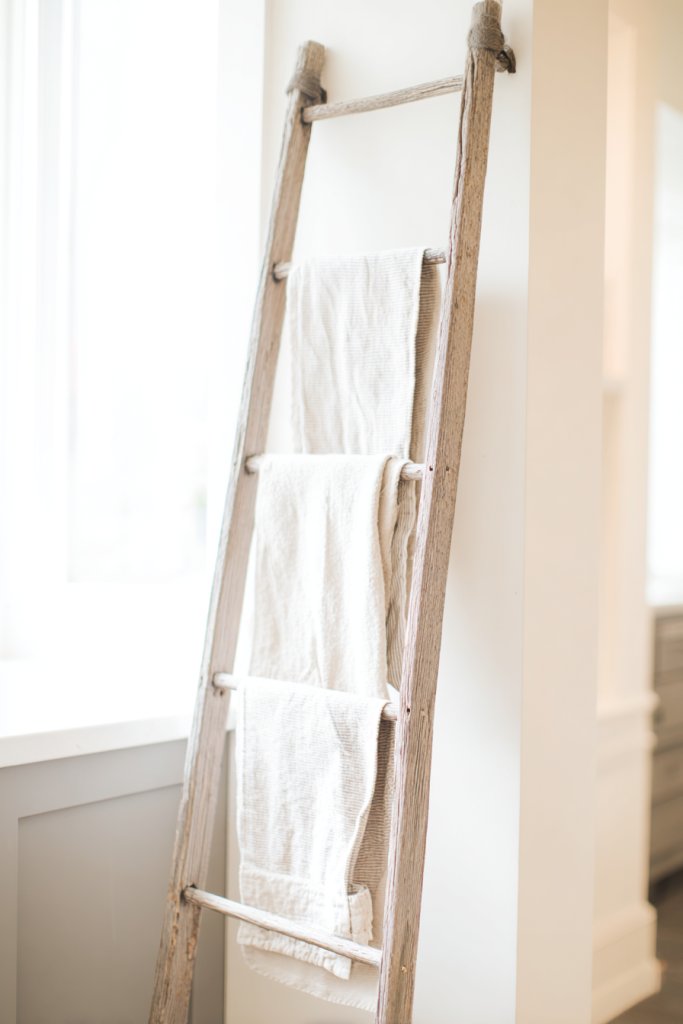
18. Repurpose a Ladder as a Unique Dish or Towel Rack
Tired of cluttered counters or dull walls in your kitchen? You want a creative way to display towels, potholders, or utensils that also adds charm. A decorative solution that’s inexpensive and easy to implement sounds perfect—especially if you love rustic or vintage vibes. Why settle for boring hooks or towel bars when you can repurpose something unexpected?
Picture an old wooden ladder leaning against a wall, with colorful dish towels draped over the rungs. Small hooks or clips hold potholders and utensils, turning the ladder into a functional piece of art. The distressed paint and natural wood add warmth and character, making your kitchen feel cozy and inviting. It’s both practical and a conversation starter—an instant focal point that’s full of personality.
Choose a ladder in a finish that matches your style—distressed paint for shabby chic, or sleek stained wood for a modern look. Use it in a small kitchen to save counter space or as a decorative piece in a larger space. You can also hang lightweight pots or baskets for extra storage. For a playful touch, decorate with fairy lights or vintage kitchen tools. Change the color or add fabric accents to suit seasonal themes or your mood.
Find an old wooden ladder at thrift stores, flea markets, or your garage. Clean and sand it if needed, then paint or stain to match your decor. Lean it against a wall or secure it with brackets for stability. Hang towels, potholders, or utensils using hooks or clips attached to the rungs. Make sure the ladder is sturdy enough for the items you plan to hang. It’s a simple project that instantly elevates your kitchen’s style.
Customize your ladder with painted patterns, stencils, or seasonal decorations. Use colorful or patterned towels to add visual interest. Attach small baskets or pouches to hold small kitchen essentials. You could even hang a small chalkboard or message board for notes or recipes. Personal touches make this piece uniquely yours and adaptable over time.
Repurposing a ladder shows your creative side and makes your kitchen more inviting. It’s a budget-friendly hack that combines style and function effortlessly. Once you see how much easier it is to grab towels or utensils, you’ll wonder why you didn’t do it sooner. This simple upgrade boosts your confidence in DIY projects and inspires further creative solutions.
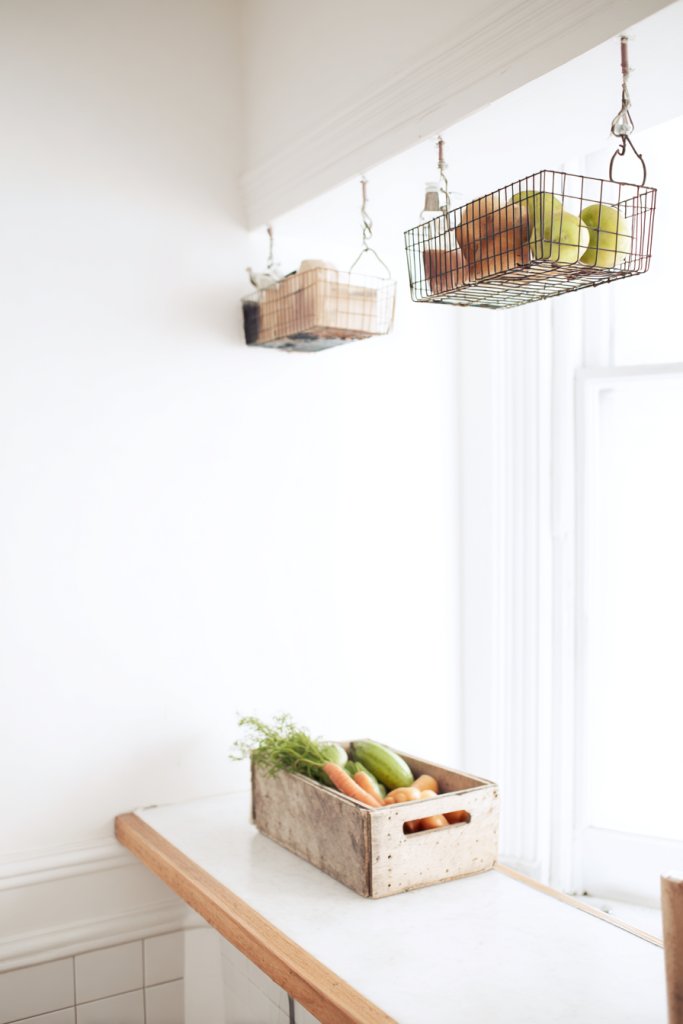
19. DIY Fruit and Vegetable Racks from Recycled Materials
Ever find your fruit bowl overflowing or your veggies taking over every available surface? It’s like a never-ending game of Tetris trying to fit everything in tiny kitchen spaces. You’re craving a cleaner, more organized look that still keeps your produce accessible. The good news? You don’t need fancy gadgets or extra counters—just some recycled materials and a bit of creativity.
Imagine a charming countertop display with hanging baskets made from repurposed wire or wooden crates painted in cheerful colors. Bright reds, fresh greens, and sunny yellows pop against neutral countertops, making produce look even more tempting. The racks are sturdy, yet lightweight, with open designs that let you see everything at a glance. Fresh herbs, ripe tomatoes, and crisp carrots sit happily in their new homes, adding a rustic, eco-friendly vibe.
Adapt these racks to small apartment kitchens with wall-mounted versions that free up counter space. For larger families, stackable crates or tiered racks work well for keeping produce organized by type or expiration date. For seasonal flair, paint or decorate the racks with fun patterns or colors matching your decor. During holidays, switch out the materials for more festive looks, like burlap or metallic finishes.
Gather recycled wood, wire baskets, or metal scraps from your local thrift stores or scrap yards. Cut or assemble them into your desired shape—simple boxes, hanging baskets, or tiered racks. Secure with nails, screws, or strong adhesive, depending on your material. Mount wall racks with sturdy hooks or brackets, ensuring they can handle the weight of your produce. Consider adding small labels made from scrap paper or Chalkboard paint for easy identification. No fancy tools needed—just some elbow grease and a little DIY spirit.
Personalize your racks with stencils, decals, or even fabric liners for a soft touch. Incorporate small hooks for hanging utensils or kitchen tools, blending storage with decor. Use eco-friendly finishes like beeswax or natural oils to protect the wood without compromising your sustainable vibe. If you love a pop of color, repaint or re-stain your racks seasonally, making your kitchen feel fresh and lively all year round.
Creating your own fruit and veggie racks from recycled materials not only clears clutter but adds a unique, personal touch to your kitchen. It’s a smart, budget-friendly way to showcase your eco-conscious side while keeping produce fresh and visible. Once you see your custom racks in action, you’ll wonder why you didn’t try this sooner. DIY your way to a more organized, stylish kitchen today!
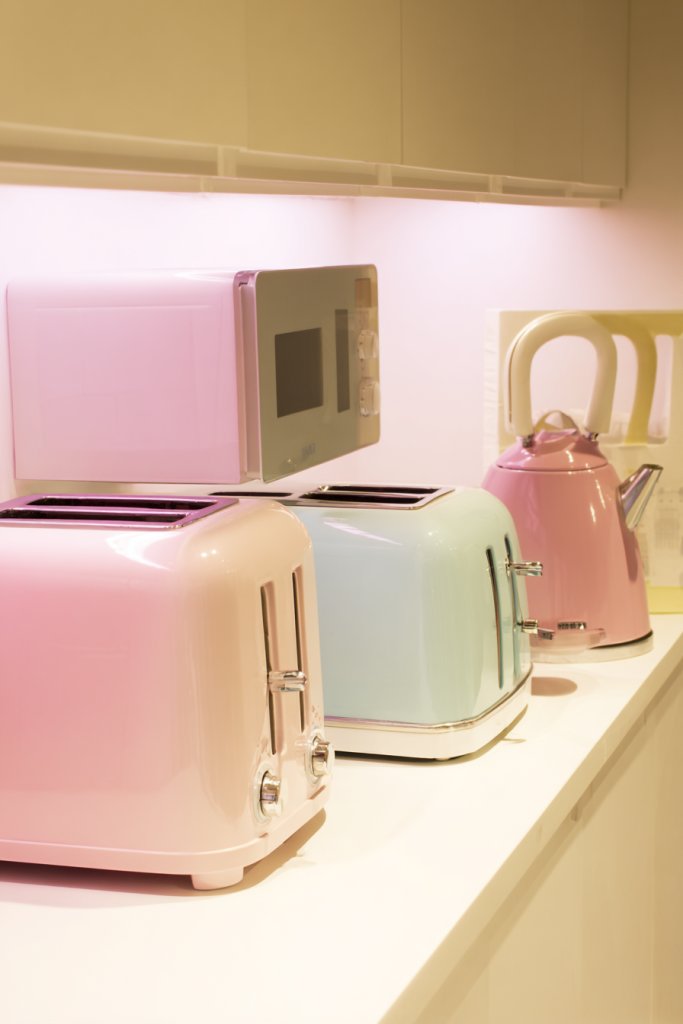
20. Paint or Decorate Plain Appliances for a Coordinated Look
Are your small appliances looking tired and mismatched, turning your sleek counters into a visual chaos? It’s frustrating to have a toaster, kettle, and microwave that don’t quite match or look outdated. The fix? A simple coat of paint or creative decor can transform your appliances into a cohesive, stylish setup. Who says you need to buy new to refresh your kitchen?
Picture a row of appliances painted in soft pastel shades or bold matte black, each one perfectly coordinated with your backsplash or cabinet hardware. The smooth, even finish gives a modern, polished look that instantly upgrades the space. Textured decals or stencils add personality without the expense of new gadgets. The appliances blend seamlessly into your decor, making your kitchen feel more put-together and inviting.
Match colors to your current theme—go monochrome for a sleek look or mix shades for a playful vibe. For a vintage touch, use chalkboard paint and add labels or doodles for a fun, functional twist. Seasonal accents like holiday decals or metallic finishes can keep the look fresh throughout the year. If you’re into minimalism, stick with subtle, matte finishes that don’t overpower the space. The key is to choose finishes and decorations that reflect your style.
Start by thoroughly cleaning your appliances to remove grease and dirt. Lightly sand surfaces if they’re glossy to help paint adhere better. Use high-quality appliance or metal paint, preferably with a spray for a smooth finish, but brushes work for detailed areas. Apply thin coats, letting each dry completely before adding the next. For added durability, consider sealing with a clear matte or gloss topcoat. Use painter’s tape to protect areas you don’t want painted. Remember, patience is key—wait the recommended drying time for a professional-looking result.
Add custom touches like stenciled patterns, stripes, or geometric shapes to give appliances a unique flair. Metallic or glitter accents can add a touch of glamour without a big investment. You could also attach decorative magnets, fabric wraps, or decals that match your kitchen’s theme. For a more personalized approach, paint a favorite quote or a fun design that makes you smile every time you cook. Keep in mind, these touches are easy to change if your style evolves.
Giving your appliances a fresh look proves that small updates can make a big impact. It’s satisfying to see your kitchen transform without spending a fortune. Plus, it’s a fun project that sparks creativity and makes everyday routines more enjoyable. Once you see how cohesive and polished your space feels, you’ll be motivated to try more DIY decor hacks. Elevate your small kitchen and enjoy that sense of accomplishment!
21. Maximize Space with Stackable and Modular Storage Solutions
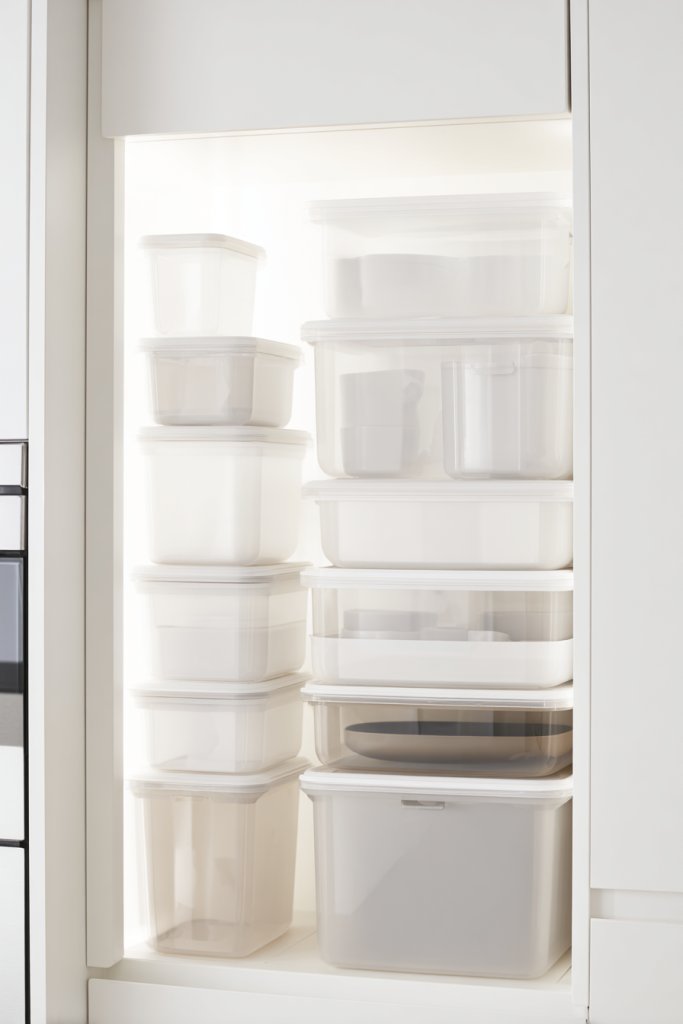
Does your tiny kitchen feel like a never-ending game of Tetris? Are your cabinets overflowing and counters cluttered with mismatched containers? You’re not alone—small spaces demand smart solutions. The answer? Stackable and modular storage options that turn chaos into order. This way, you get more storage without sacrificing style or accessibility.
Visualize a series of clear, stackable containers neatly arranged in your pantry or on open shelves. They come in different sizes, fitting perfectly into each other and making use of vertical space. Bright labels and uniform shapes create a tidy, streamlined look. These containers hold everything from pasta and rice to spices and snacks. The result is a clean, organized kitchen that looks Pinterest-worthy and functions like a dream.
Use modular containers with adjustable dividers to customize storage for different items. Opt for stackable bins with lids for fridge organization or open baskets for quick access. Mix and match materials—bamboo, plastic, or metal—based on your decor style. For kids’ spaces, colorful bins make tidying up fun, while neutral tones suit minimalist aesthetics. Adapt designs for seasonal storage, like holiday cookie cutters or summer picnic supplies.
Start by decluttering your cabinets and pantry. Measure your space and select stackable containers that fit your needs. Look for airtight options to keep food fresh and labels for easy identification. Organize items by frequency of use, placing everyday essentials at the front. Stack containers in a way that allows easy access to the bottom layers without unstacking everything. Regularly review and rotate items to prevent clutter buildup. Consider investing in nesting or modular sets for maximum flexibility.
Label your containers with chalkboard labels or fun stickers for a personalized touch. Use color coding to categorize different food groups or meal prep zones. Incorporate decorative liners or fabric covers for a cozy, homey feel. For added convenience, install pull-out trays or tiered racks to access items stored at the back. These small tweaks make your storage both functional and visually appealing.
Stackable and modular solutions prove that you don’t need a big budget to create a big impact. They make everyday routines smoother and reduce stress caused by clutter. Seeing your neatly organized space will boost your confidence and inspire more DIY projects. Once you master smart storage, your kitchen will become a source of pride, not frustration. Start small, and watch your tiny kitchen transform into a model of efficiency!
Conclusion
With a diverse range of small kitchen ideas on a budget, you’re equipped to make impactful changes without overspending. Whether it’s reorganizing for better flow or adding simple decorative touches, these tips can truly elevate your space. Don’t wait—start experimenting today and turn your small kitchen into a smart, beautiful centerpiece of your home!