Imagine stepping into a room that instantly sparks joy and inspiration—transformations like these are what make room makeovers so captivating! The appeal lies in the power of a fresh look to revive your space, boost your mood, and reflect your unique personality.
In this article, you’ll find a diverse array of inspiration ideas to help you reimagine any room in your home. Whether you prefer a cozy, minimalist vibe or vibrant, eclectic flair, these ideas will guide you to create a space that feels truly yours and energizes your everyday life.
1. Brighten with a Fresh Coat of Paint in Trendy Colors
Feeling like your room’s stuck in a rut? Sometimes, all it takes is a splash of color to transform a space from dull to delightful. If your walls are looking tired or uninspired, a fresh coat of paint can do wonders. It’s the easiest way to breathe new life into any room without a major overhaul. Plus, choosing trendy shades keeps your space feeling current and lively.
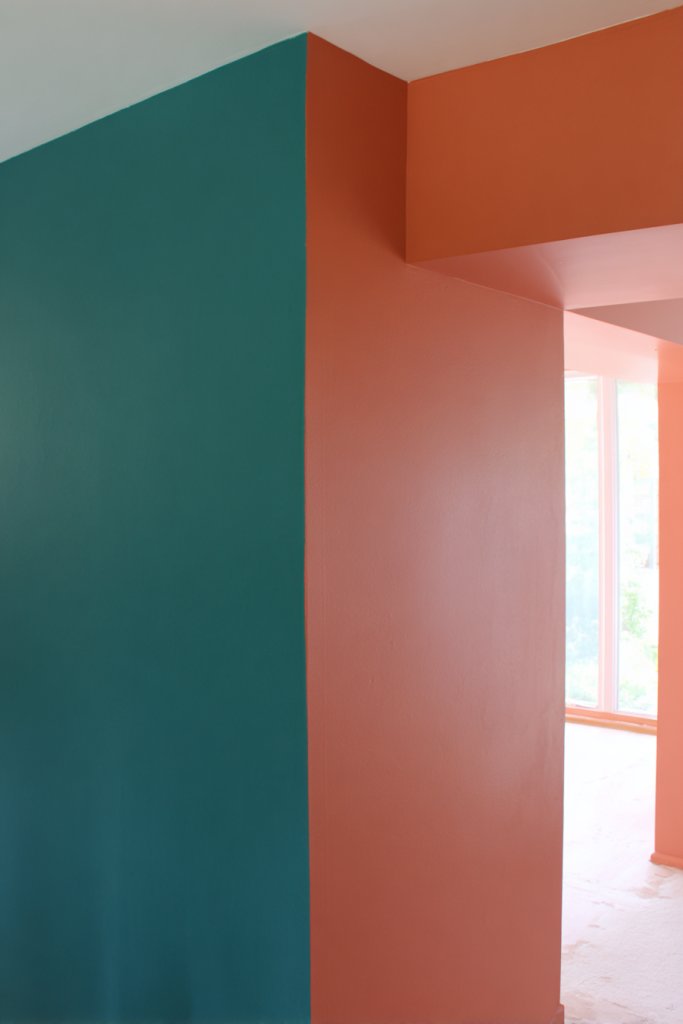
Imagine a room bathed in a soft pastel pink or a bold navy blue that makes the furniture pop. The smooth, matte finish of high-quality paint creates a sleek backdrop for your decor. Light bounces off freshly painted walls, making the space feel brighter and more welcoming. Think about the subtle warmth a warm terracotta hue can add or the crispness of a cool gray. It’s like giving your room a new personality with just a brush.
You can go daring with an accent wall in a contrasting shade or keep it monochrome for a minimalist vibe. Seasonal colors work well—think icy blues for winter or sunny yellows for summer. If your space is small, lighter shades can make it feel bigger, while darker tones add coziness. Mixing matte, satin, or gloss finishes allows you to customize the look further. The best part? You can always repaint if your style changes.
Start by choosing a color that resonates with your mood or style. Prep your walls by cleaning and patching any holes. Use painter’s tape to protect trim and edges, and lay down drop cloths to catch drips. Invest in good-quality brushes and rollers to ensure smooth coverage. Apply the paint in thin, even coats, allowing ample drying time between layers. For a flawless finish, consider using a primer first, especially on darker or stained walls. Remember, patience is key for professional-looking results.
Combine your new paint with decorative techniques like stenciling or color blocking for extra personality. Adding a glossy topcoat can give an elegant sheen, or a matte finish offers a softer look. Coordinate your wall color with textiles, furniture, or accessories for harmony. Don’t be afraid to experiment with unexpected shades—bright coral or muted olive can set your space apart. Personal touches like DIY painted art on the walls can also complement your new color palette.
A fresh coat of trendy paint instantly elevates your home’s style and mood. It’s a simple project that pays off big in aesthetic appeal and personal satisfaction. With so many color options and techniques, you’re bound to find a look that feels uniquely you. Ready to pick up that brush and make a bold statement? Your revamped space is just a few strokes away!
2. Incorporate Creative Wall Molding or Paneling for Dimension
Bored of flat, boring walls that do nothing for your decor? Adding wall molding or paneling can instantly add depth and character. It’s a classic trick to elevate a room without a full renovation. If you crave architectural interest but lack the budget for big changes, this is your ticket. Plus, it’s a DIY-friendly upgrade that can make your space feel much more upscale.
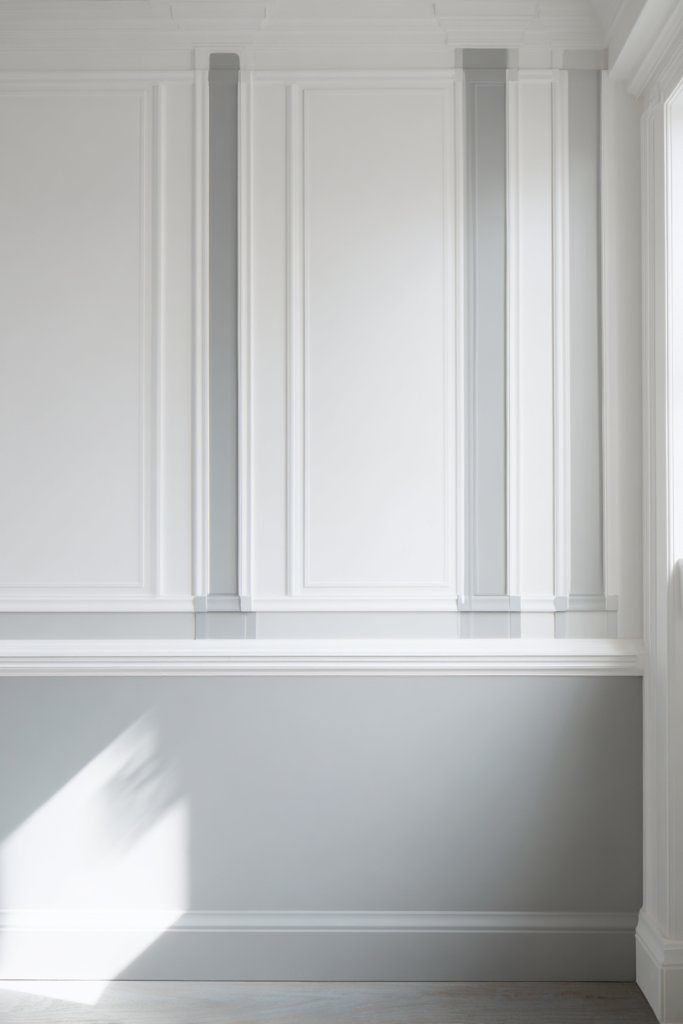
Picture your walls adorned with crisp, geometric panels or intricate beadboard details. The interplay of shadows and light on these surfaces creates a layered, textured look. A coat of crisp white paint on molding contrasts beautifully with a bold accent wall. Think about how the shadows cast by the molding can change throughout the day, adding visual interest. It’s like turning your walls into a piece of art, full of dimension and sophistication.
Choose simple or elaborate designs depending on your style—modern with clean lines or vintage with ornate details. You can paint the molding the same color as the wall for subtle elegance or in a contrasting hue for a dramatic effect. For small rooms, vertical panels can create the illusion of height. In more rustic spaces, reclaimed wood paneling adds warmth and texture. Seasonal accents, like darker colors for fall or lighter shades for spring, can refresh the look.
Begin by measuring your walls and selecting a panel design. Use a level and pencil to mark where the molding will go. For DIY projects, pre-made MDF or foam moldings are affordable options. Attach the molding with nails or adhesive, making sure to keep everything straight and flush. Fill gaps with caulk and sand for a smooth finish. Paint or stain the panels to match your decor, and consider adding a protective topcoat for durability. This project can be completed over a weekend with patience and precision.
Add visual interest by mixing different molding styles or layering paneling with wallpaper or textured paint. Incorporate LED strip lighting behind panels for a modern glow effect. For a more eclectic look, paint panels in contrasting colors or add wallpaper within the frames. Use decorative nails or rosettes to accentuate the molding details. This approach offers endless customization options to suit your unique taste.
Creative wall molding instantly adds a luxurious feel without the hefty price tag. It transforms plain walls into focal points and elevates your entire room aesthetic. Whether you prefer sleek modern lines or vintage charm, this idea is adaptable and rewarding. Ready to make your walls stand out? A little molding can change everything!
3. Swap Out Old Hardware for Modern, Sleek Fixtures
Old, tarnished hardware can make an otherwise stylish room look stuck in the past. Swapping out outdated drawer pulls, handles, and switches instantly updates your space. It’s one of those small details that pack a punch, giving your furniture and fixtures a fresh, contemporary vibe. If your room feels tired or mismatched, new hardware can be a quick fix.
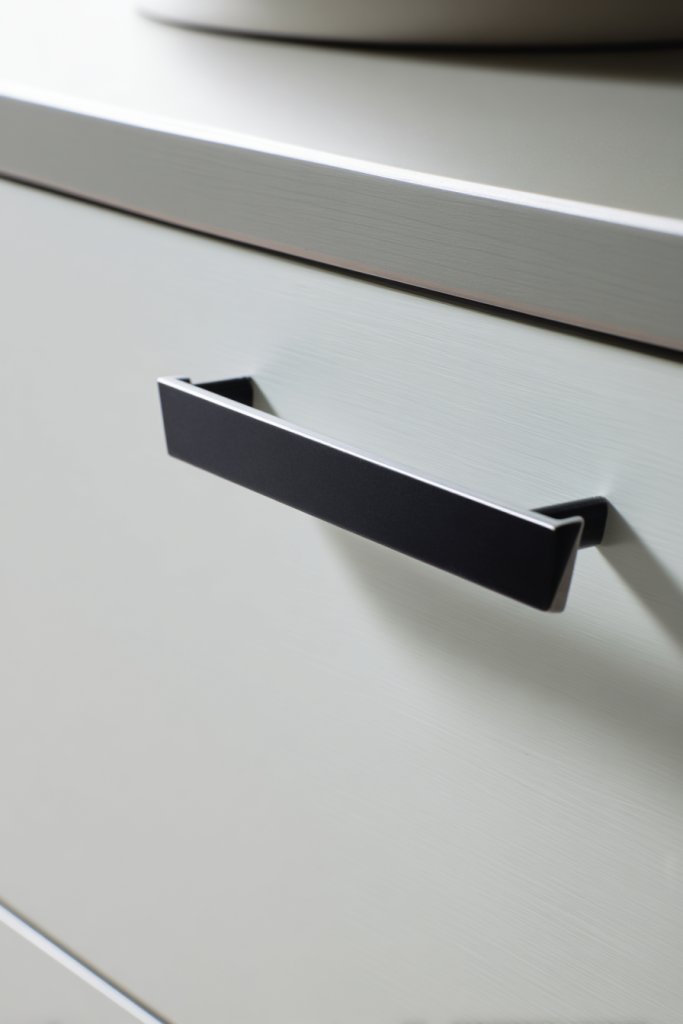
Imagine shiny brushed nickel or matte black handles adorning your cabinets, catching light with every movement. The contrast between sleek new fixtures and aged furniture creates a modern-meets-vintage look. The tactile feel of smooth, well-made hardware adds a touch of luxury. Think about how changing cabinet knobs from plastic to metal instantly elevates the entire kitchen or bathroom aesthetic. It’s the little details that make a big difference.
Choose hardware styles that reflect your taste—minimalist, industrial, or ornate. For a cohesive look, pick finishes that match your fixtures or mix metals for an eclectic vibe. Seasonal updates, like changing knobs or handles, can refresh your decor without much effort. For furniture, consider replacing old knobs with unique ceramic or wooden options for added personality. These small swaps are perfect for renters or those who like to change up their style frequently.
Start by removing the existing hardware with a screwdriver. Clean the surface before installing new pieces to ensure a secure fit. Measure carefully to ensure new hardware aligns with existing holes or plan to drill new ones. Use a level to keep everything straight and avoid crooked handles. Tighten screws firmly but avoid over-tightening, which can crack or strip the hardware. With a few simple tools, you can have an entirely refreshed look in less than an hour.
Create a theme by choosing hardware in a specific style or finish—think matte black for a modern look or antique brass for vintage charm. Mix and match different handles on furniture pieces for an eclectic feel. For added flair, consider customizing handles with paint or decals. Combining hardware with complementary accessories, like matching hooks or towel bars, can create a cohesive design statement.
Swapping hardware is a simple, budget-friendly way to upgrade your space. It’s satisfying to see immediate results, and the process is so straightforward you can do it in minutes. The right hardware can tie together your room’s style and make everything feel more polished. Ready to give your furniture and fixtures a sleek, modern update? Just unscrew and replace—easy peasy!
4. Use Removable Wall Decals for a Playful or Elegant Touch
Tired of plain, boring walls but hesitant to commit to permanent decor? Removable wall decals are your answer—fun, flexible, and mess-free. They allow you to inject personality without the hassle of painting or wallpapering. Whether you want something playful for a kids’ room or elegant for a sophisticated space, decals are versatile. Plus, they’re perfect for renters or anyone who likes changing things up often.
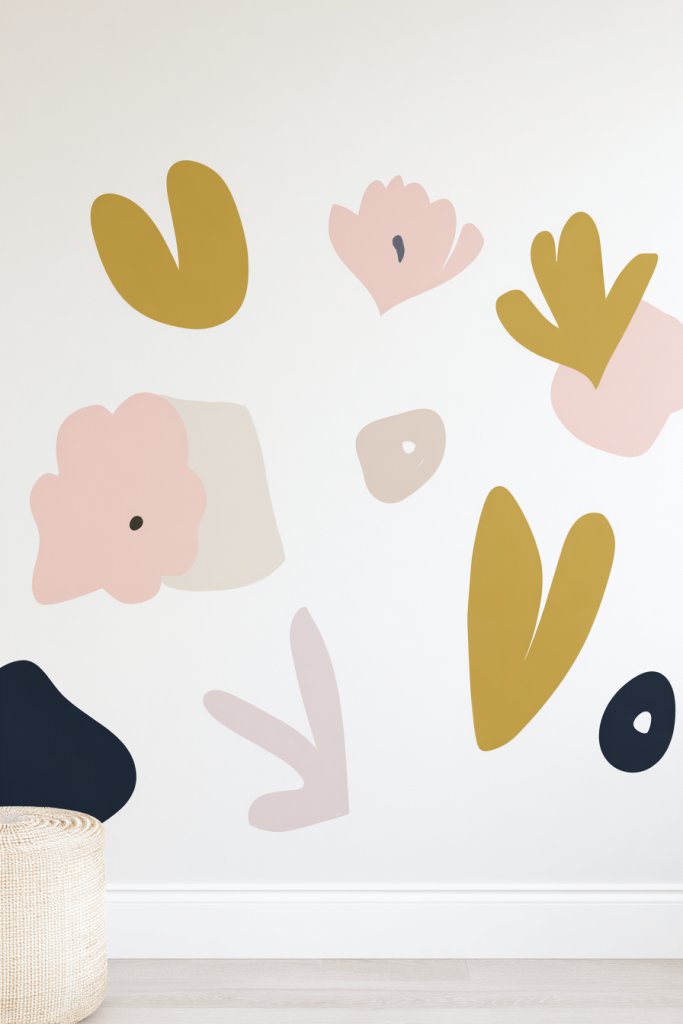
Picture a wall decorated with intricate floral patterns or whimsical geometric shapes in bold colors. The decals adhere smoothly, creating a clean, seamless look. They can be layered or combined with other decor elements, like textiles or furniture. The texture of decals adds subtle dimension, and they catch the light differently depending on their finish. Think about how a large decal can serve as a focal point, transforming an entire wall in minutes.
Decals come in countless styles, from delicate metallic designs to bold, graphic statements. They work well in any room—living rooms, bedrooms, or even bathrooms. For a seasonal refresh, swap out decals to match holidays or themes. You can also create custom designs or patterns, making your decor truly one-of-a-kind. The flexibility allows you to match your current mood or style without permanent commitment.
Clean the wall thoroughly to remove dust and grease. Carefully peel the decal from its backing, then align it with your desired position. Use a squeegee or credit card to smooth out air bubbles and ensure good adhesion. For larger decals, work from the center outward to avoid wrinkles. Once applied, you can reposition gently if needed, but avoid stretching or pulling to prevent tearing. Removal is just as easy—peel slowly, and no residue is left behind.
Combine decals with painted murals or stenciled borders for a custom look. Use decals to highlight certain areas or create a themed gallery wall. You can also add metallic or textured decals for a luxe effect. Incorporate decals into a layered design with wall-mounted shelves or textiles for a curated vibe. The possibilities are endless for creating a space that truly reflects your personality.
Removable decals make decorating fun and stress-free. They let you experiment with styles and colors without long-term commitment. It’s an easy way to add flair and make your space uniquely yours. Feeling inspired? Go ahead, peel, stick, and enjoy your personalized masterpiece!
5. Create a Focal Point with a Statement Headboard or Accent Wall

Ever feel like your bedroom is missing that wow factor? A bold headboard or accent wall can instantly become the room’s highlight. It draws the eye and anchors your entire decor scheme. If your space feels flat or uninspired, this is the quick fix to add drama and personality. Plus, it sets the tone for the rest of your decor choices.
Imagine a tall, tufted velvet headboard in jewel tones or a wall painted in a deep, moody hue. The contrast between the headboard and surrounding decor creates a striking visual. Textured fabrics or patterned wallpaper on one wall add depth and interest. Consider how the light hits the feature, enhancing its impact. It’s like giving your room a centerpiece that commands attention without overwhelming the space.
Choose a statement headboard in fabric, wood, or metal to match your style—be it modern, boho, or classic. For the accent wall, experiment with paint, wallpaper, or textured panels. Seasonal updates can include changing bedding or accessories to complement the feature. Smaller rooms benefit from vertical or narrow focal points that don’t overpower the space. In larger rooms, go big—think oversized art or wallpaper murals.
Start by selecting a wall or bed that naturally becomes the room’s focus. For a headboard, choose a fabric or material that suits your comfort and style. Attach the headboard securely to the wall or bed frame, ensuring it’s level. For an accent wall, prep the surface, then apply paint, wallpaper, or panels following manufacturer instructions. Use painter’s tape for clean edges and a level for accurate placement. Add layered bedding, lighting, or decor to complete the look.
Personalize your feature with decorative trims, tufting, or contrasting piping on the headboard. Incorporate complementary textiles like plush throw pillows or textured bedding. Use artwork or sconces around the feature to enhance its prominence. Seasonal changing of accessories or colors can keep the focal point fresh. With a little effort, your room becomes a stylish retreat centered around this eye-catching element.
A statement headboard or accent wall transforms your space into a personal sanctuary. It boosts your confidence in DIY decor and design choices. The visual impact makes your room feel complete and thoughtfully curated. Ready to make your bedroom the envy of all? A bold focal point is your first step!
6. Add Texture with Layered Rugs and Soft Textiles
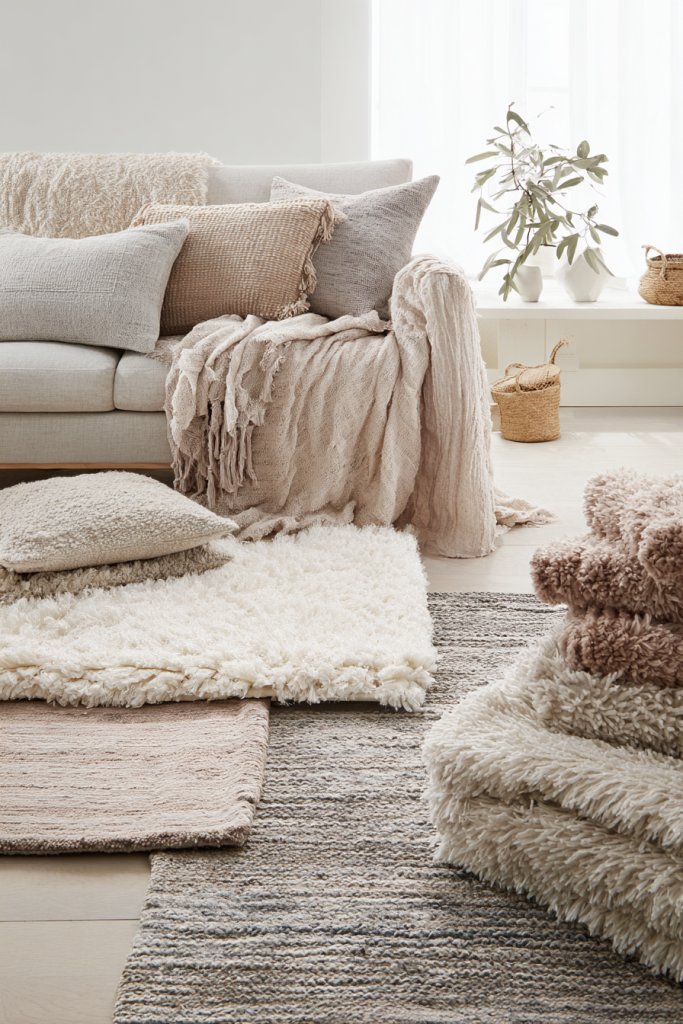
Does your room feel flat or cold despite your best efforts? Adding texture with layered rugs and textiles can warm up the space instantly. It creates visual interest and invites comfort, making your room feel more lived-in and cozy. If you want to elevate your decor without a big budget, this is a simple, effective solution. Plus, it’s a great way to express your style through tactile elements.
Visualize a plush, shaggy rug layered over a flat jute or sisal rug in the living room. The mix of textures adds depth and richness to the floor. Soft throws and cushions with chunky knits or silky finishes complement the rugs, inviting you to sink in. Think about the tactile contrast—smooth silk pillows against rougher woven textiles. It’s all about creating a layered, inviting environment that appeals to the senses.
Combine different textures—think faux fur, velvet, linen, and woven materials—to suit your aesthetic. For the colder months, add thick, cozy throws and plush cushions; switch to lighter, breathable fabrics for summer. Layer rugs of varying sizes and patterns to create a dynamic look. In small spaces, one well-chosen rug can anchor the room, while larger areas benefit from multiple layered textures. Play with color and pattern for added personality.
Start with a base rug in a neutral or matching color. Layer a smaller, patterned or textured rug on top for visual interest. Use different pile heights to add tactile variation—long shag versus flat weave. Select cushions, throws, and curtains that complement or contrast your rugs. Use a variety of fabrics to make the textures pop. Keep the color palette cohesive to avoid cluttered or chaotic looks. Regular fluffing and cleaning keep textiles looking fresh.
Mix textures to reflect your personality—sleek silk, fluffy faux fur, rough burlap. Incorporate decorative pillows with embroidery or fringe for extra detail. Use textured curtains or bedspreads to enhance the layered look. Experiment with color blocking or contrasting hues to make textures stand out. These small tweaks can significantly elevate your space’s tactile appeal.
Adding layered textiles creates a warm, inviting atmosphere that makes you want to stay and relax. It’s a simple, budget-friendly way to add personality and comfort. Feel confident expressing your style through textures—there are no rules, only your preferences. Ready to cozy up your space? Start layering today!
7. Upgrade Lighting with Statement Pendant or Floor Lamps
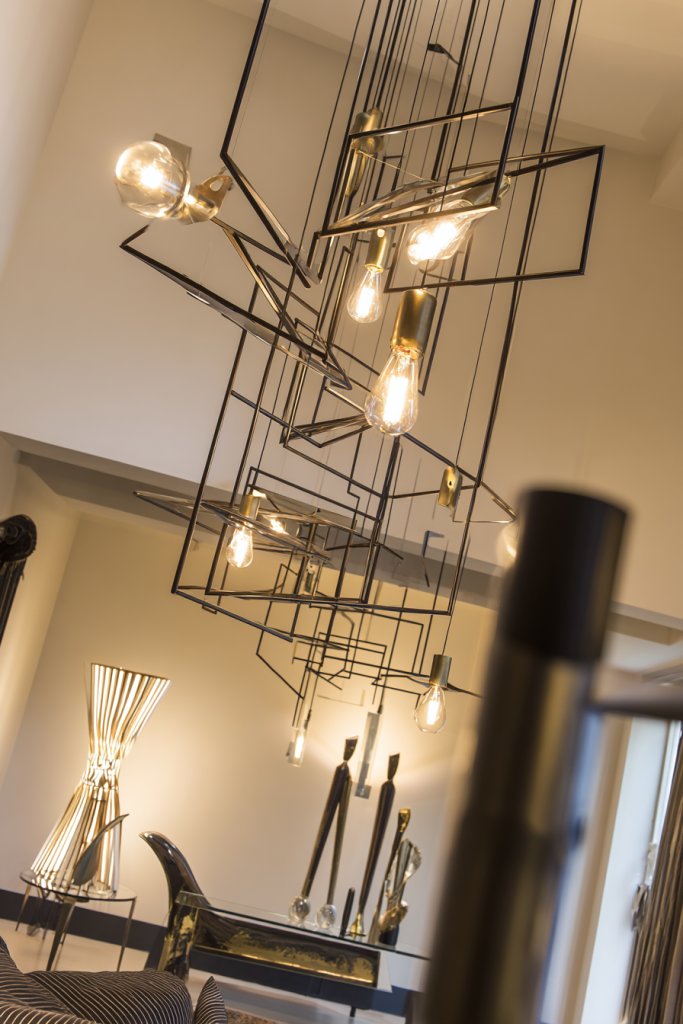
Tired of dull or outdated lighting fixtures that do nothing for your decor? Upgrading to statement pendant or floor lamps can dramatically change the ambiance. Good lighting is the secret ingredient to making a space feel warm, inviting, and stylish. If your room lacks personality or proper illumination, this is your chance to shine—literally.
Visualize a sleek black pendant lamp hanging above your dining table or a sculptural floor lamp next to your reading nook. The light’s shape and finish add a sculptural element to your decor. Warm LED bulbs cast a cozy glow, highlighting textures and colors around the room. The contrast between the fixture and the ceiling or wall creates visual balance and draws attention.
Choose fixtures that match your overall aesthetic—industrial with metal finishes, boho with woven shades, or modern with minimalist lines. For smaller spaces, compact pendants work well; larger rooms can handle oversized fixtures. Layer your lighting with sconces or table lamps for a versatile, adaptable scheme. Seasonal lighting options, like dimmable bulbs, allow you to adjust ambiance easily.
Start by assessing your space and deciding on focal points for lighting. For pendant installations, locate ceiling joists and use a level to hang at the desired height. For floor lamps, choose a style that complements your furniture and provides adequate light coverage. Use compatible bulbs—warm white for cozy vibes, cool white for task lighting. Install dimmers for greater control and set the mood for different occasions. Position lamps to avoid glare and shadows.
Select fixtures with unique shapes or finishes that serve as decor statements. Add dimmable features to create different atmospheres. Coordinate your lighting with other accessories—metal accents, textured shades, or decorative bulbs. Use multiple sources of light to layer brightness and create depth. Small details like a vintage filament bulb can add personality and charm.
Upgrading your lighting instantly boosts your room’s style and functionality. It’s an easy project that pays off in both aesthetics and mood setting. Well-placed lighting fixtures can make your space look more polished and inviting. Ready to light up your space with style? The right fixture is just a switch away!
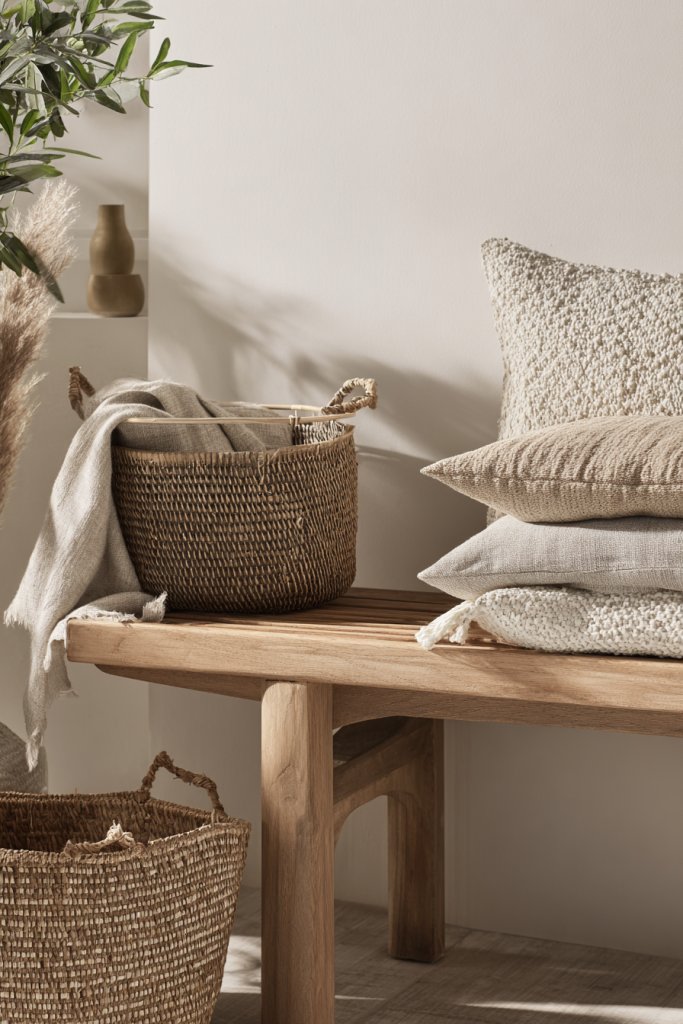
8. Organize with Stylish Storage Solutions and Decorative Baskets

Clutter can ruin even the most beautiful room, making it feel chaotic and uninviting. Stylish storage solutions and decorative baskets are the perfect answer to keeping things tidy while maintaining aesthetic appeal. They hide the mess and add a layer of texture or color to your decor. If your space feels disorganized, this quick fix can dramatically improve both function and style.
Imagine woven seagrass baskets stacked neatly in a corner or sleek metal bins lining your shelves. The mix of materials adds warmth and visual interest, preventing storage from looking sterile. Open shelving with baskets in coordinating colors creates a balanced look. Think about how the natural textures contrast with modern furniture, making the room feel cozy yet contemporary. It’s all about functional beauty.
Choose baskets in natural fibers like rattan or jute for a boho vibe, or go for sleek metal or acrylic for a modern look. Use decorative boxes or bins to organize items like toys, linens, or craft supplies. Seasonal swaps—like adding holiday-themed baskets—keep things fresh. Incorporate labels for a tidy, organized appearance, especially in busy households. These solutions are adaptable for closets, living rooms, or bedrooms.
Identify clutter hotspots and select storage options that fit the space and style. Measure shelves or corners to ensure baskets fit comfortably. Use baskets with handles for easy transport and access. Group similar items together to streamline your organization. Keep frequently used items within reach, and store seasonal or rarely used things in higher or less accessible spots. Regularly declutter to maintain your system.
Add decorative touches like ribbons or fabric liners inside baskets. Match your storage with your overall color scheme for harmony. Use labels or tags that reflect your personality or humor. Incorporate decorative trays or stands to elevate baskets and add dimension. Personal touches make organization feel less like a chore and more like a design statement.
Smart storage solutions make your space more functional and beautiful. They help you keep clutter at bay, making your home more relaxing. With a few stylish baskets, you can turn chaos into order effortlessly. Feeling inspired to tidy up? Stylish storage is your secret weapon!
9. Incorporate Mirrors to Expand Space and Reflect Light
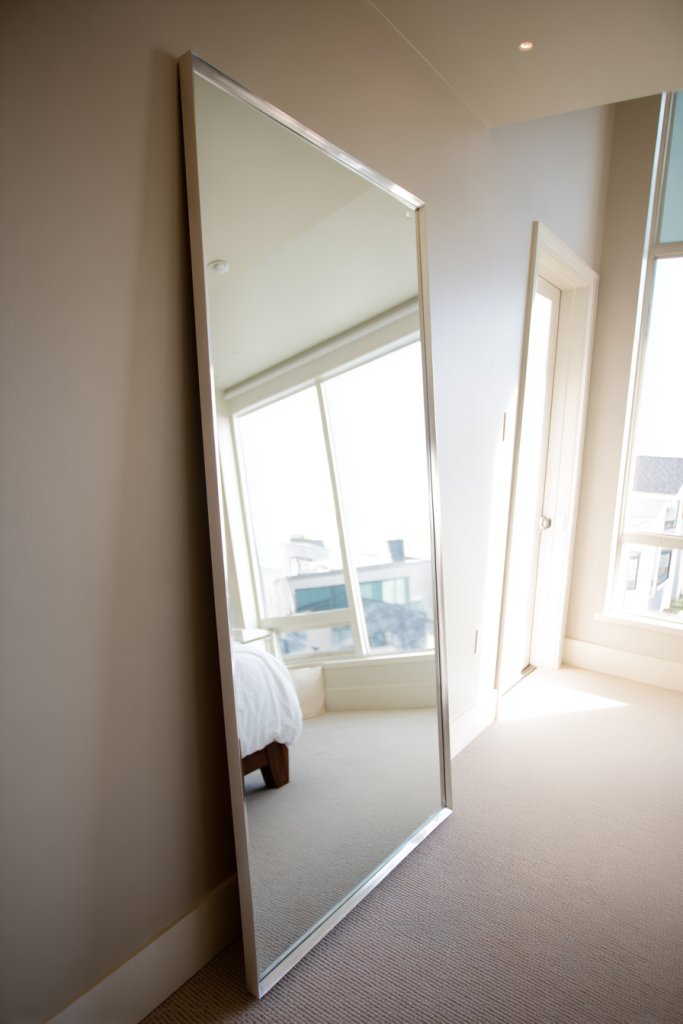
Small or dark rooms can leave you feeling cramped and gloomy. Mirrors are the ultimate trick to make any space feel larger and brighter. They reflect light and create an illusion of depth, transforming your decor instantly. If you’re craving more openness without knocking down walls, this is your solution. Plus, mirrors add a touch of elegance and style.
Picture a large, frameless mirror leaning against a wall or a statement mirror with an ornate frame. The reflection captures natural light streaming in from windows, bouncing it around the room. It visually doubles the space, making narrow hallways appear wider. Think about how carefully placed mirrors reflect your favorite decor elements, adding layers of visual interest. The right mirror can serve as both a functional and decorative piece.
Choose a mirror shape and frame style that complements your decor—sleek and modern, vintage and ornate, or minimalist and frameless. Hang mirrors above furniture to create focal points or in corners to brighten shadows. For small rooms, vertical mirrors add height; horizontal ones expand width. Consider mirrored closet doors or decorative wall panels with mirrored sections for a dramatic effect. Change your arrangement seasonally for fresh vibes.
Pick a strategic location—opposite a window or near a light source to maximize reflection. Use appropriate hardware to hang the mirror securely, ensuring it’s level. For large mirrors, anchoring to studs provides stability. Clean the glass regularly with a streak-free cleaner to keep reflections crisp. Play with placement—sometimes a mirror on a door or in a corner can make a surprising difference. Remember, the goal is to amplify light and space.
Frame your mirrors with unique materials—wood, metal, or even reclaimed materials—to add personality. Decorate around the mirror with artwork, shelves, or lighting accents. Use multiple smaller mirrors for a gallery wall effect or a single large piece for maximum impact. Incorporate decorative hooks or stands for versatility. Personal touches like etching or custom framing make your mirror display truly your own.
Mirrors are a simple yet powerful tool to redefine your space. They boost your confidence in DIY decorating and can be adapted to any style. With just a few strategic placements, your room will feel more open and inviting. Ready to reflect your style and expand your space? It’s as easy as hanging a mirror!
10. Refresh Window Treatments with Modern Curtains or Blinds
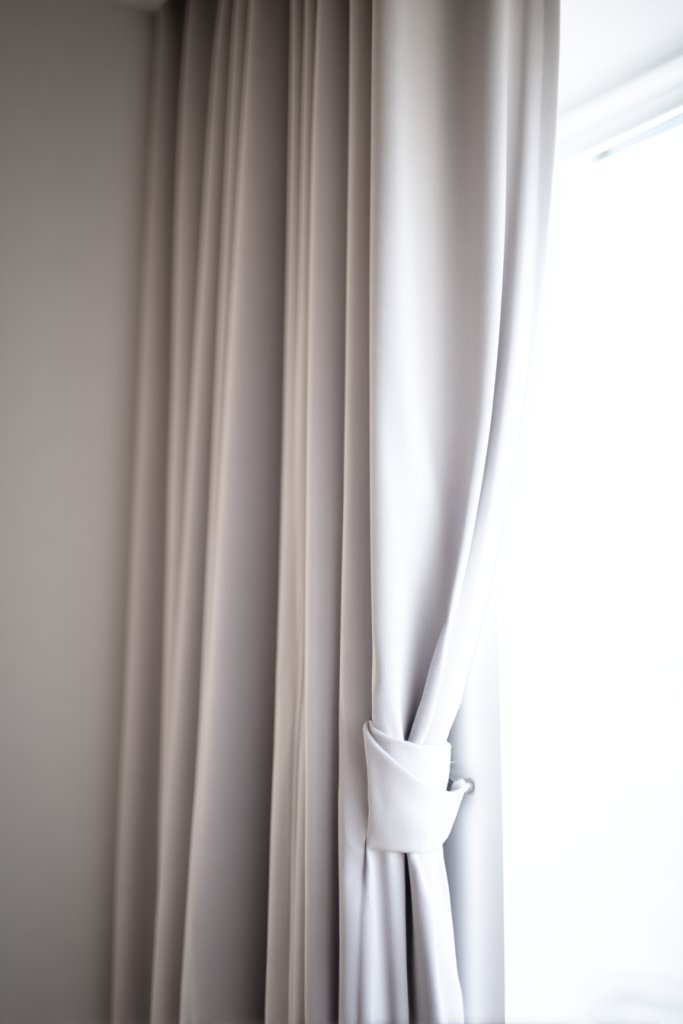
Outdated or dull window treatments can drag down your entire room’s vibe. Updating curtains or blinds is a quick way to add freshness and style. They frame your windows beautifully and influence the room’s lighting and mood. If your current treatments are frayed or boring, it’s time for a change that makes a big impact with minimal effort. Plus, new window coverings can add privacy and energy efficiency.
Imagine flowing, linen curtains in a soft neutral or sleek roller blinds in a bold color. The fabric or material sets the tone—light and airy for a breezy feel or heavy and textured for coziness. Think about how the right curtains catch the light, creating gentle shadows and highlighting your decor. The contrast between fabric textures and wall colors adds depth, making your windows a design feature rather than just a functional element.
Choose from various styles—grommet, rod pocket, or tab tops—for different looks. Light-colored sheers can brighten rooms while blackout blinds are perfect for bedrooms. Seasonal updates can include swapping out fabrics for warmer or cooler options. Layering curtains with blinds or shades adds versatility. For small windows, use slim profiles; larger windows can handle dramatic drapes or bold patterns.
Measure your windows carefully before purchasing. Install rods or tracks at the right height—just above the window frame—to make windows appear larger. Use a level to ensure straightness. For curtains, hang rods high to create the illusion of height. For blinds, follow manufacturer instructions for mounting brackets. Adjust the length to just touch the floor or hover slightly above it, depending on your style. Regular cleaning keeps treatments looking fresh.
Add decorative tiebacks, tassels, or curtain rings for flair. Coordinate your curtains with other textiles in the room—cushions, rugs, or bedding—for a cohesive look. Use patterned fabrics or textured materials to add visual interest. Consider layering sheer curtains with heavier drapes for versatility. Personal touches like monogrammed trims or custom prints make your window treatments uniquely yours.
Refreshing your window treatments can elevate your entire decor effortlessly. It’s an easy DIY project that instantly updates your space’s look and feel. Well-chosen curtains or blinds frame your windows beautifully and set the mood. Ready for a quick decor upgrade? New window treatments are a simple, stylish solution!
11. Introduce Multi-Functional Furniture for Space Efficiency
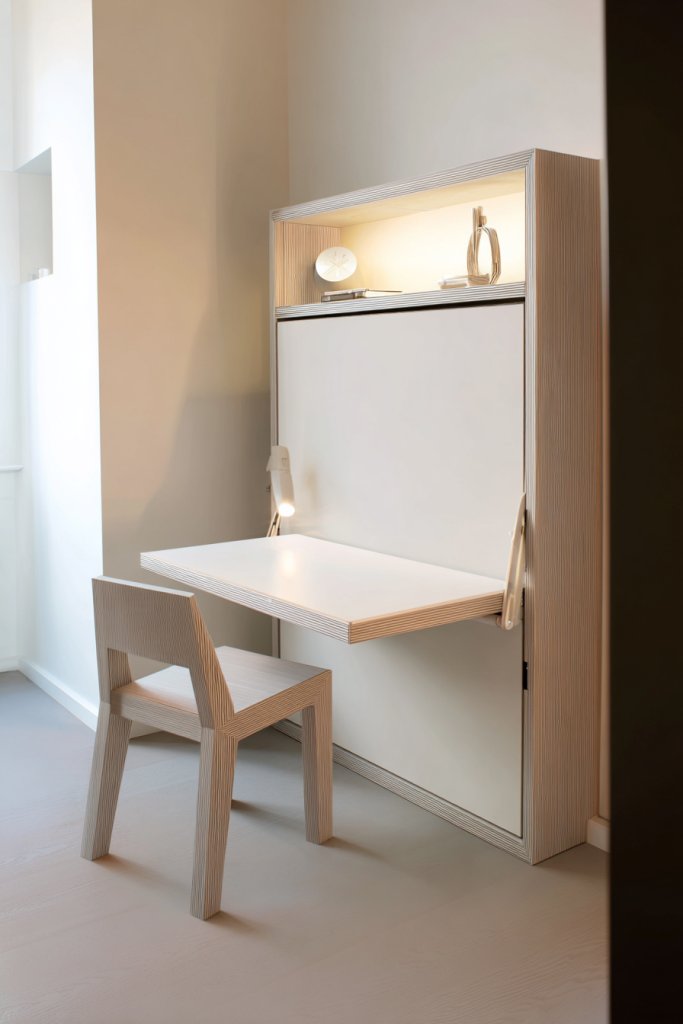
Limited space can make even a cozy apartment feel cramped and chaotic. Multi-functional furniture is a clever way to maximize every inch without sacrificing style. It allows you to combine seating, storage, and sleeping areas into one sleek piece. If you’re tired of cluttered rooms or furniture that doesn’t serve multiple purposes, this idea is for you. It’s the ultimate space-saver that keeps things tidy and stylish.
Imagine a sofa bed with hidden storage underneath or a coffee table that lifts to reveal space for books and blankets. Modular pieces can be rearranged to suit your needs—perfect for hosting or everyday living. Textured fabrics or sleek finishes keep the furniture looking modern and inviting. Visualize a room where every piece has a secret function, enhancing both comfort and organization. It’s like having a secret weapon for small spaces.
Opt for furniture with built-in storage, fold-out beds, or extendable tables. Choose styles that match your decor—industrial, Scandinavian, or boho. Seasonal adaptations can include adding removable covers or swapping out accessories. For guest rooms, fold-away beds save space; for living rooms, storage ottomans serve dual purposes. Balance functionality with aesthetics by selecting pieces that complement your existing decor.
Start by assessing your space and identifying your most pressing needs. Look for versatile pieces that combine style and utility—think sleek designs with hidden compartments. Measure your rooms carefully to ensure proper fit. Assemble furniture following the manufacturer’s instructions, paying attention to stability and safety. Use multi-purpose furniture as focal points around which your room’s layout naturally flows. Regularly declutter to keep multifunctional pieces working their magic.
Customize with removable slipcovers, decorative hardware, or interchangeable cushions. Add personal touches like themed accessories or contrasting textiles. Incorporate modular units that can be expanded or reconfigured over time. Use decorative trays or baskets to organize smaller items within storage furniture. These personal details make multifunctional pieces feel uniquely yours while enhancing their practicality.
Multi-functional furniture empowers you to create stylish, efficient spaces that adapt to your lifestyle. They make small spaces feel larger and more functional. Plus, they’re a fun challenge to incorporate your personality into your decor. Ready to optimize your space and enjoy a clutter-free life? These pieces are your new best friends!
12. Personalize with Unique DIY Art or Custom Wall Hangings
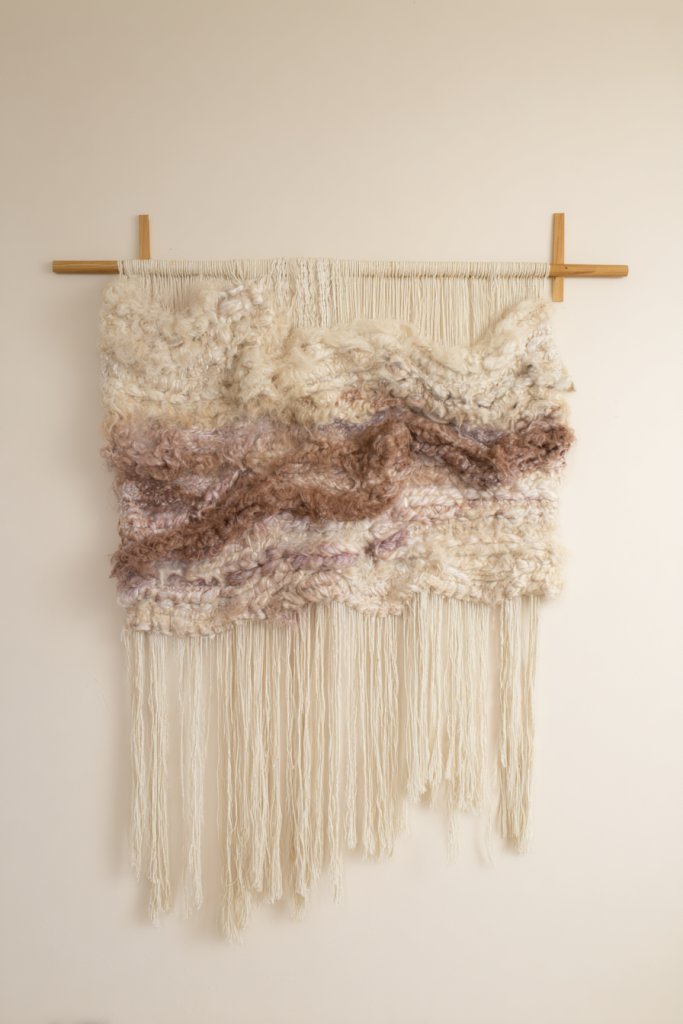
Generic wall decor can make your space feel uninspired. Creating your own art or wall hangings adds a personal touch that truly reflects your style. DIY projects are budget-friendly and incredibly satisfying—they turn your walls into a showcase of your personality. If you want your home to stand out, this is a perfect way to do it. Plus, every time you look at your DIY masterpiece, you’ll feel a sense of accomplishment.
Imagine a gallery wall filled with your own abstract paintings, textured fabric art, or meaningful quotes on handmade signs. The textures and colors you choose tell a story—whether playful, serene, or bold. Think about combining different mediums like fabric, paper, and paint for a layered look. The tactile qualities of your DIY art add depth and warmth, making your walls more inviting. It’s all about creating a curated, personal gallery.
Use canvases, wood panels, or even fabric to craft your art. Incorporate mixed media—think embroidery, paper cutouts, or pressed flowers (if you dare). Change your artwork seasonally or whenever your mood shifts. Frame your creations for a polished look or keep them raw for a boho vibe. For a cohesive look, stick to a color palette or theme that matches your decor.
Gather supplies based on your project—canvases, paints, brushes, fabrics, or tools for assembling. Plan your designs by sketching or laying out materials first. Use stencils, painter’s tape, or templates for precision. Assemble or paint your art, then let everything dry thoroughly. Hang your creations with nails, hooks, or adhesive strips, ensuring they’re level. Get creative with arrangements—cluster small pieces or make a single large statement.
Add embellishments like metallic accents, embroidery, or textured fabrics to elevate your art. Incorporate items with sentimental value—like fabric from a favorite shirt or paper with special meaning. Mix different styles and textures for an eclectic, personalized gallery. Use lighting or floating shelves to display your work prominently. Every piece should feel authentic and uniquely yours.
DIY art is a rewarding way to decorate and personalize your space. It boosts your confidence in your creative abilities and makes your home truly one-of-a-kind. Every piece you craft adds warmth and personality, turning walls into conversations starters. Feel inspired to create? Your unique wall decor is waiting!
13. Paint or Refinish Existing Furniture for a Cohesive Look
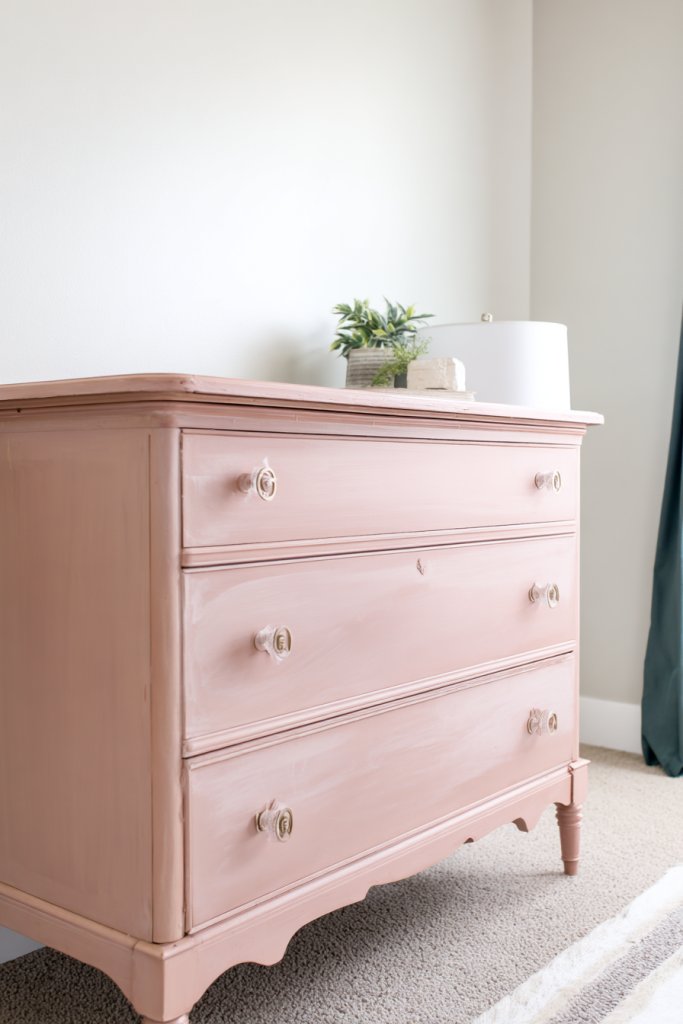
Old furniture can feel tired and out of sync with your current style. Instead of replacing everything, give it a fresh look through painting or refinishing. It’s an eco-friendly, cost-effective way to unify your space and add character. Plus, it’s surprisingly easy to transform a piece from drab to fab with a little effort. If your furniture has good bones, it’s worth a second chance.
Imagine a vintage dresser painted in a crisp white or a wooden chair stained in a rich, dark hue. The transformation highlights the furniture’s details and craftsmanship. The new finish can create a modern, shabby-chic, or rustic vibe, depending on your choice. Think about how different paint finishes—matte, satin, or glossy—alter the look and feel. The refreshed furniture becomes a statement piece that ties your decor together.
Choose paint colors that complement your room’s palette or go bold with contrasting shades. For a distressed look, use sanding techniques or wax finishes. For a sleek modern look, opt for high-gloss paints or lacquer. Refinish wooden pieces with stain or oil for a natural, warm glow. Seasonal color swaps or hardware updates can keep furniture looking fresh over time.
Start by cleaning and sanding the furniture to ensure a smooth surface. Use painter’s tape to protect areas you want to keep unpainted. Apply a primer if needed, especially on dark or raw wood. Use quality brushes or rollers for even coverage, and apply multiple thin coats, allowing drying time. Finish with a protective sealant or wax for durability. Hardware updates, like new knobs, finish the look.
Personalize furniture with stenciled patterns, color blocking, or metallic accents. Add new hardware that matches your style—brass pulls, ceramic knobs, or vintage handles. Incorporate decorative touches like faux finishes or textured paints for extra flair. Repurposing furniture with fresh paint makes it uniquely yours and a centerpiece in your decor.
Refinishing furniture is a rewarding way to create a cohesive, personalized space. It boosts your confidence in DIY projects and showcases your style. Transformed pieces breathe new life into your home and can even increase its value. Ready to give your old furniture a new lease on life? Grab your paintbrush and get started!
14. Add a Pop of Color with Vibrant Accent Pieces
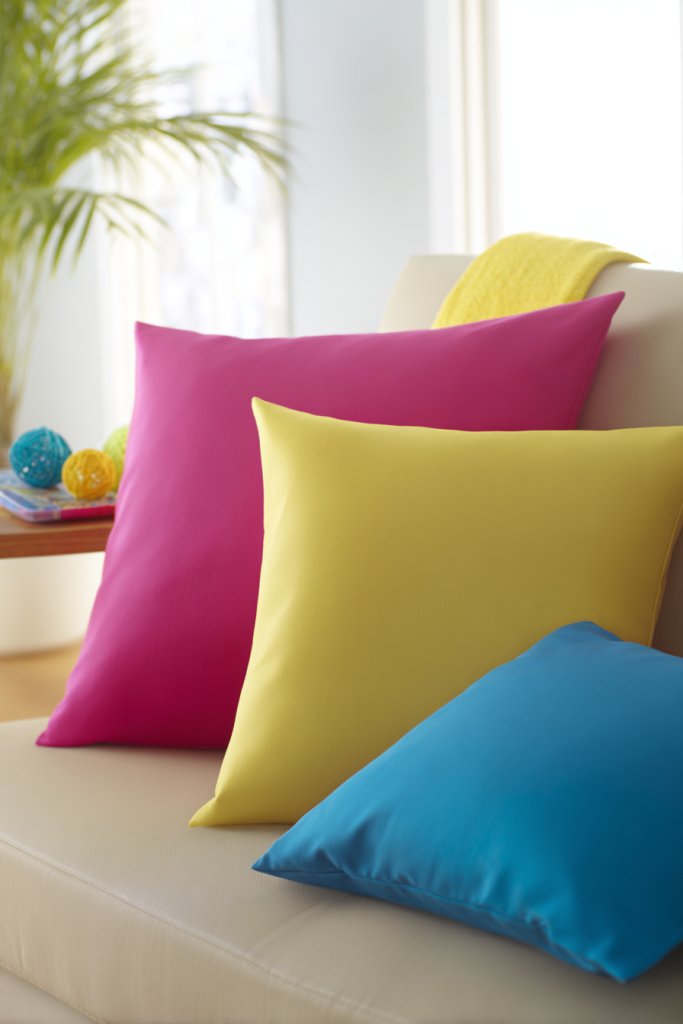
Feeling like your room lacks energy or personality? A splash of vibrant color can turn a dull space into a lively one. Incorporating bold accent pieces like pillows, throws, or small decor items creates focal points and visual interest. It’s a simple way to express your style without a total overhaul. If your decor feels flat or uninspired, this is your quick fix.
Picture a neutral-toned sofa topped with bright cushions in hot pink or electric blue. Add a vivid throw blanket in a contrasting hue, and suddenly your space feels fresh and energetic. Small accessories like vases or artwork in bold colors can also draw attention. Think about how these pops of color can tie different elements together, creating harmony and excitement. It’s like giving your room a shot of adrenaline.
Mix vibrant accent pieces with neutral backgrounds or go full-on with color-blocked decor. Seasonal accents, like bright table runners or colorful candles, keep things fresh. Use contrasting colors—think turquoise and coral—or complementary palettes for a more harmonious look. Small pops of color in unexpected places, like a single wall or through art, can make a big impact. Play around with patterns and textures for extra flair.
Start by choosing a color scheme that energizes you—bright, cheerful, or daring. Shop for cushions, throws, or decor items in those hues. Balance the pops of color with neutral or subdued furniture and walls. Mix different textures—silk, velvet, knits—for visual richness. Incorporate colorful accessories gradually to avoid overwhelming the space. Regularly refresh or replace accent pieces to keep your decor lively.
Create your own custom cushions or throws with DIY fabric dyeing or sewing projects. Use bold art prints or patterns to reinforce your color theme. Add metallic or neutral accents to tone down or highlight the pops of color. Incorporate small decorative items like lamps or sculptures in vibrant hues. Personal touches make the space uniquely yours and full of personality.
A pop of vibrant color energizes your space and lifts your mood. It’s a simple, low-cost way to make a big style statement. Embrace bold choices—you’re creating a space that’s lively and true to your personality. Ready to add that splash of color? Start small and watch your room transform!
15. Incorporate Natural Elements with Textured Materials
Rooms that lack warmth or a connection to nature can feel sterile or disconnected. Incorporating natural elements and textured materials introduces organic beauty and calming vibes. It’s a simple way to add depth and softness to your decor. If you crave a serene, earthy atmosphere, this idea is perfect. Plus, textured materials invite touch—making your space more inviting.
Imagine a jute rug under your feet, woven baskets on shelves, and linen curtains softly swaying. The textures create a layered, tactile environment that’s visually rich. Think about the warm tones of wood or the roughness of sisal and how they contrast with smooth finishes. These natural materials soften modern furniture and bring a cozy, organic feel to any room. It’s about creating a space that feels grounded and calming.
Mix woven baskets, linen throws, and wooden accents for a boho vibe, or opt for sleek stone or concrete for a modern look. Seasonal changes might include swapping out light linens or adding plush throws. Use textured wall finishes like plaster or stucco for an earthy backdrop. Incorporate organic shapes—rounded furniture or sculptural wood pieces—for a natural touch. These elements adapt well across styles and seasons.
Select materials like jute, linen, wood, or stone based on your style and budget. Use layered textiles—rugs, cushions, throws—to add tactile interest. Incorporate furniture with natural finishes or handcrafted details. Mix different textures to avoid monotony and enhance visual depth. Place organic decor in focal spots, like entryways or reading nooks. Regular cleaning and maintenance keep natural materials looking their best.
Add handcrafted or vintage pieces to deepen the organic vibe. Use natural dyes or plant-based finishes for furniture to enhance authenticity. Incorporate DIY projects like weaving or woodwork to add a personal touch. Layer textures with various fabric weaves and patterns for visual interest. These details create a warm, inviting environment that reflects your love for nature.
Natural textures cultivate a peaceful, grounded atmosphere. They make your space feel more authentic and cozy. Embracing organic materials is a sustainable, stylish choice that aligns with current eco-conscious trends. Ready to bring the outdoors inside? Start layering natural elements today!
16. Rearrange Furniture for Better Flow and Visual Interest
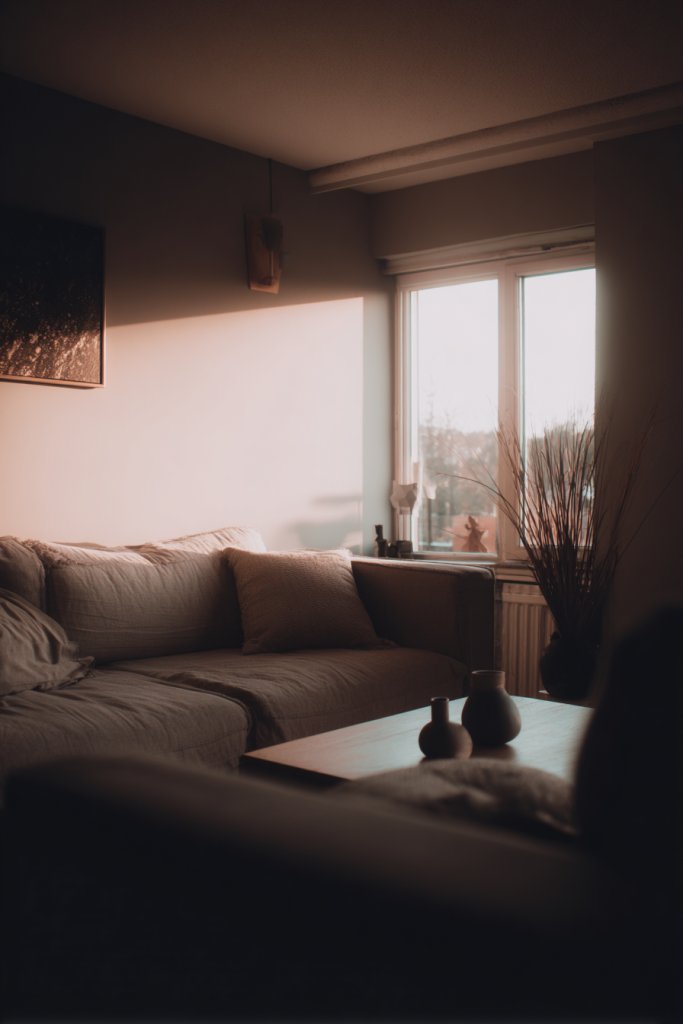
Feeling like your room is cluttered or awkwardly arranged? Sometimes, all you need is a furniture shuffle to unlock better flow and a fresh perspective. Rearranging can make a space feel more open, functional, and inviting. It’s a simple, cost-free way to breathe new life into your decor. Plus, it helps you discover new ways to enjoy your space.
Imagine moving your sofa to face a window or swapping the bed’s position to make room for a cozy reading nook. Visualize a layout that creates natural pathways and highlights focal points like a statement wall or artwork. The new arrangement can emphasize light, improve conversation zones, and reduce clutter. Think about how a fresh perspective instantly makes your space feel larger and more welcoming.
Experiment with different furniture placements based on room shape and function. For open-concept spaces, define zones with rugs or furniture grouping. In small rooms, push furniture against walls to maximize space. Seasonal or mood-based changes—like creating a more intimate seating area—can refresh your environment. Use symmetry or asymmetry intentionally to achieve your desired vibe.
Start by sketching your current layout and then creating a few alternative arrangements. Measure your furniture and space to ensure everything fits comfortably. Use moving pads or sliders to shift heavy pieces easily. Keep traffic flow in mind—leave enough space for movement and access to all areas. Don’t be afraid to experiment; sometimes, the most unexpected layout works best. Take photos of your setups for reference.
Personalize your new layout with decorative accents like throws or cushions that match your style. Use lighting placement to highlight focal points or create ambiance. Add functional pieces like side tables or storage units in strategic spots. Create cozy corners or conversation areas to foster connection. Small tweaks can make your room more functional and visually pleasing.
Rearranging furniture is a quick, impactful way to refresh your space without spending a dime. It boosts your creativity and confidence in your design choices. A new layout can improve your home’s flow and make it more enjoyable to live in. Ready to give it a shot? Your ideal setup is just a few moves away!
17. Install Decorative Wall Shelves for Display and Storage
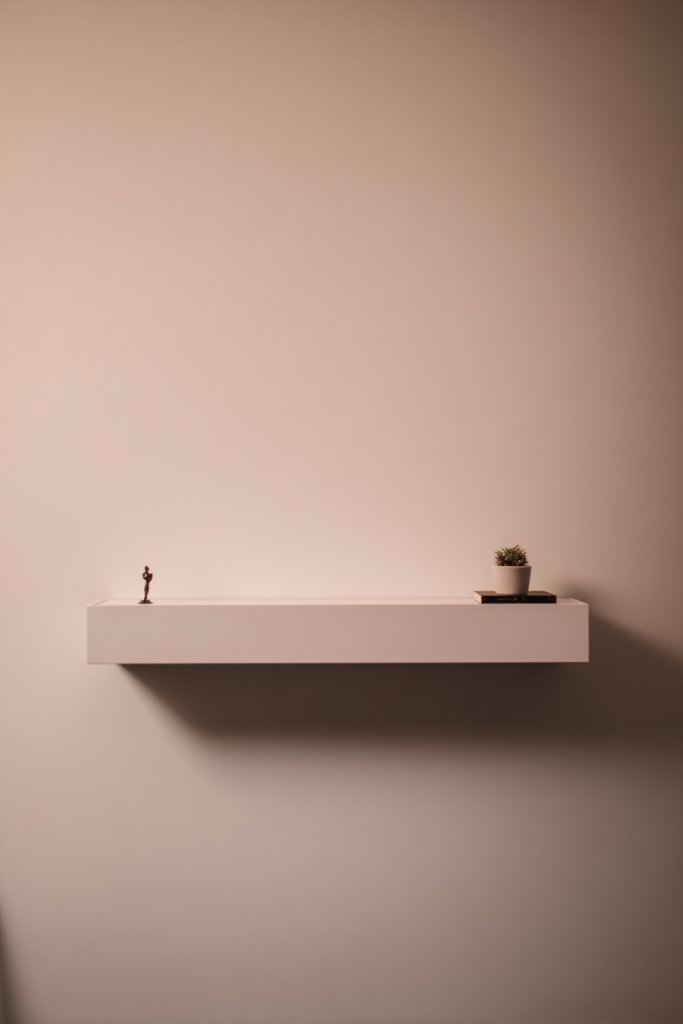
Cluttered surfaces and empty walls can make your space feel disorganized and uninspired. Decorative wall shelves are a stylish solution for displaying your favorite items and adding storage. They create visual interest and can turn blank walls into focal points. If you’re craving more organization without sacrificing style, this idea is a game-changer.
Picture sleek floating shelves in wood or metal holding curated books, plants (if you dare), or decorative objects. The staggered arrangement adds rhythm and movement to your wall. Think about how shelves in different lengths and depths create a layered, interesting display. The open design keeps your space feeling airy while showcasing your personality. It’s a perfect balance of function and art.
Choose minimalist shelves for a modern look or ornate designs for vintage charm. Adjust shelf placement based on your wall size and the items you want to display. Use brackets or hidden mounting hardware for a clean look. Incorporate baskets or boxes underneath for hidden storage. Change your display seasonally to keep things fresh and exciting.
Start by selecting the right type and size of shelves for your space. Mark the desired height with a pencil and use a level to ensure they’re straight. Securely attach the brackets or mounting hardware to wall studs or anchors. Arrange your items thoughtfully, balancing height, color, and style. Use a mix of decorative objects and practical items for visual appeal. Regularly dust and rearrange for an evolving display.
Personalize your shelves with a mix of personal memorabilia, artwork, or DIY crafts. Incorporate different textures—ceramic, woven, metallic—to add depth. Use lighting, like small LED strips or puck lights, to highlight your display. Coordinate your shelf decor with other room elements for a cohesive look. It’s about creating a space that reflects your unique taste.
Decorative shelves are an easy way to showcase your personality and style. They add visual interest and functional storage in one. With a little planning, you can create a dynamic display that evolves over time. Ready to transform your walls into a gallery? Floating shelves are your new best friend!
18. Add a Stylish Accent Chair or Cozy Nook
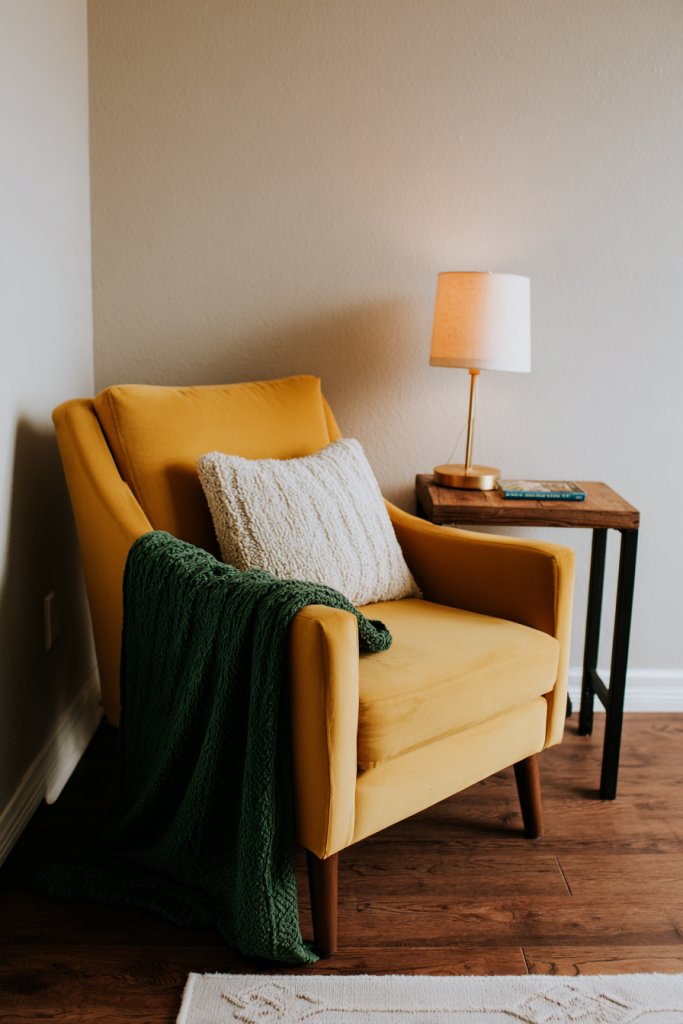
Every room needs a little something to invite relaxation and personality. An accent chair or cozy nook can create that perfect retreat within your space. It’s a way to add color, texture, and comfort without overhauling your entire decor. If you’re craving a dedicated spot for reading or lounging, this idea is your answer. Plus, it can serve as a statement piece or conversation starter.
Imagine a plush velvet armchair in a bold color nestled beside a textured throw or a small side table. A cozy nook in the corner with a soft cushion, layered textiles, and warm lighting beckons you to unwind. Think about how the addition of a statement chair with unique legs or a sculptural shape elevates the room’s style. It’s about creating a dedicated, inviting corner that’s both functional and beautiful.
Choose a chair that complements your decor—think mid-century, boho, or modern minimalist. For small spaces, opt for a compact or multi-functional piece like a storage chair. Layer with throws and cushions in textures and colors that enhance the overall aesthetic. Incorporate a small side table or a floor lamp nearby to complete the setup. Seasonal swaps in textiles keep the nook feeling fresh.
Identify a corner or wall that needs a focal point or cozy corner. Select a chair that fits your style and space—consider comfort and scale. Add layered textiles—plush throws and cushions—to invite relaxation. Place a side table or a small shelf nearby for books, plants, or decor. Use lighting to create ambiance—think warm LED or battery-operated fairy lights. Make sure everything’s at comfortable heights and proportions.
Personalize your nook with decorative pillows, DIY artwork, or themed textiles. Mix textures—velvet, woven, faux fur—for tactile richness. Add a blanket ladder or a small bookshelf nearby for extra function. Use accessories like candles or small sculptures to add personality. Regularly update textiles and accessories to keep the space inviting and fresh.
A stylish accent chair or cozy nook transforms any room into a personal retreat. It adds comfort, style, and a sense of purpose to your decor. DIY touches and thoughtful styling make it uniquely yours. Feeling inspired? Create that inviting corner today and enjoy a space designed just for you!
19. Incorporate Subtle Metallic Accents for a Touch of Glam
Your space might feel a little flat or lacking that touch of sophistication. Subtle metallic accents—like gold, brass, or chrome—can add instant glamour without overwhelming your decor. They reflect light and create a luxurious feel, elevating your entire room. If you’re after a chic, modern vibe or just want to add a little sparkle, this is your secret weapon. It’s all about the right touches for big impact.
Imagine a brass-trimmed mirror, a chrome lamp base, or gold-finished picture frames. These accents catch the light and add a layer of richness to your decor. Think about how metallic hardware on cabinets or drawers complements matte or glossy finishes. The subtle shine creates depth and catches your eye, making your space look more curated and polished. It’s like adding jewelry to your home.
Use metallic accents sparingly—think hardware, light fixtures, or small decor objects—to avoid clutter. Mix different metals, like brass with chrome, for an eclectic, modern look. Incorporate metallic finishes in accessories like trays, candle holders, or vases (if you accept minimal vases). For seasonal updates, swap out accessories in different finishes or colors. Keep the look balanced—avoid overdoing it.
Select key areas for metallic accents—hardware, fixtures, or small decorative objects. Mount or place items with precision, ensuring they’re secure and level. Coordinate finishes across your room for harmony—mix matte, brushed, or polished surfaces intentionally. Use metallic spray paints or adhesive accents for DIY projects. Regularly dust and polish to keep the shine looking fresh. Small upgrades can make a big style statement.
Personalize with custom engraved or painted metallic accents. Pair metallic hardware with plush textiles or matte surfaces for contrast. Incorporate metallic paint in furniture or accessories for a bespoke touch. Use metallic washi tape or decals for subtle decorative details. These touches add sophistication and can be layered to create a cohesive, glamorous environment.
Subtle metallic accents bring a touch of sophistication and luxury to your decor. They’re easy to incorporate and maintain, making your space feel polished and intentional. A few well-placed touches can elevate your entire aesthetic. Ready to add a little glam? The right metallic details can make all the difference.
Conclusion
From bold color schemes to clever furniture arrangements, these room makeover inspiration ideas showcase a variety of ways to refresh your home. Don’t hesitate to try out different styles and techniques—your dream space is within reach! Take the first step today and turn your vision into reality, creating a beautiful, inviting home you’ll love.